
Integrating DocuSign with Salesforce
Learn how to integrate DocuSign with Salesforce to automate document generation, signing, and approval workflows.
Salesforce Developer

Abstract
The use of electronic signatures is now considered one of the most critical elements of doing business in the contemporary world. By integrating the services of DocuSign with Salesforce, users can work on their documents, sign them, track and manage them directly through Salesforce.
This article will describe the process of integration of the DocuSign App Launcher package with Salesforce, establish the connection, create templates, send documents to be signed, and resolve common problems when implementing them.
Solution
There is a solution that will enable you to integrate your Salesforce CRM with DocuSign using an Apps Launcher Package offered by the latter in AppExchange.
- Send documents for signature.
- Monitor the status of envelopes in Salesforce.
- Generate templates.
- Use merge fields to map data from Salesforce to documents.
- Automate document workflows.
The integration process involves installing the Apps Launcher package, logging in with your DocuSign account details, defining permissions for the users, and creating templates.
Step-by-Step Guide
Prerequisites
Before beginning the integration, ensure the following:
Salesforce Requirements
- Salesforce Administrator access
- API-enabled Salesforce org
- Permission to install AppExchange packages
DocuSign Requirements
- Active DocuSign account
- DocuSign Administrator privileges
- Appropriate subscription plan supporting required features
Step 1: Install DocuSign Apps Launcher
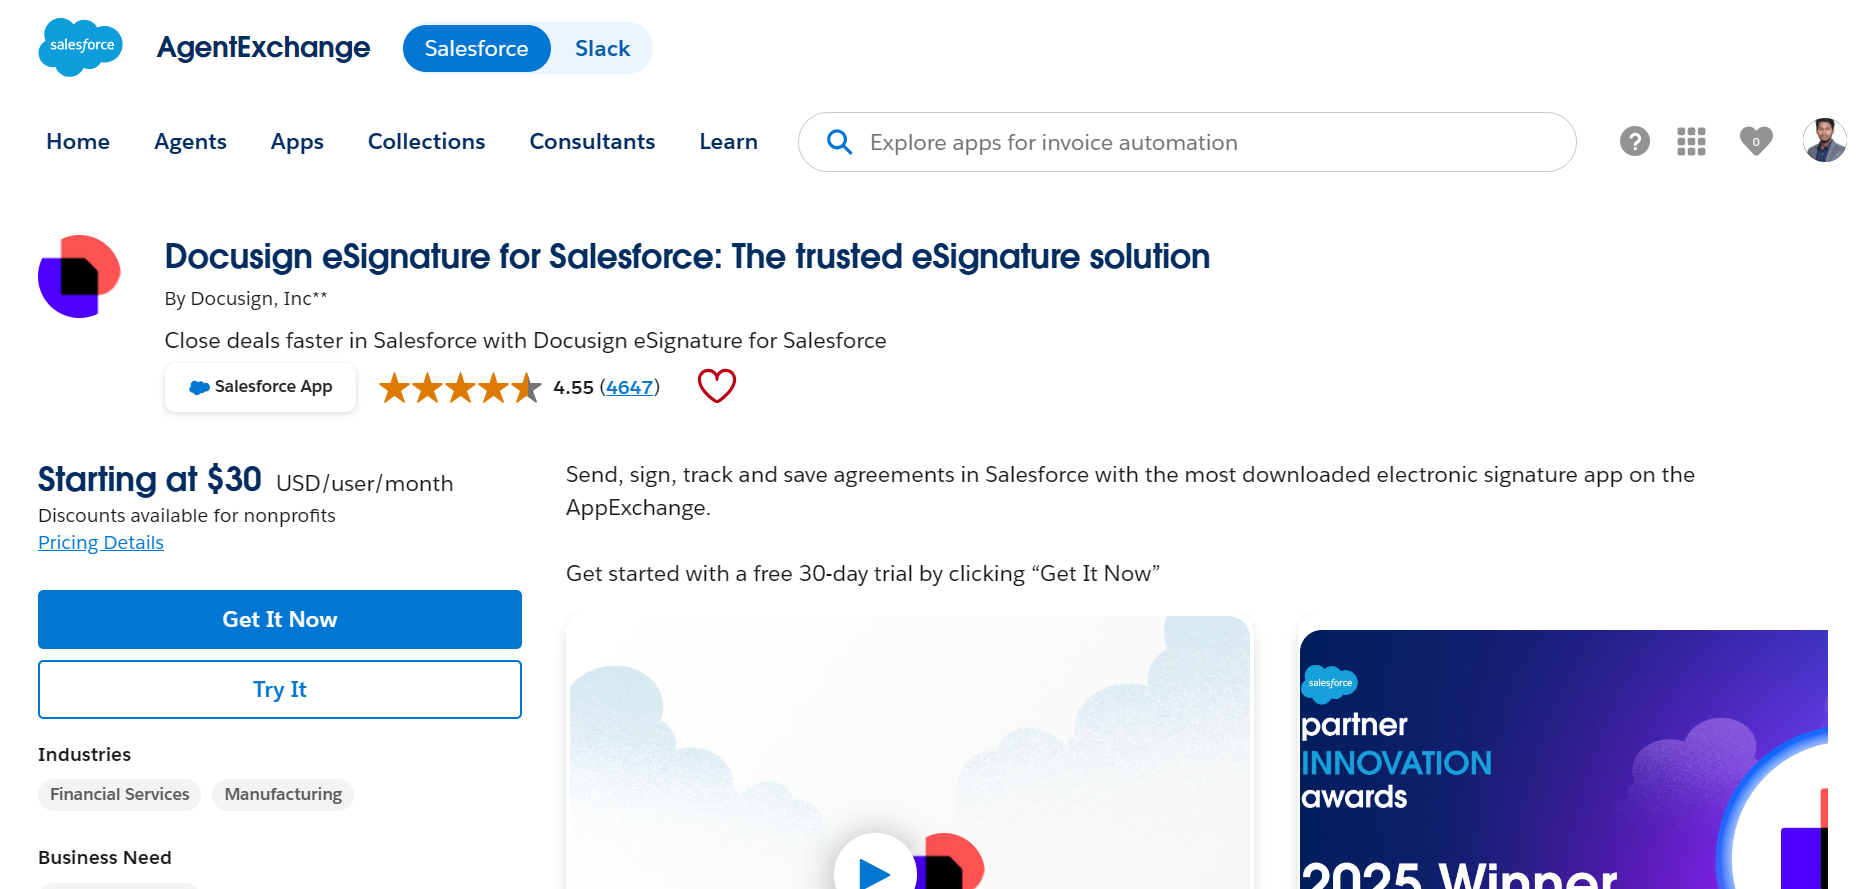
- To begin with, visit AppExchange or click on the listing link for "DocuSign Apps Launcher".
- Search for "DocuSign Apps Launcher."
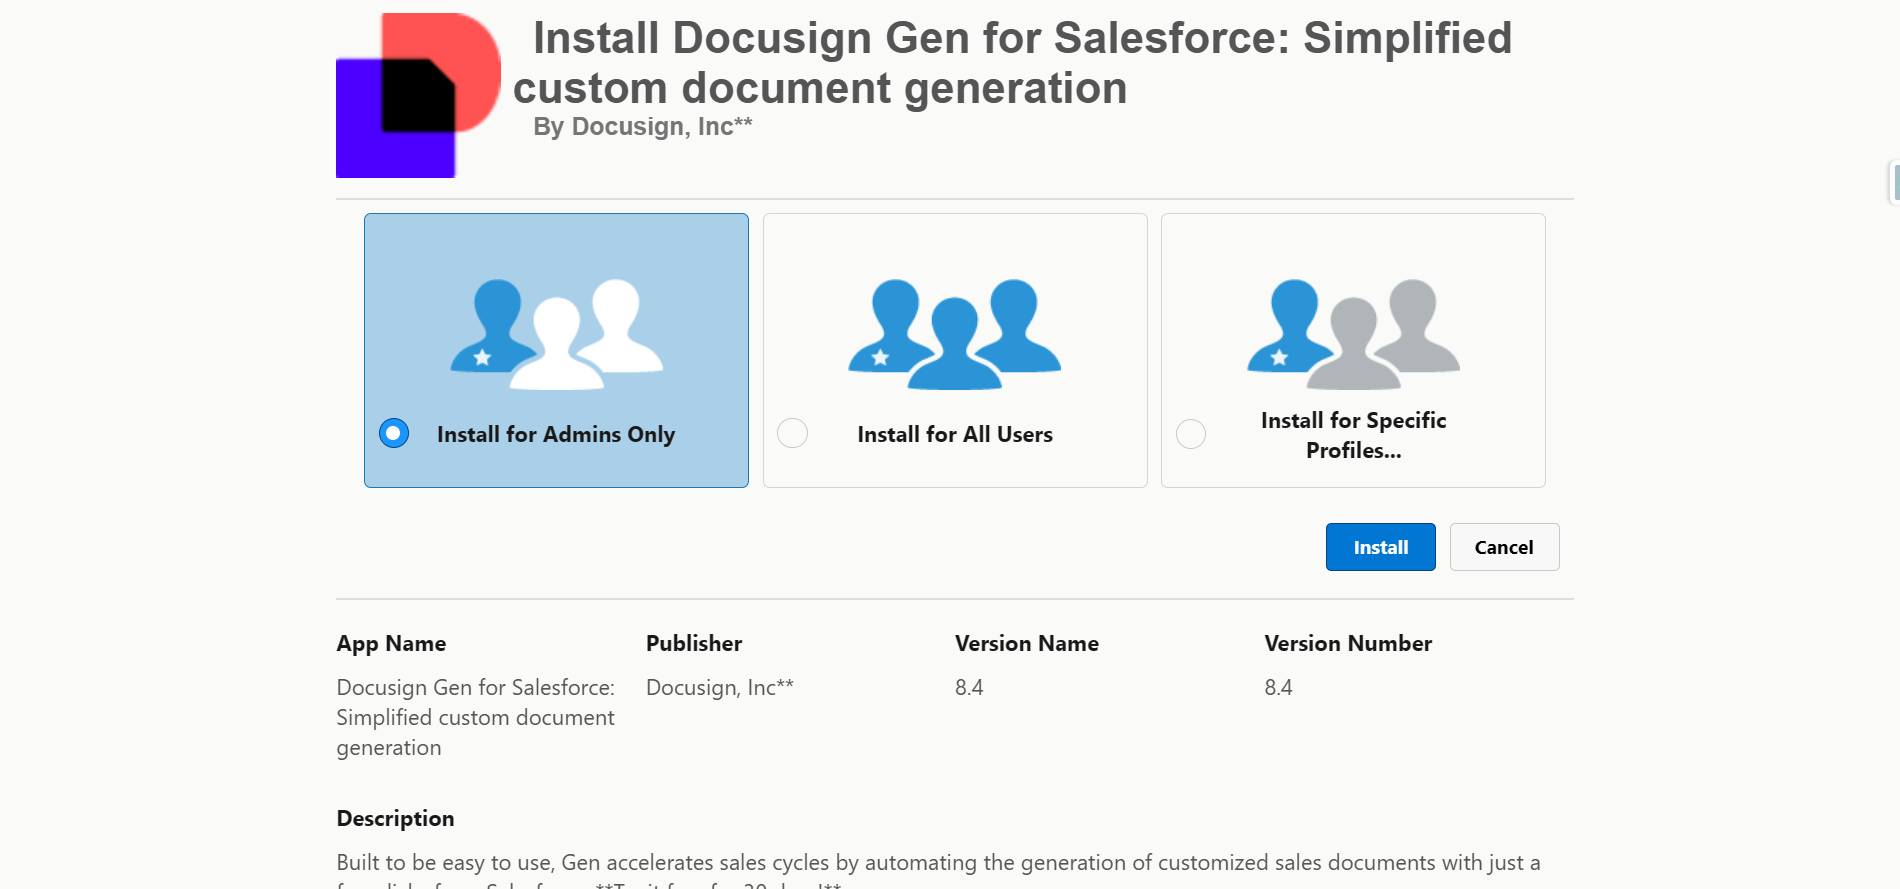
- Click Install.
- Choose the target Salesforce environment.
- Complete package installation.
- Assign required permission sets.
.png)
Step 2: Launch DocuSign Apps Launcher in Salesforce
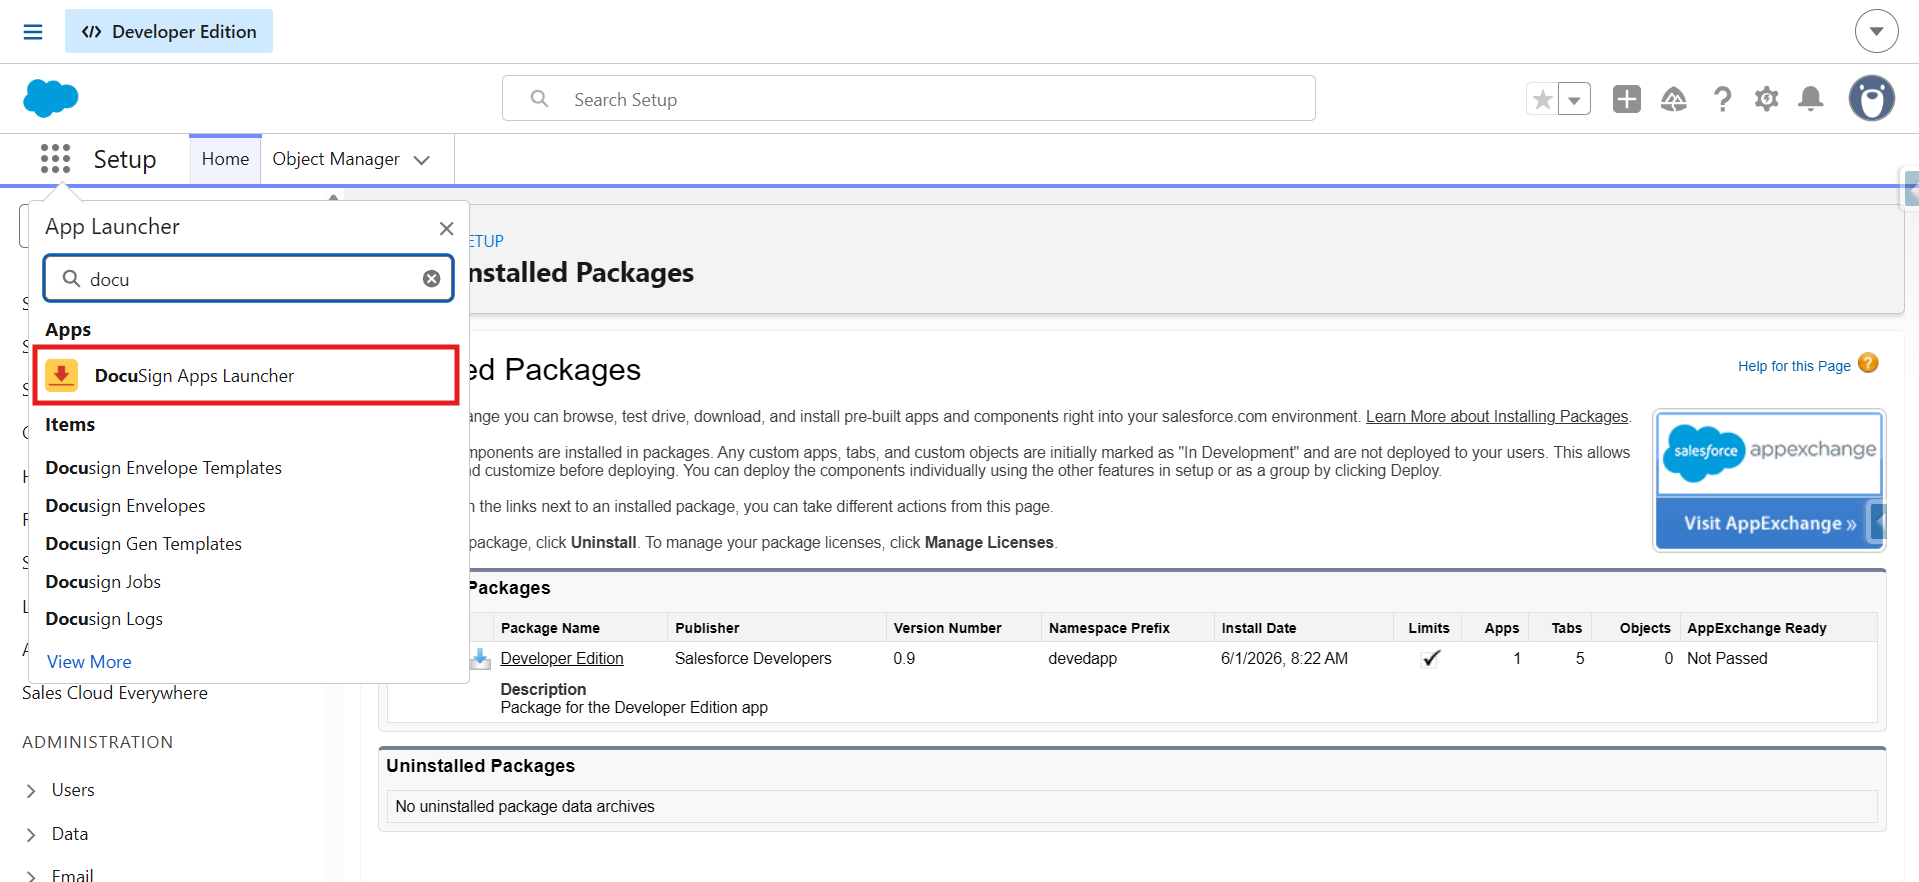
- Click App Launcher.
- Search for "DocuSign Apps Launcher" and click it.
- Open the application.
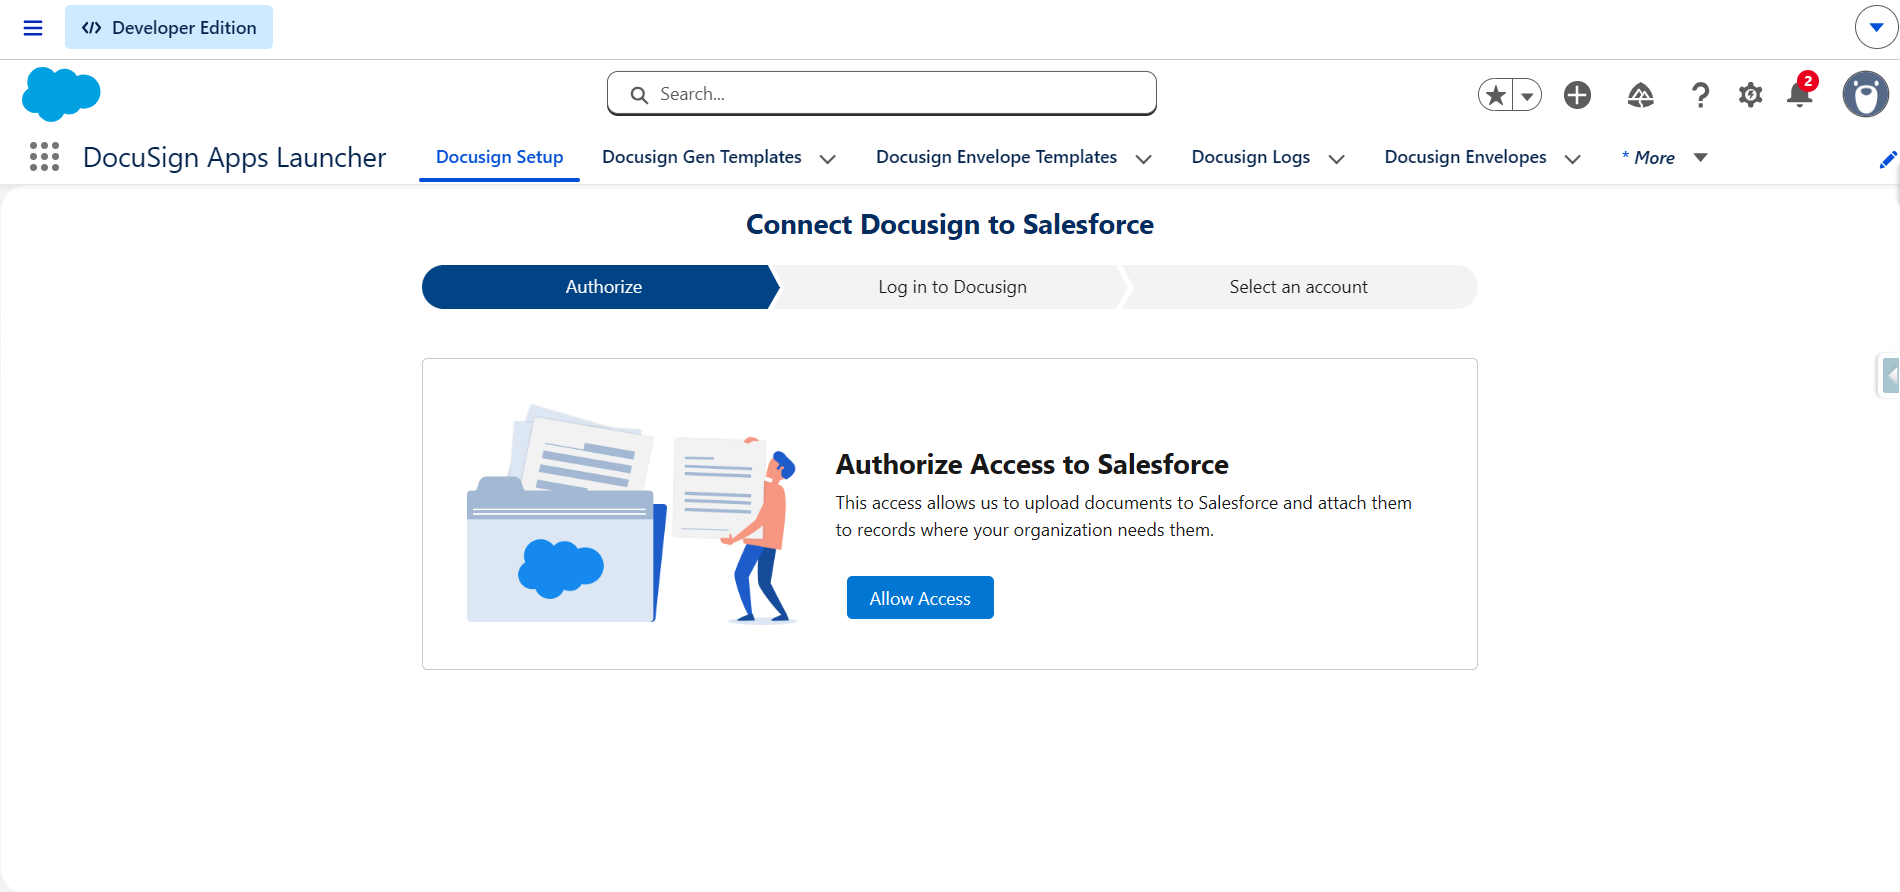
- Click Allow Access on this page.
- Then allow on the pop-up screen.
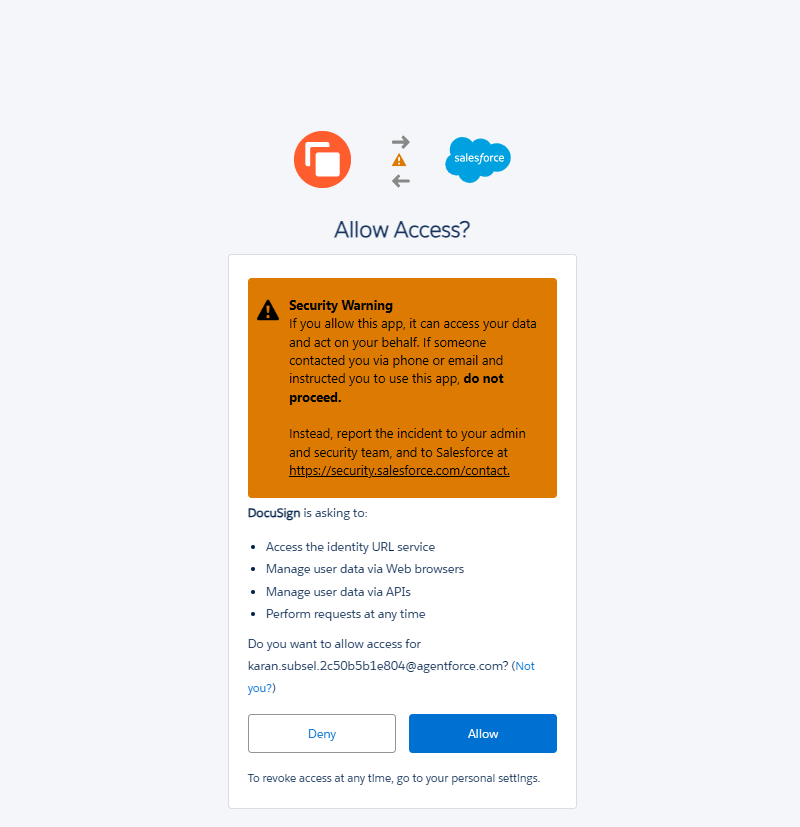
Step 3: Connect Salesforce to DocuSign within Salesforce
- Click Login to DocuSign.
- Enter DocuSign credentials.
- Authorise Salesforce access.
- Verify Successful Authentication.
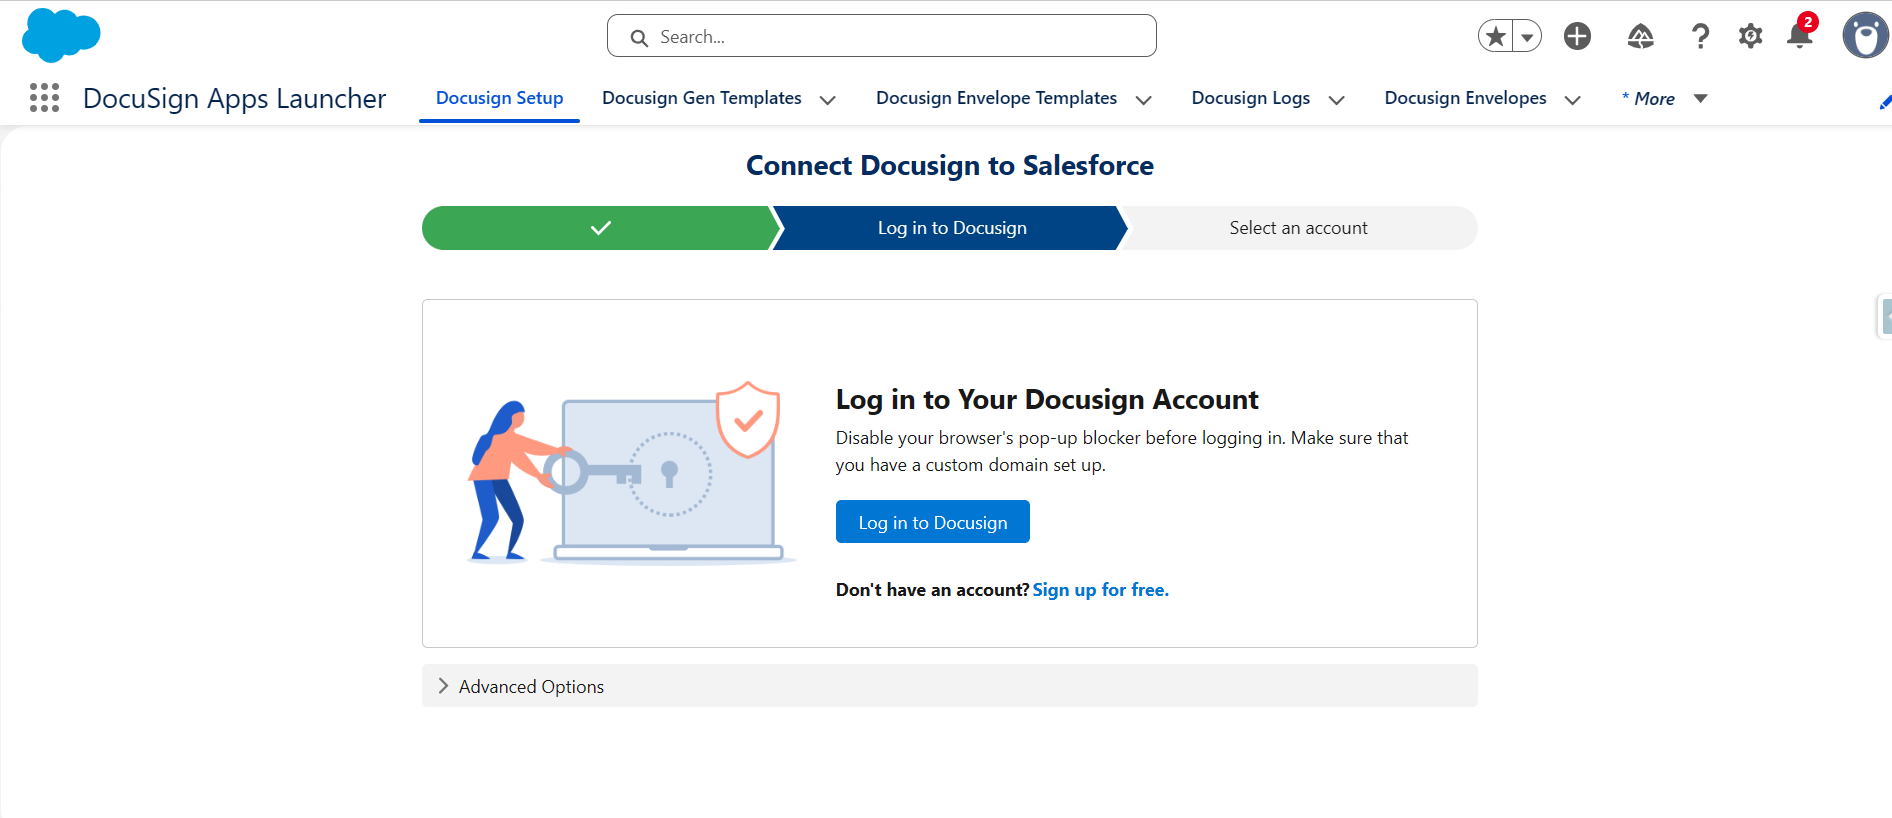
Click "Login to DocuSign" on this screen and authorise, then click Next.
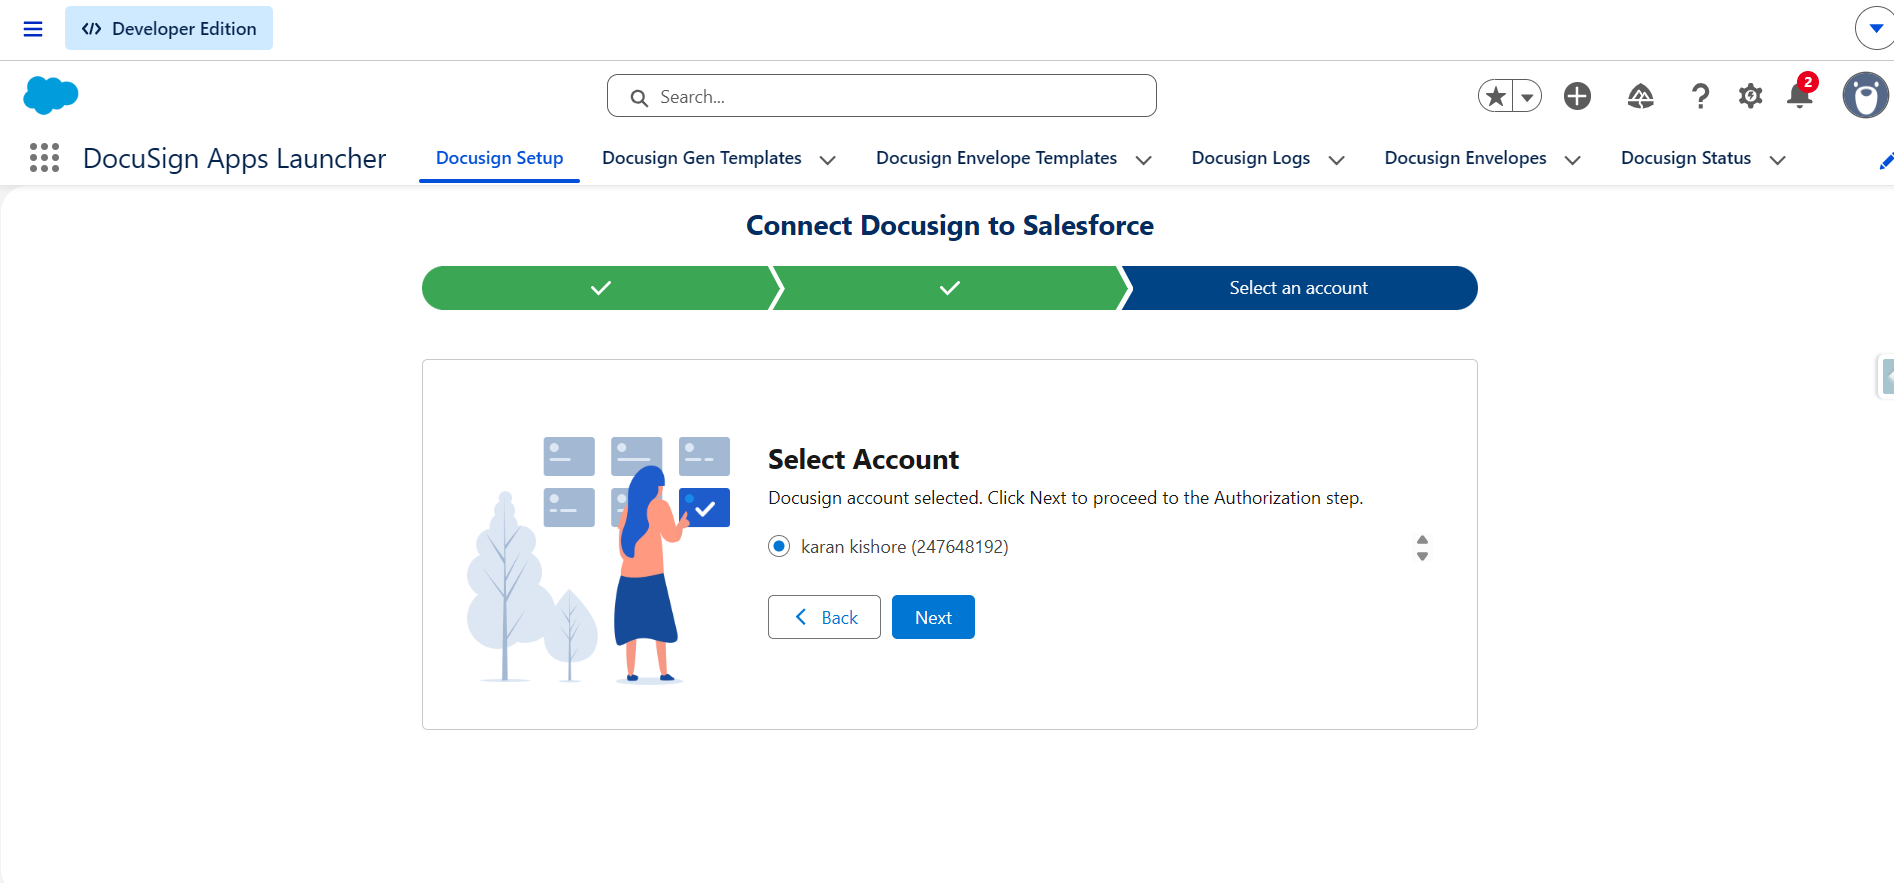
Step 4: Configure User Access
- Open Setup.
- Assign DocuSign permission sets to users.
- Verify profile permissions.
- Confirm DocuSign user mapping.
Step 5: Create a DocuSign Template
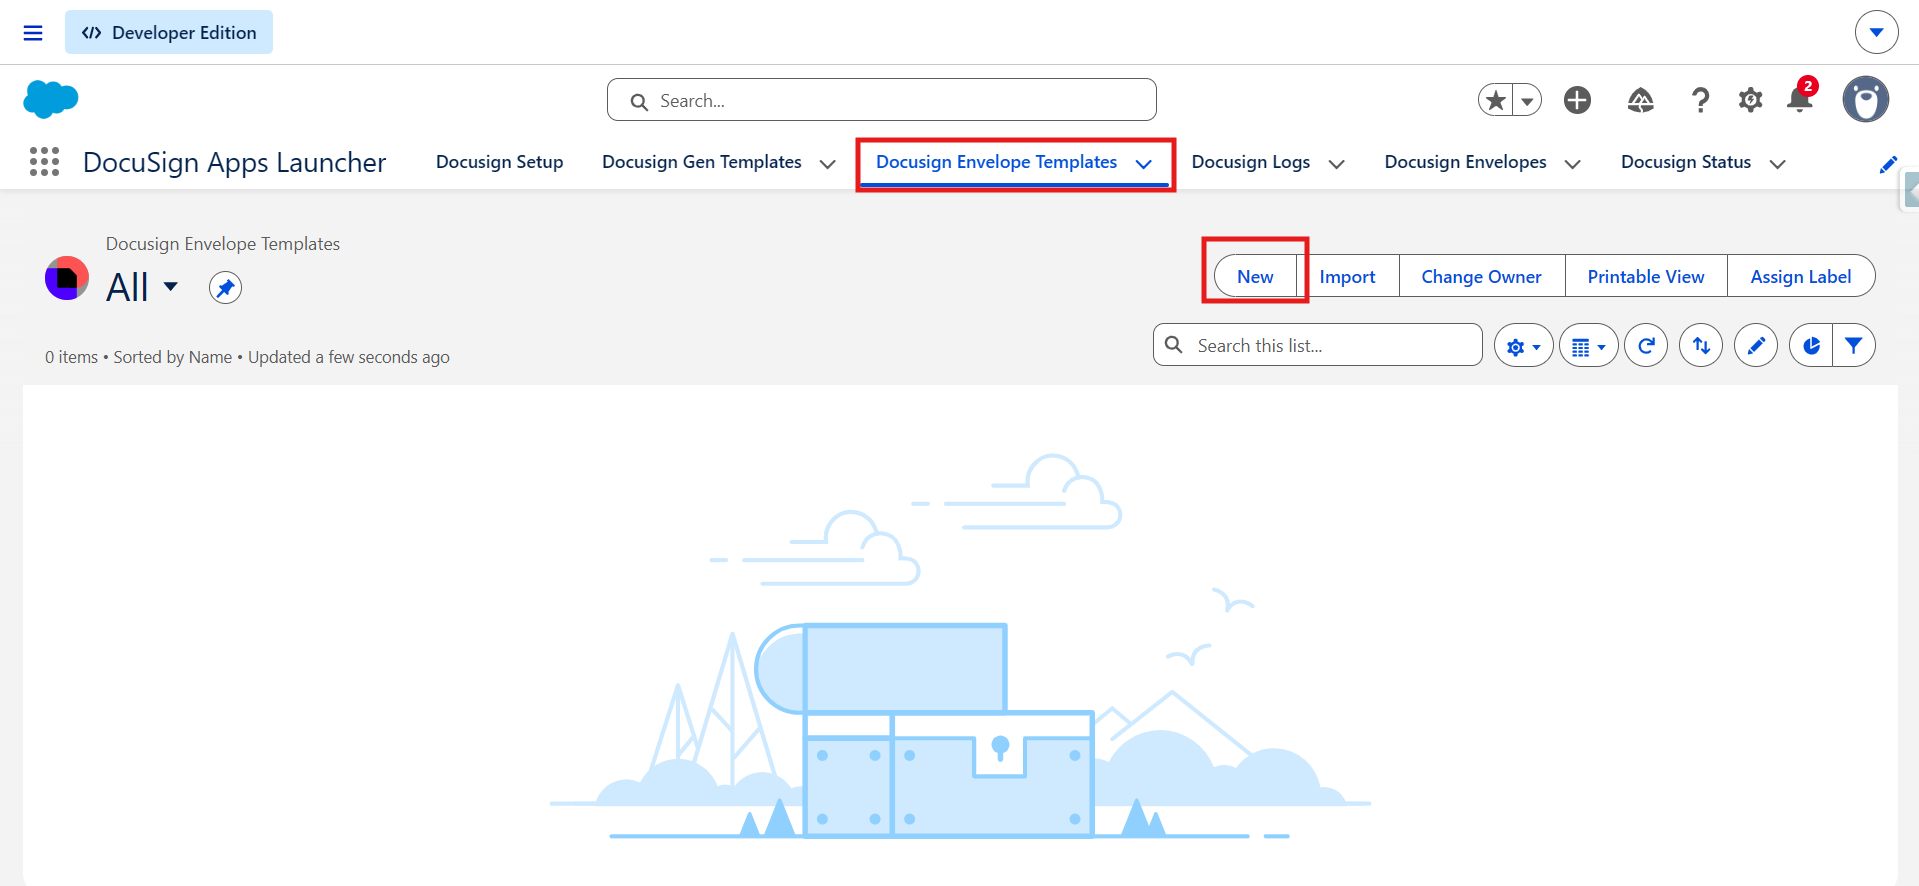
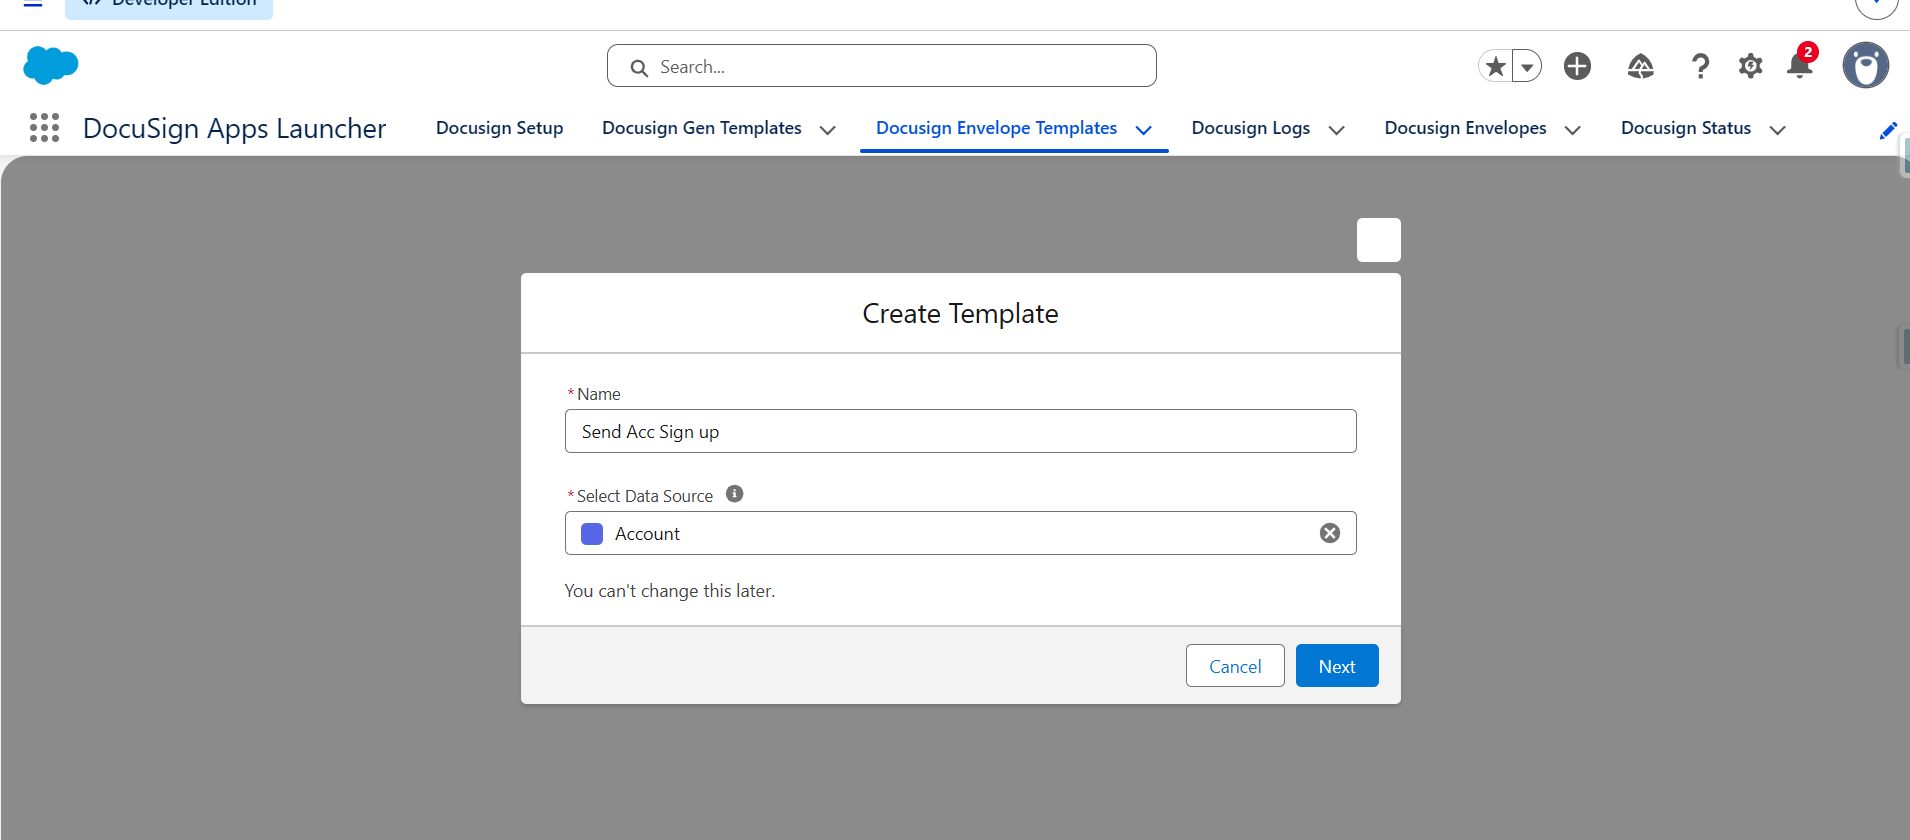
- Go to the "DocuSign Envelope Templates" tab and click New.
- Give a name for the template and choose an Object.
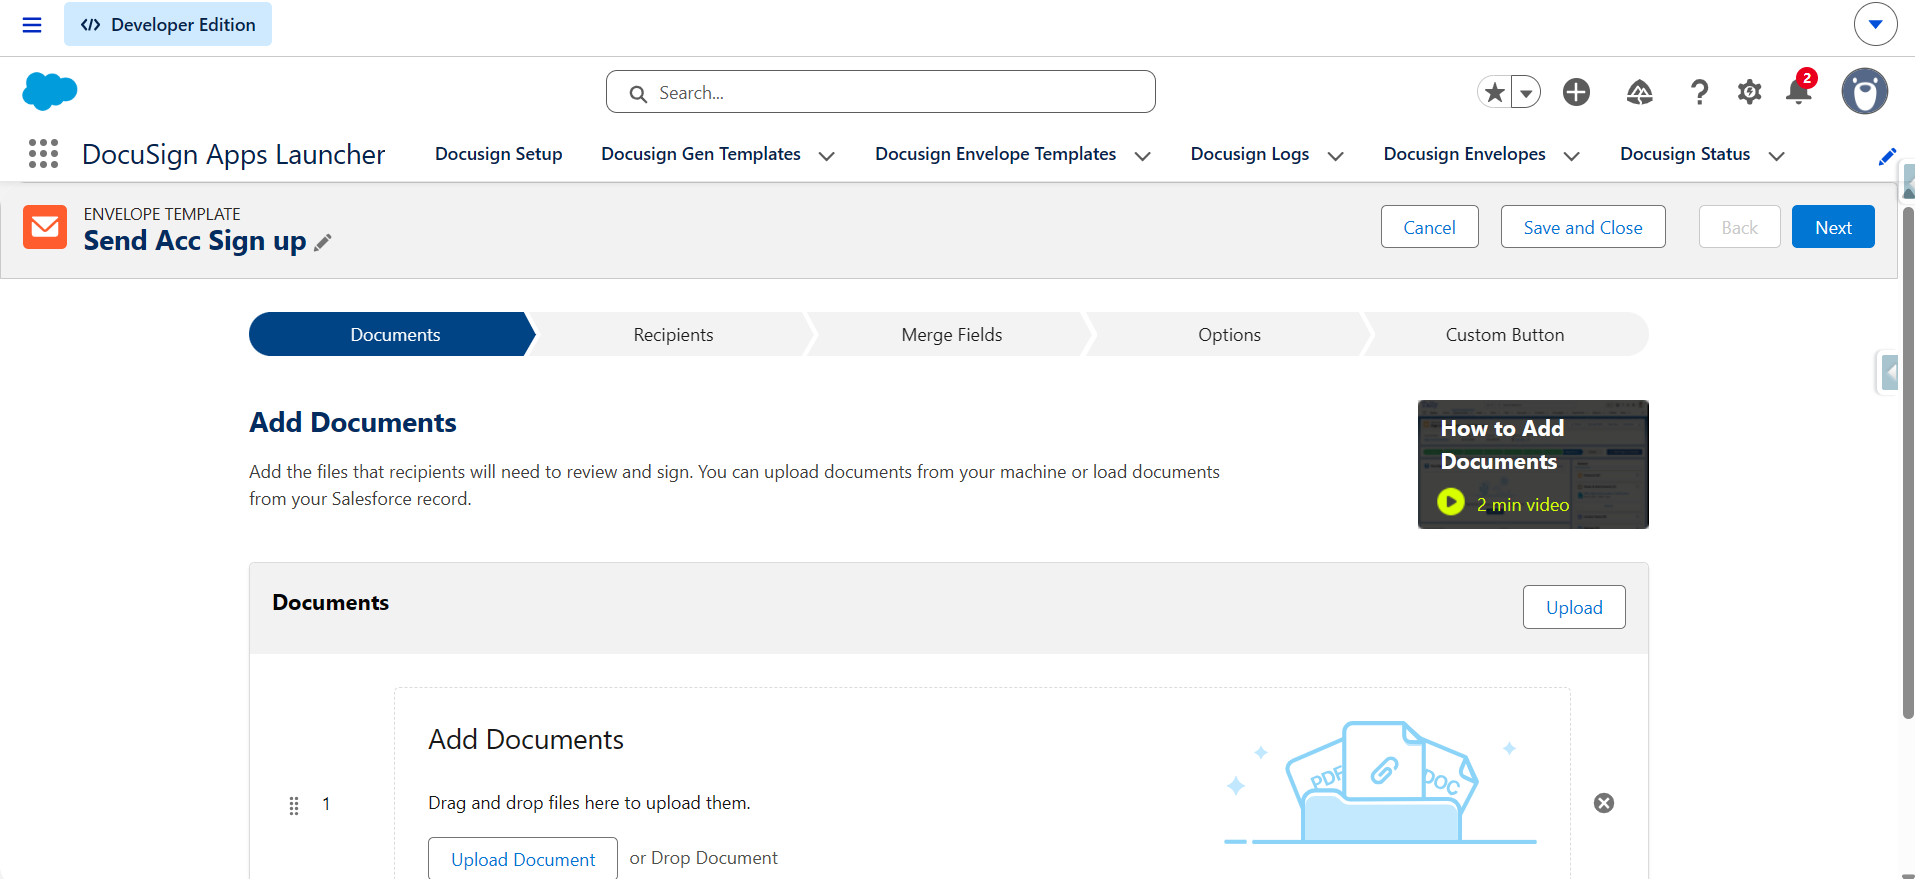
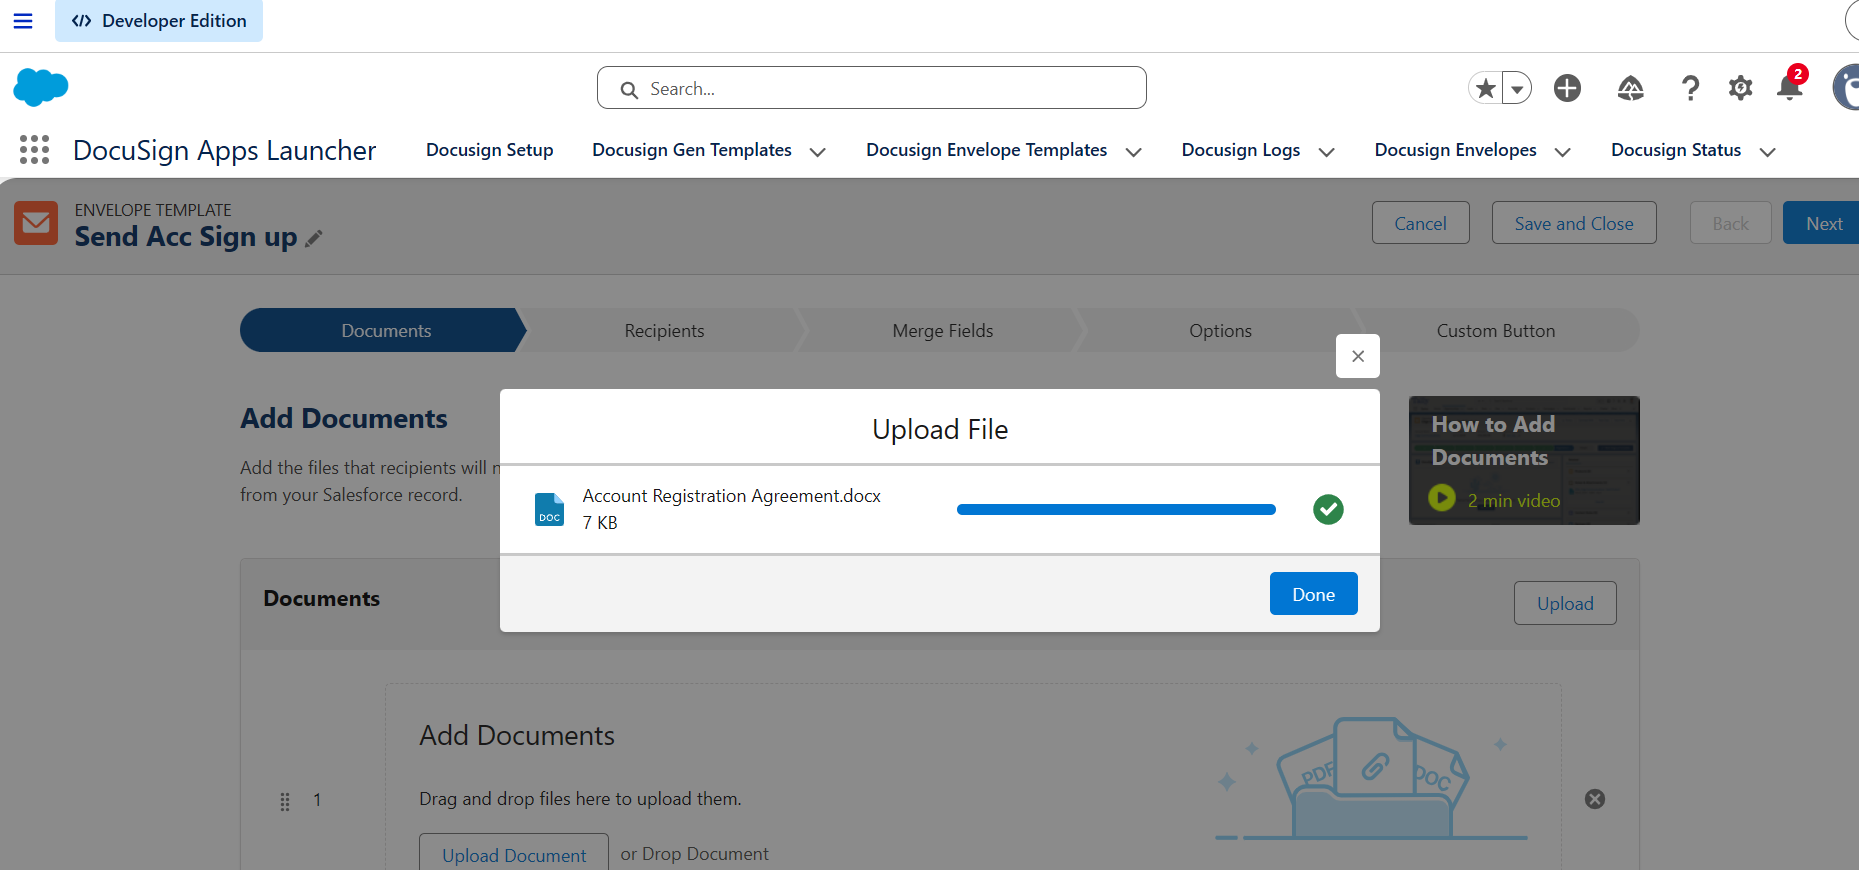
- Click Upload on this screen and choose a document to send.
- Once the document is uploaded, click Done and Next.
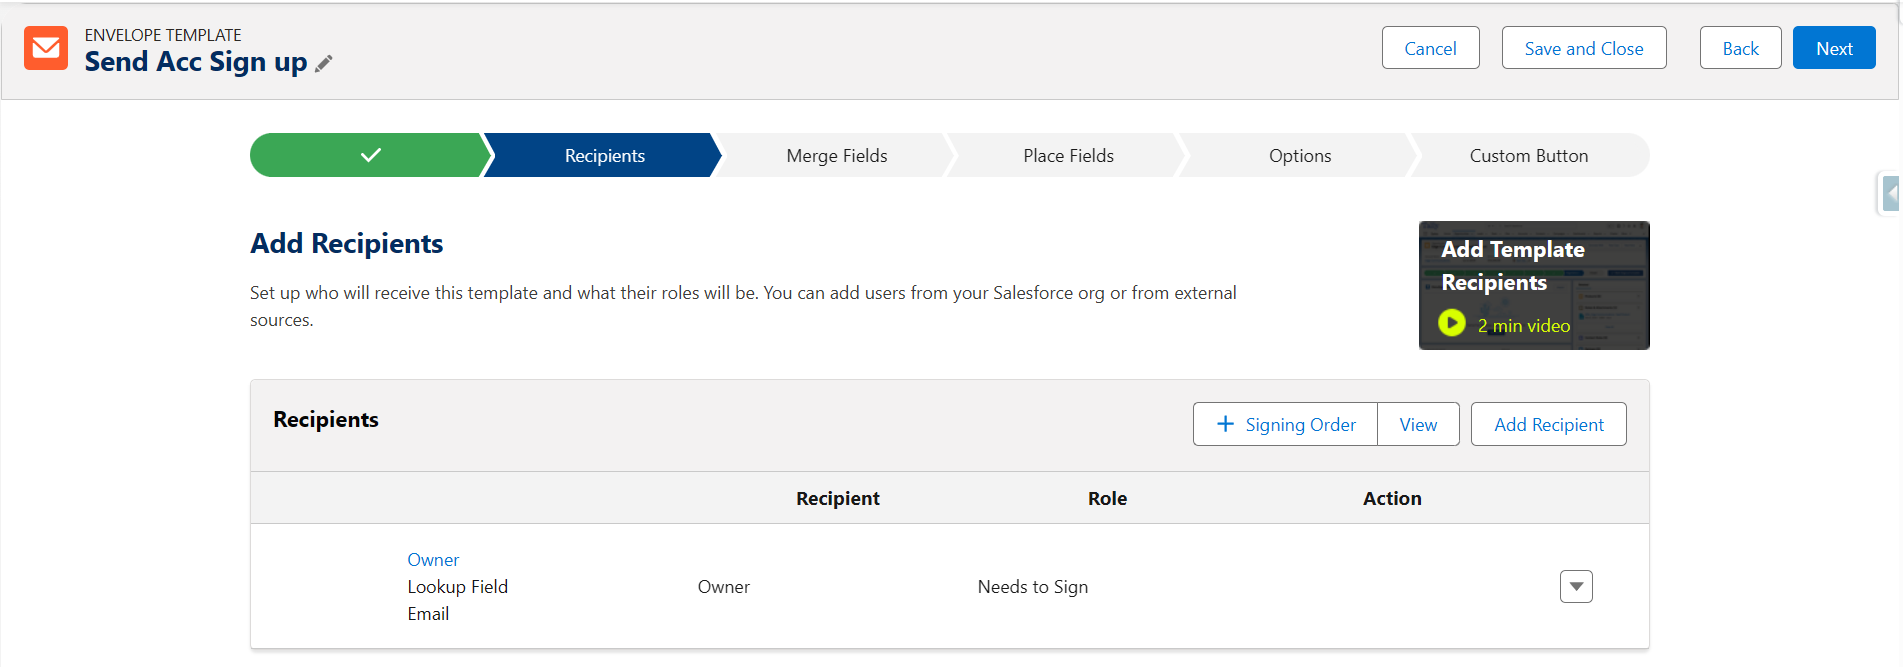
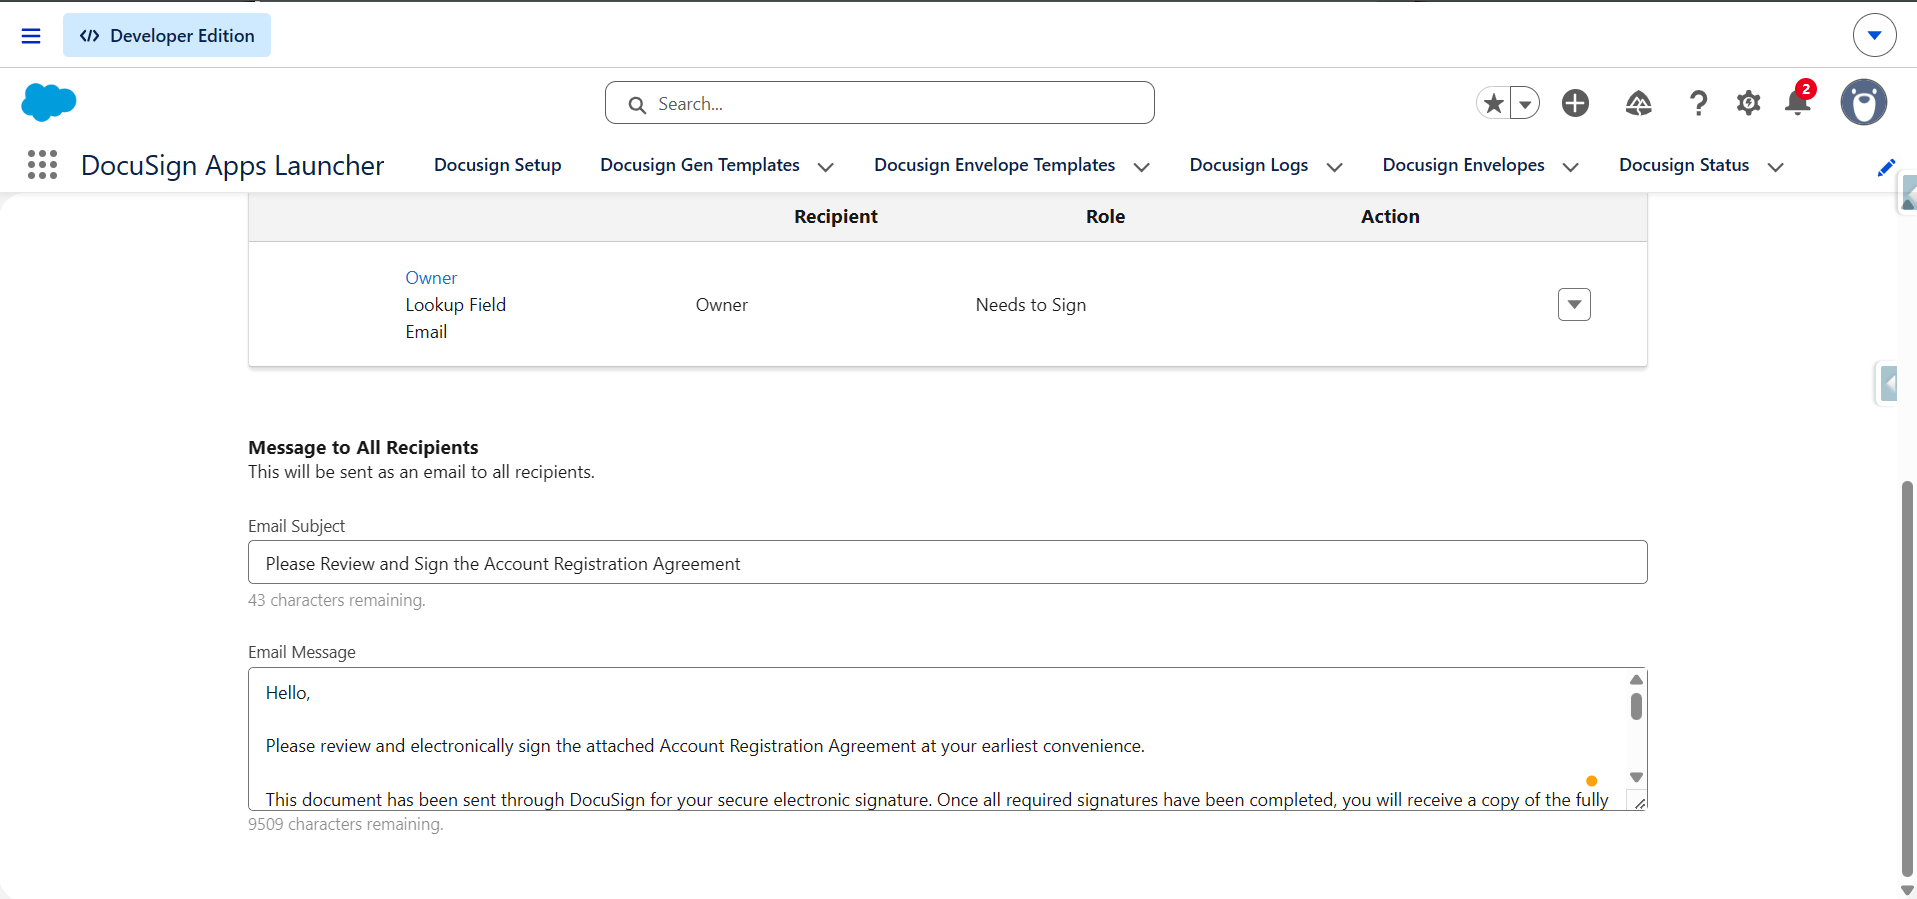
- Add a recipient who needs to get this document for signing and scroll down.
- Enter a Subject and Message, which will be sent to the email, and click Next.
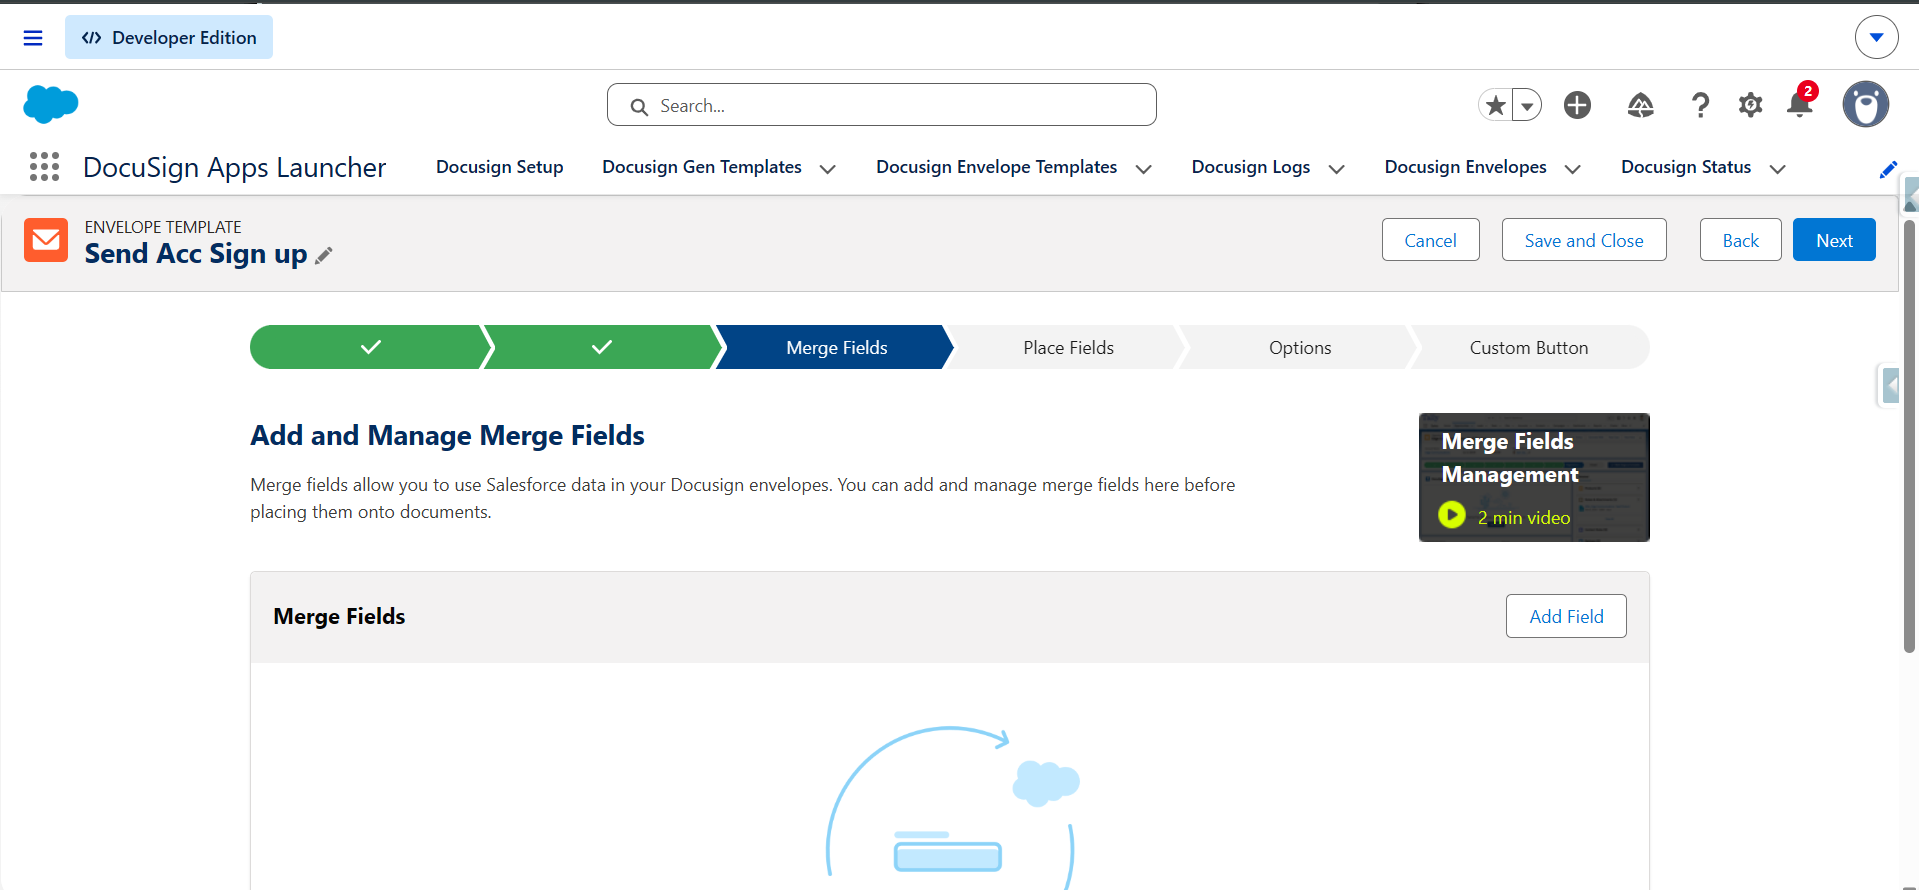
- On this screen, include the Merge Fields from the target Objects and their related objects alone, and click Next.
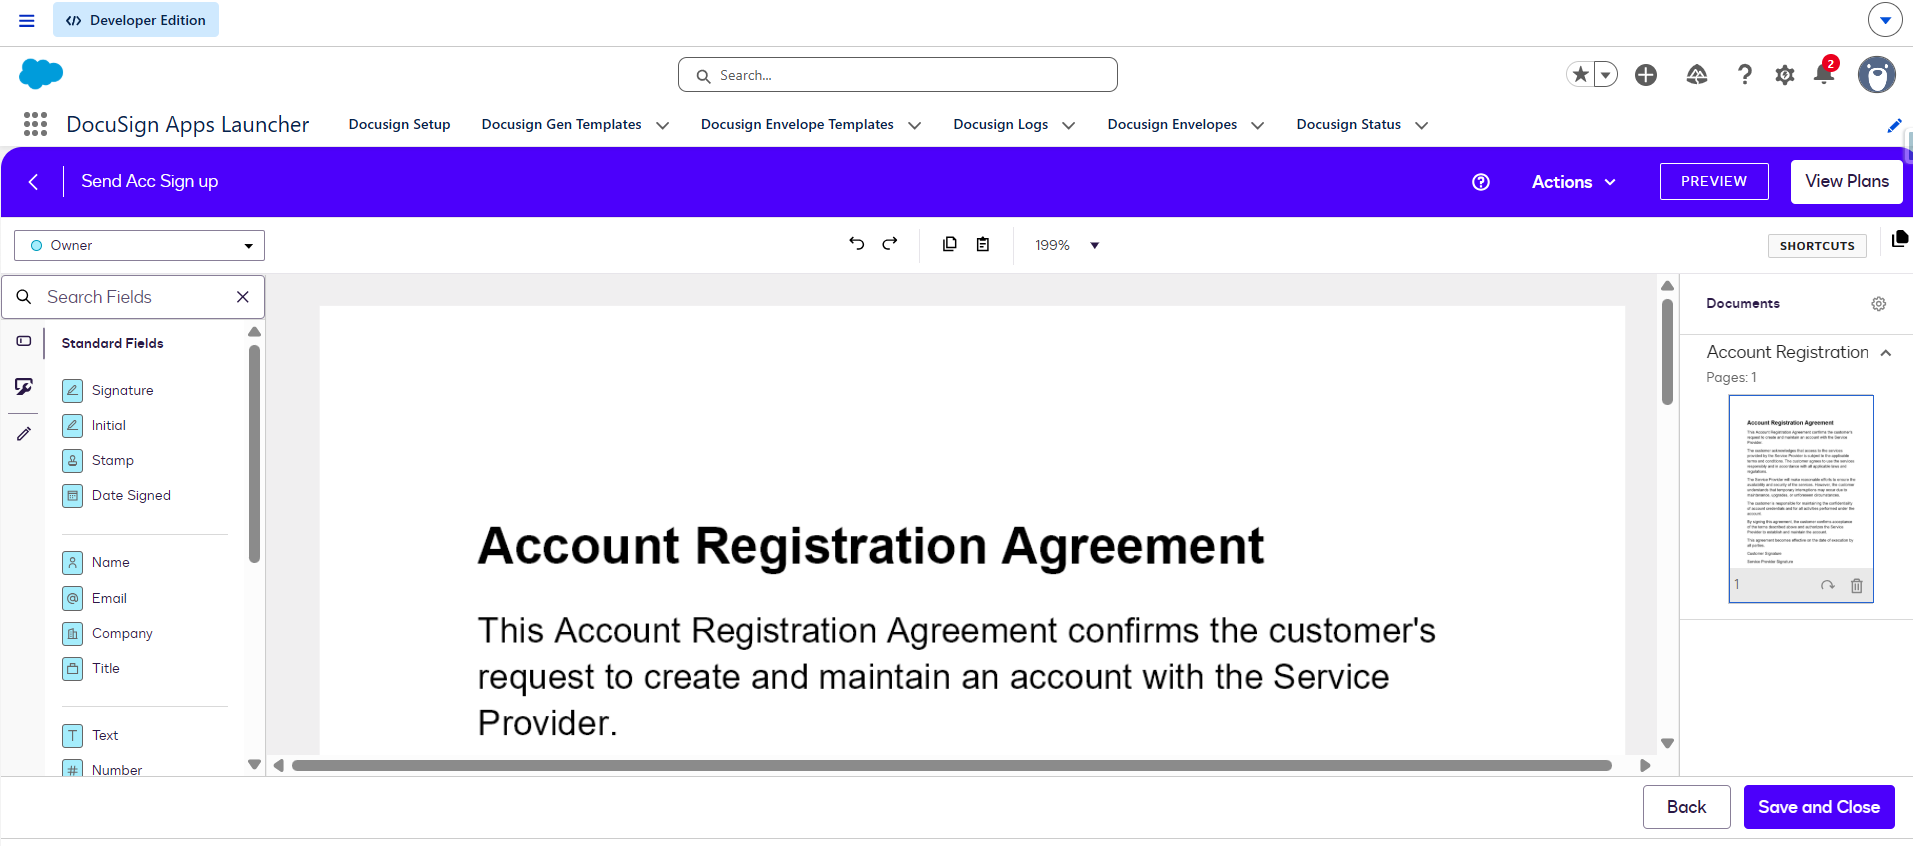
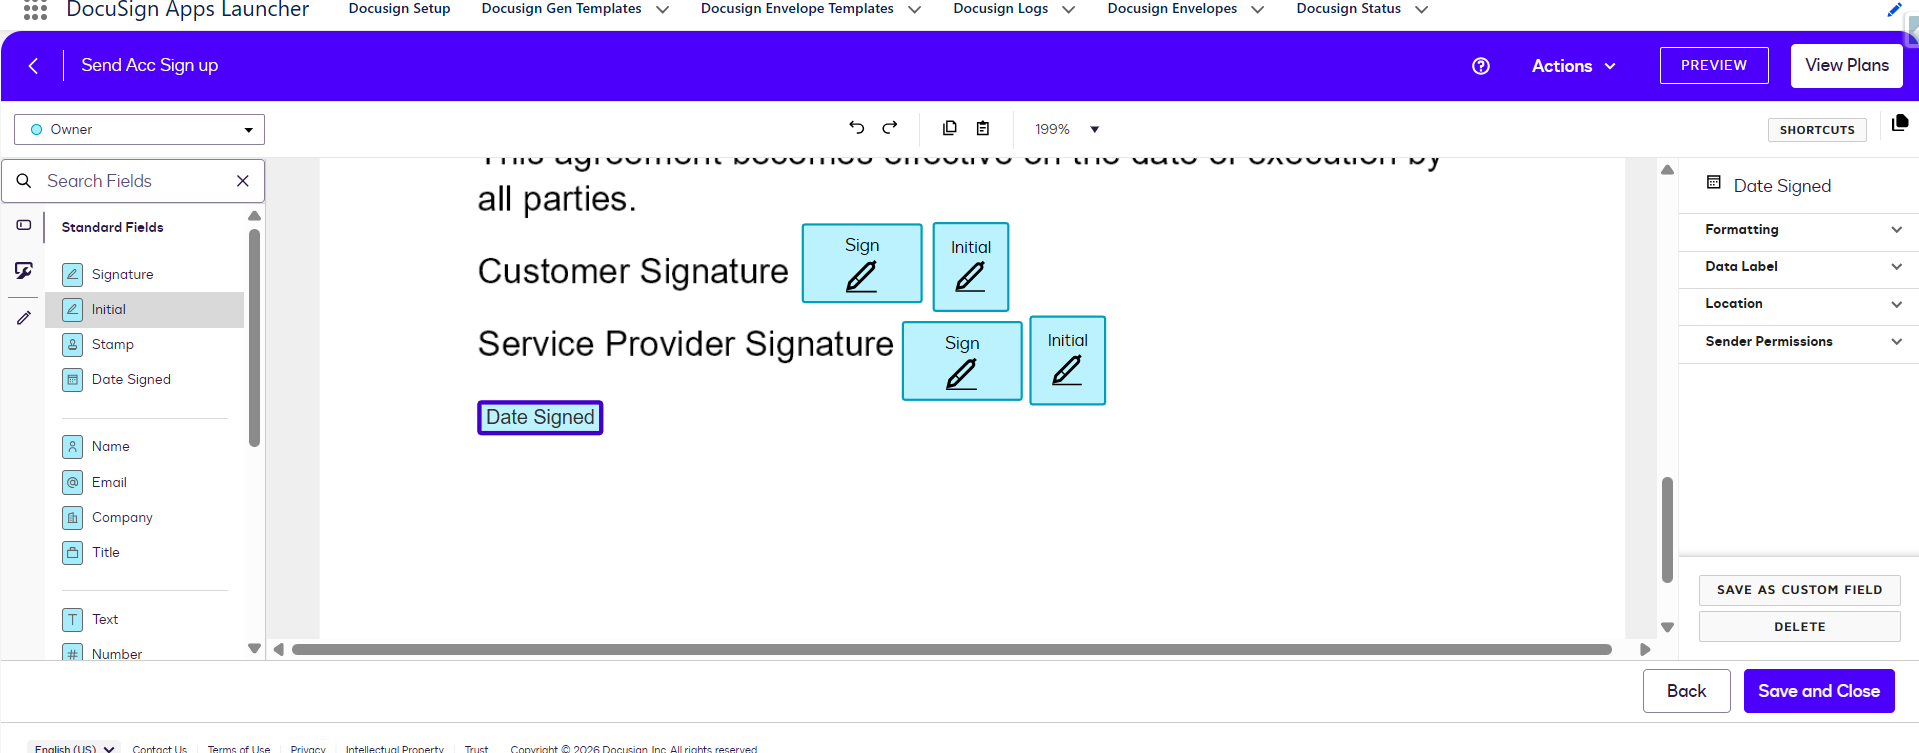
- On this screen, place the Sign Place and Fields needed; any alterations except the content will be made.
- Drag and drop the Standard fields and configure them based on requirements, and click Save and Close.
- Customise the options based on needs and scroll down.
- Alter the field updates based on conditions and click Next.
- Provide the Button Name and choose the Page Layouts to appear on the UI, then press Finish.
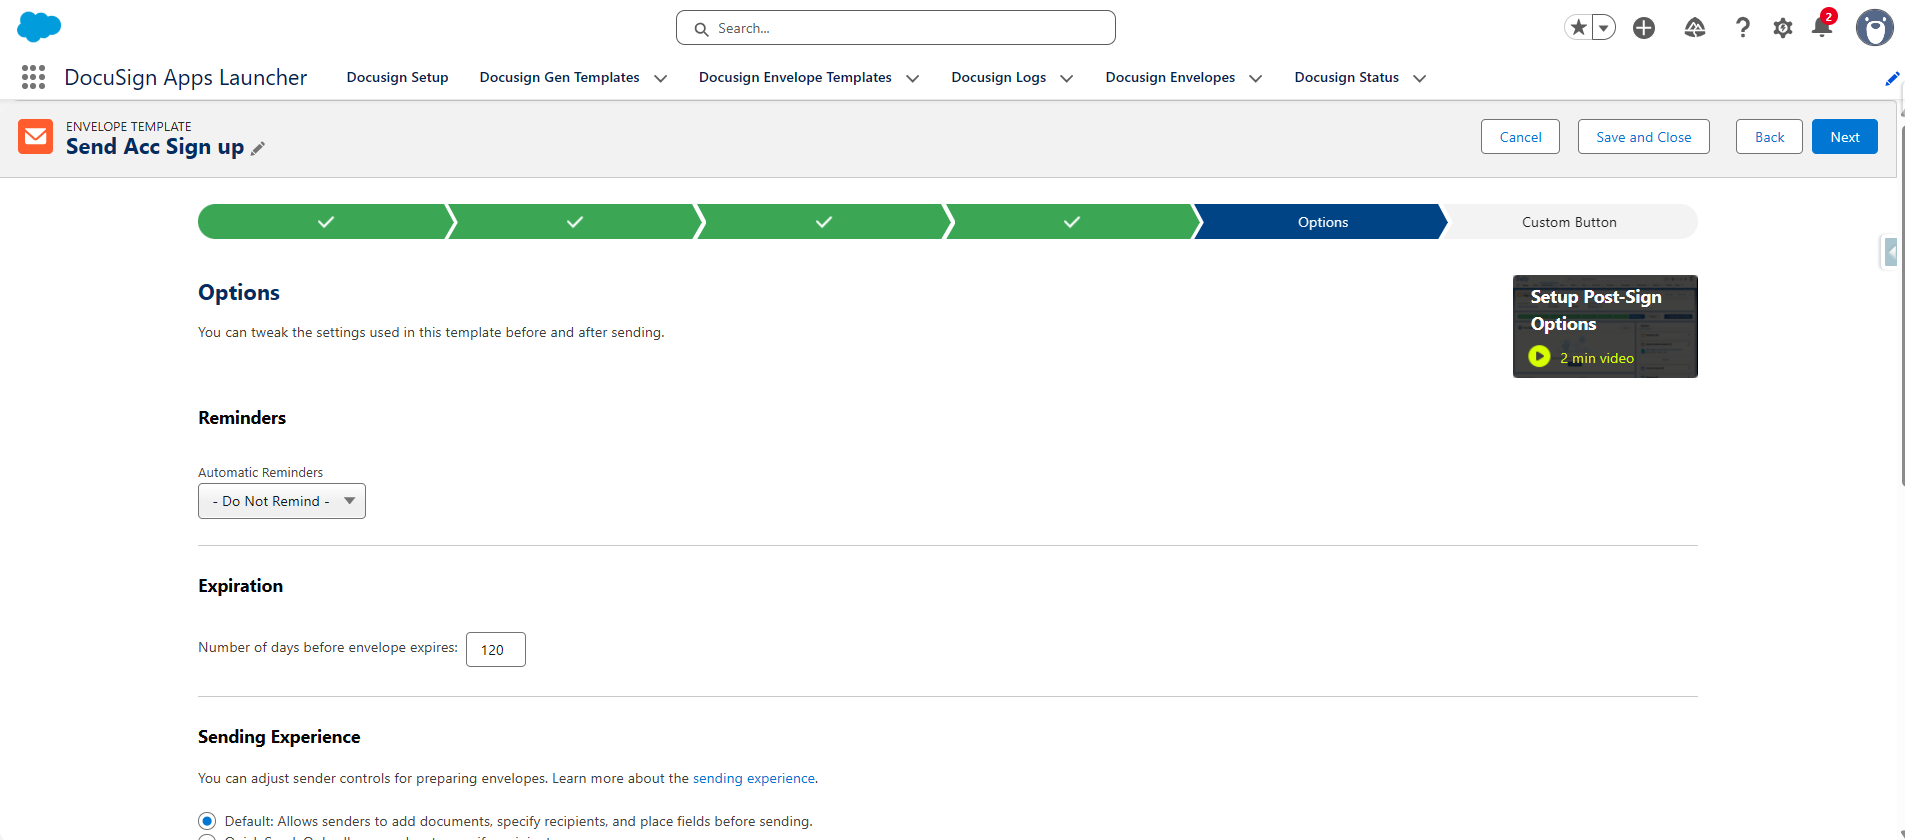
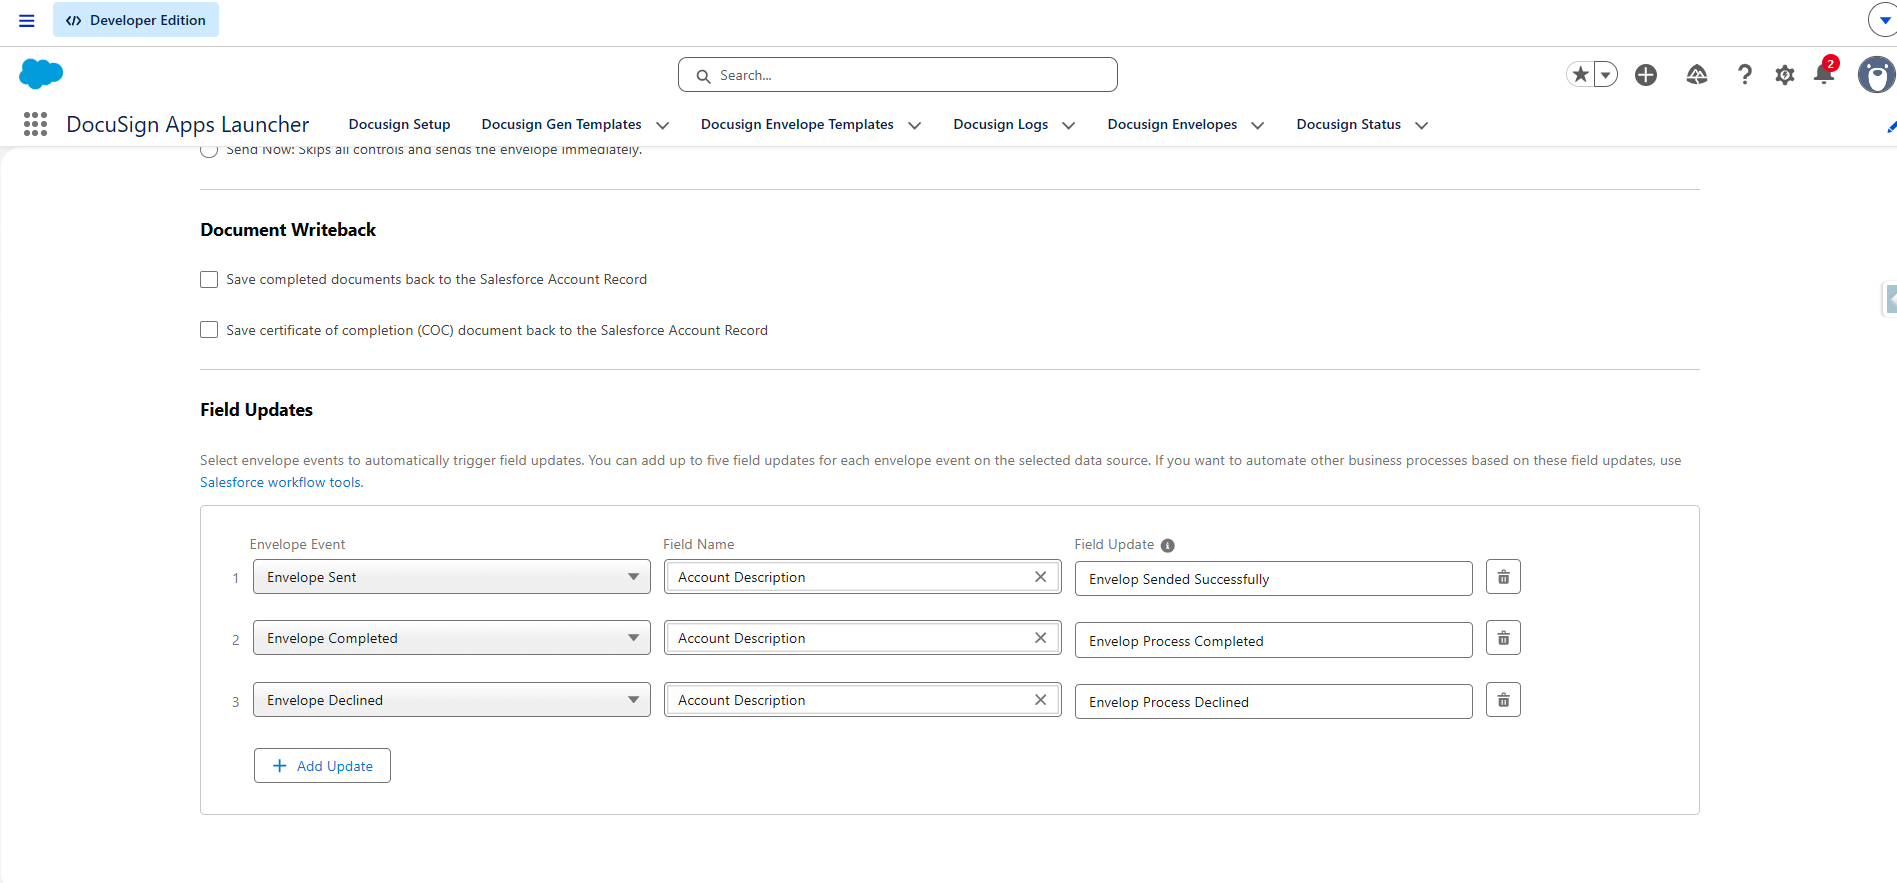
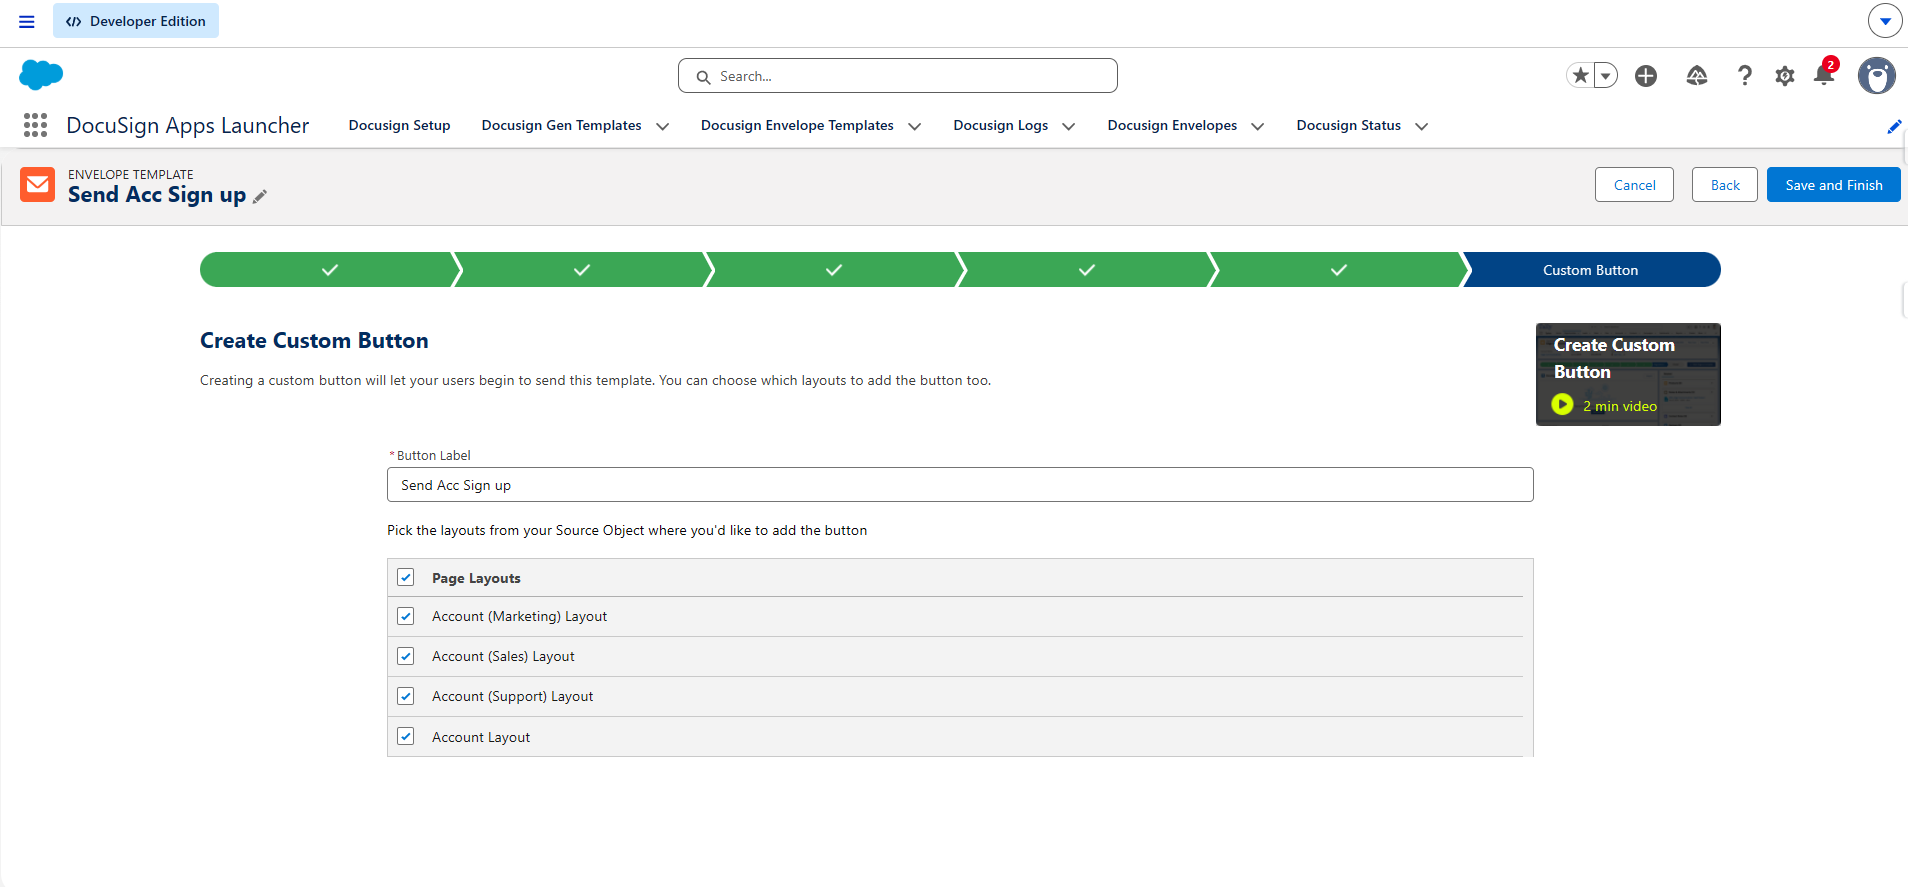
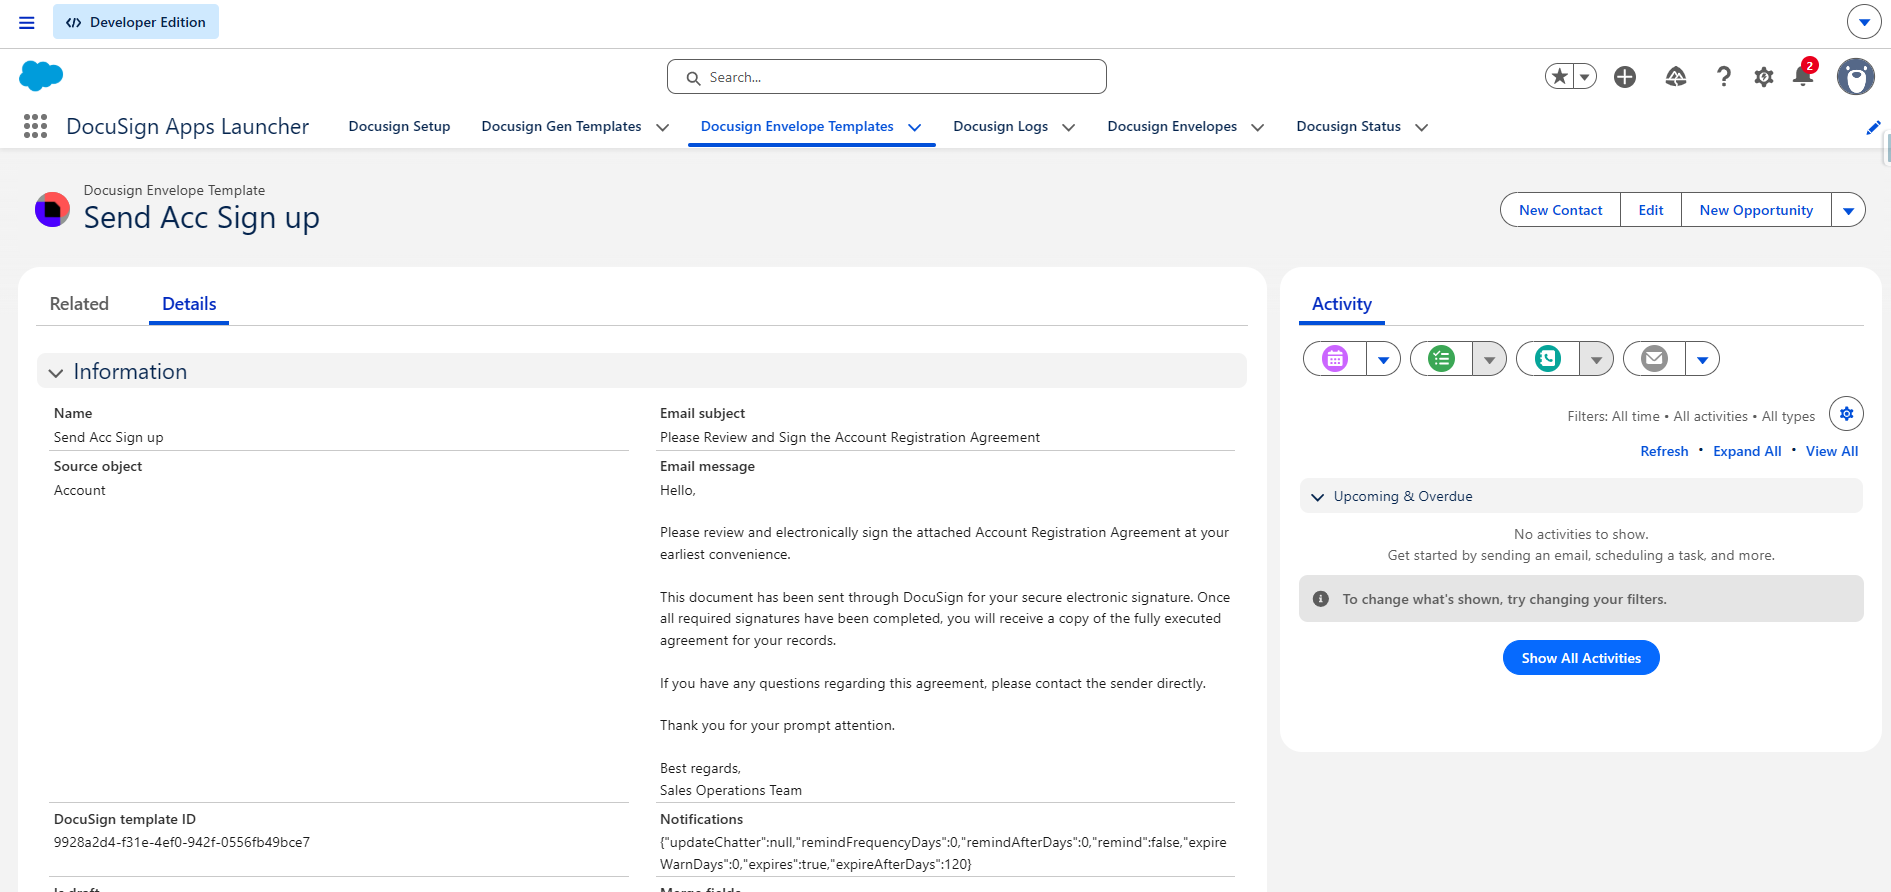
Creation of the DocuSign Envelope Template is successful and it can now be used.
Step 6: Send Documents for Signature
- Open a Salesforce record.
- Select Send with DocuSign.
- Choose a template.
- Review recipients.
- Send the envelope.
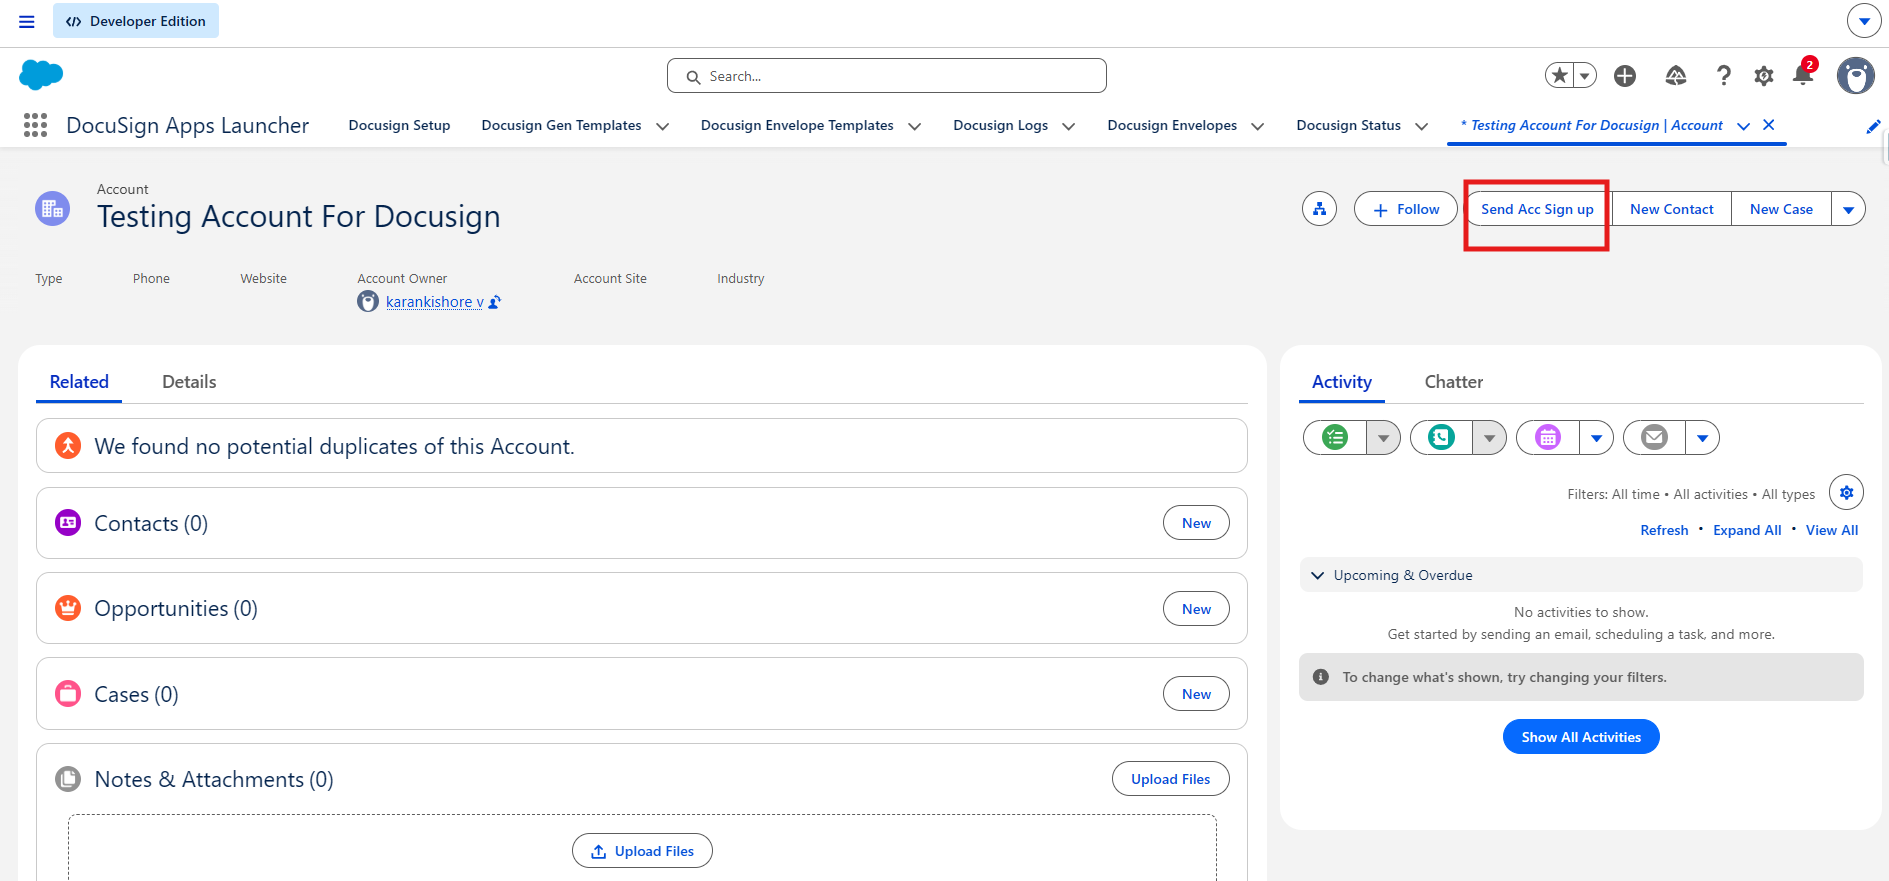
Open a Salesforce record (Account Record), and you will see the custom button created earlier. Click the button.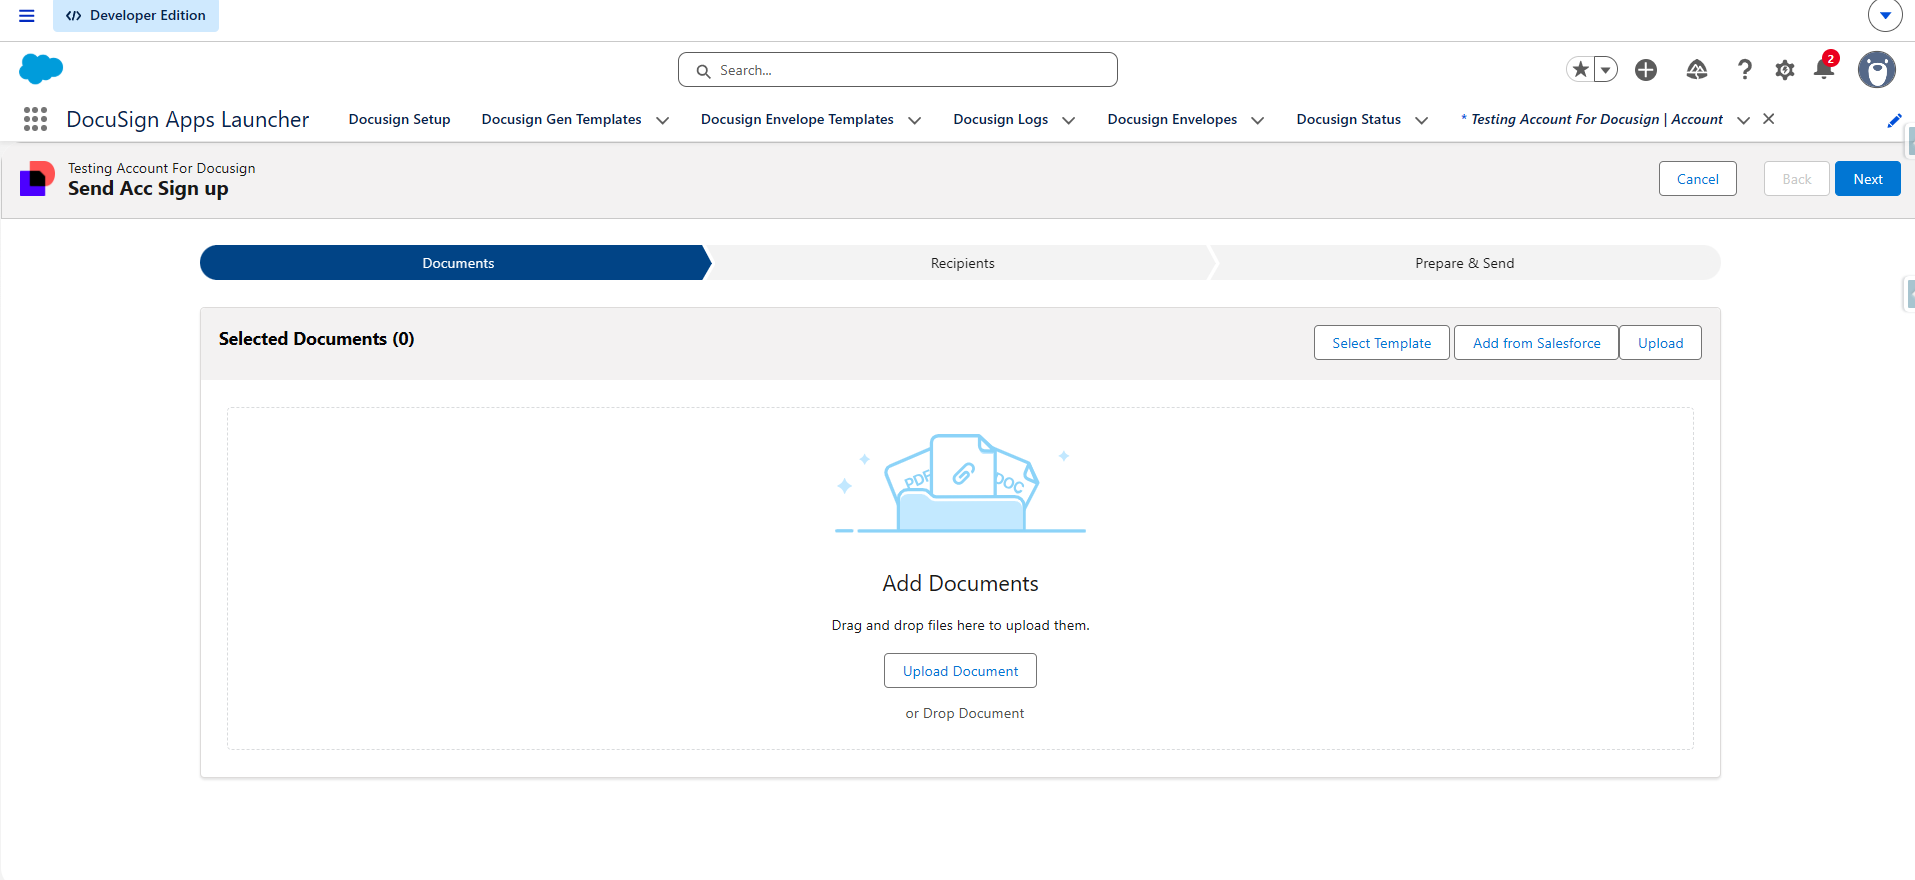 You will be navigated to a screen — click Select Template and choose the template created, then click Next.
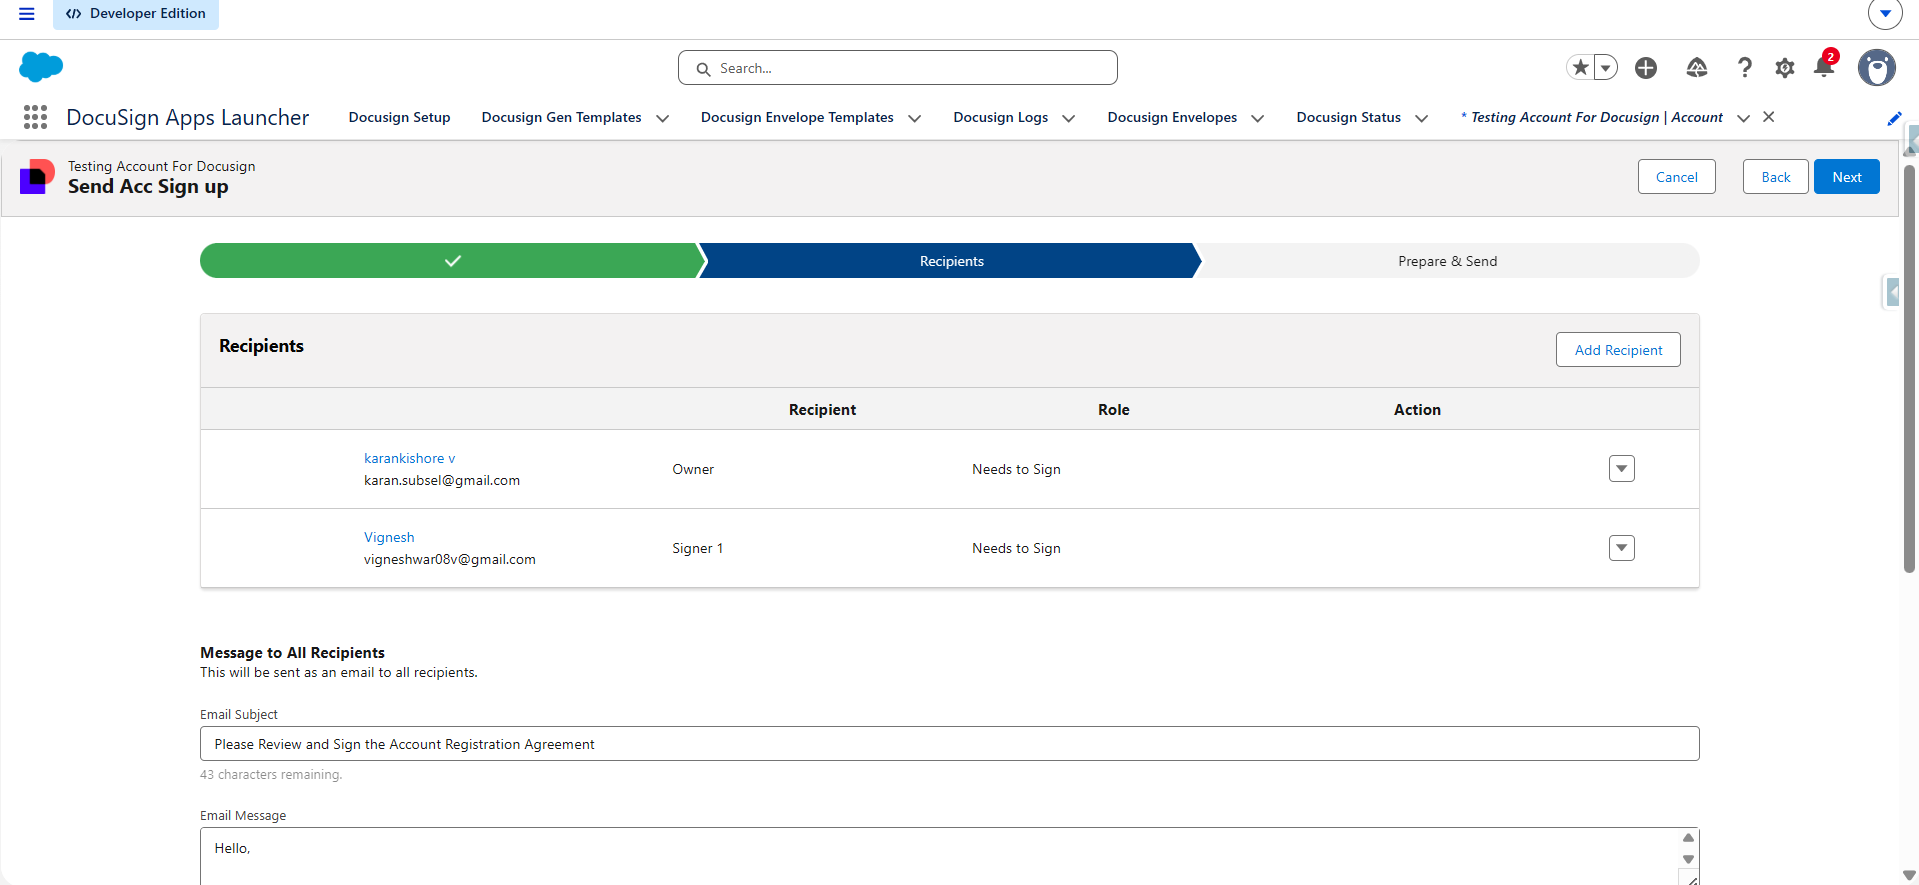 Add a recipient who needs to receive the envelope to sign, and click Next.
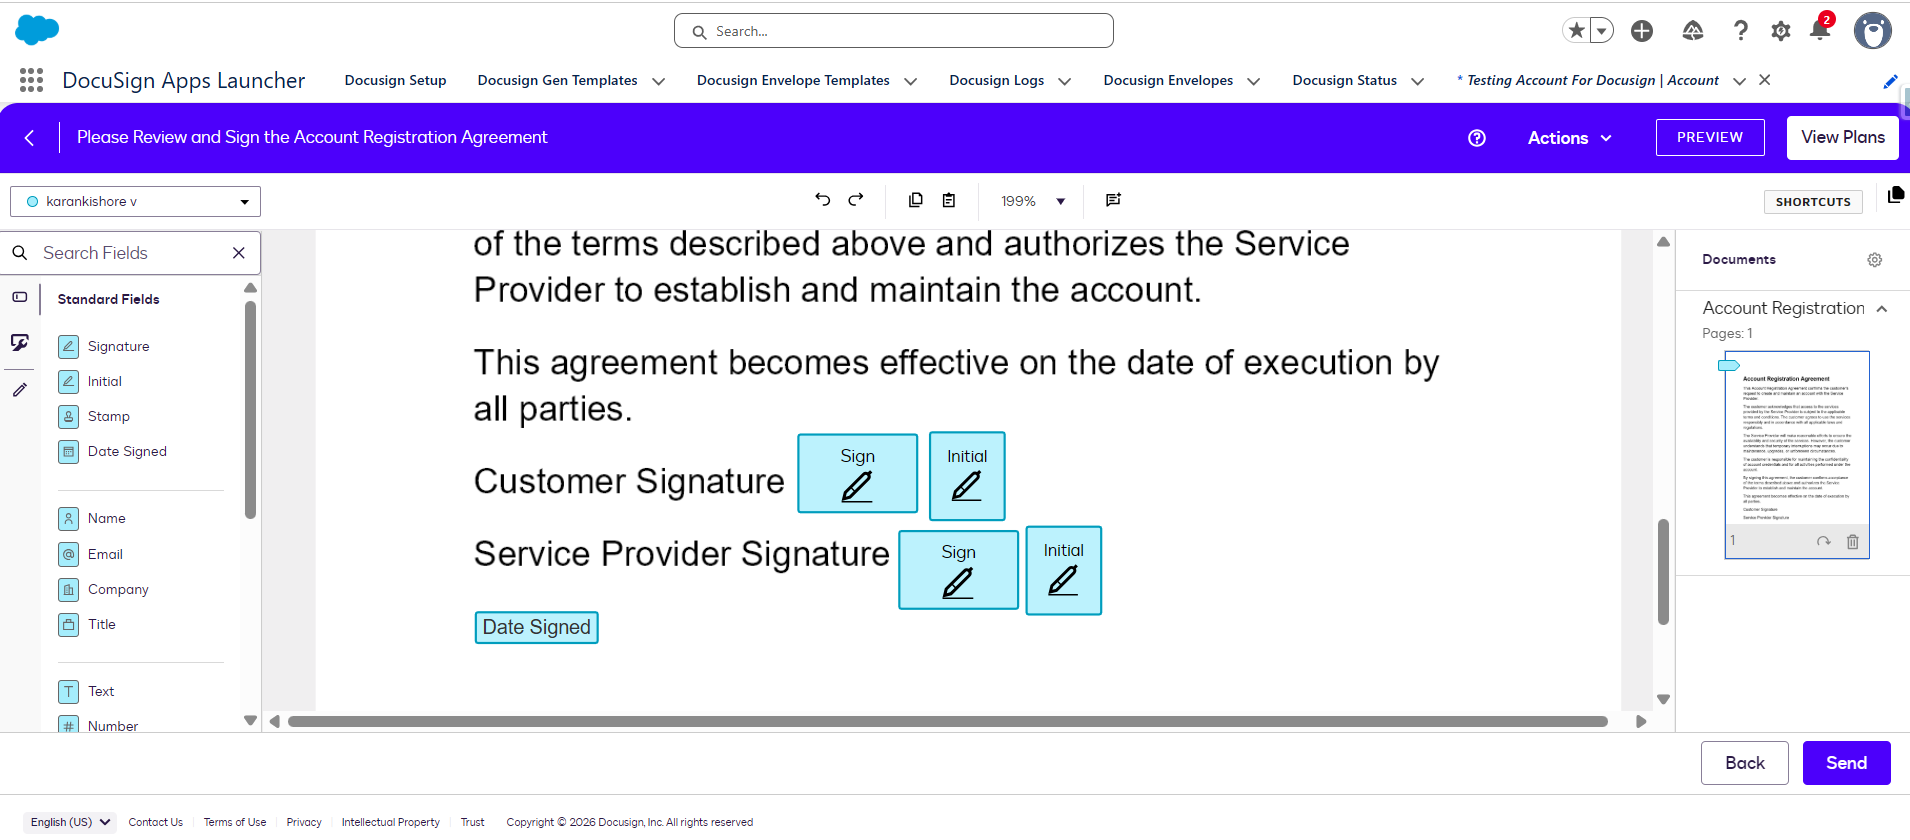 A document in edit mode appears — edit here if needed and then click Send.
Step 7: Track Envelope Status
Document progress can be tracked in Salesforce itself:
- Sent
- Delivered
- Signed
- Completed
- Declined
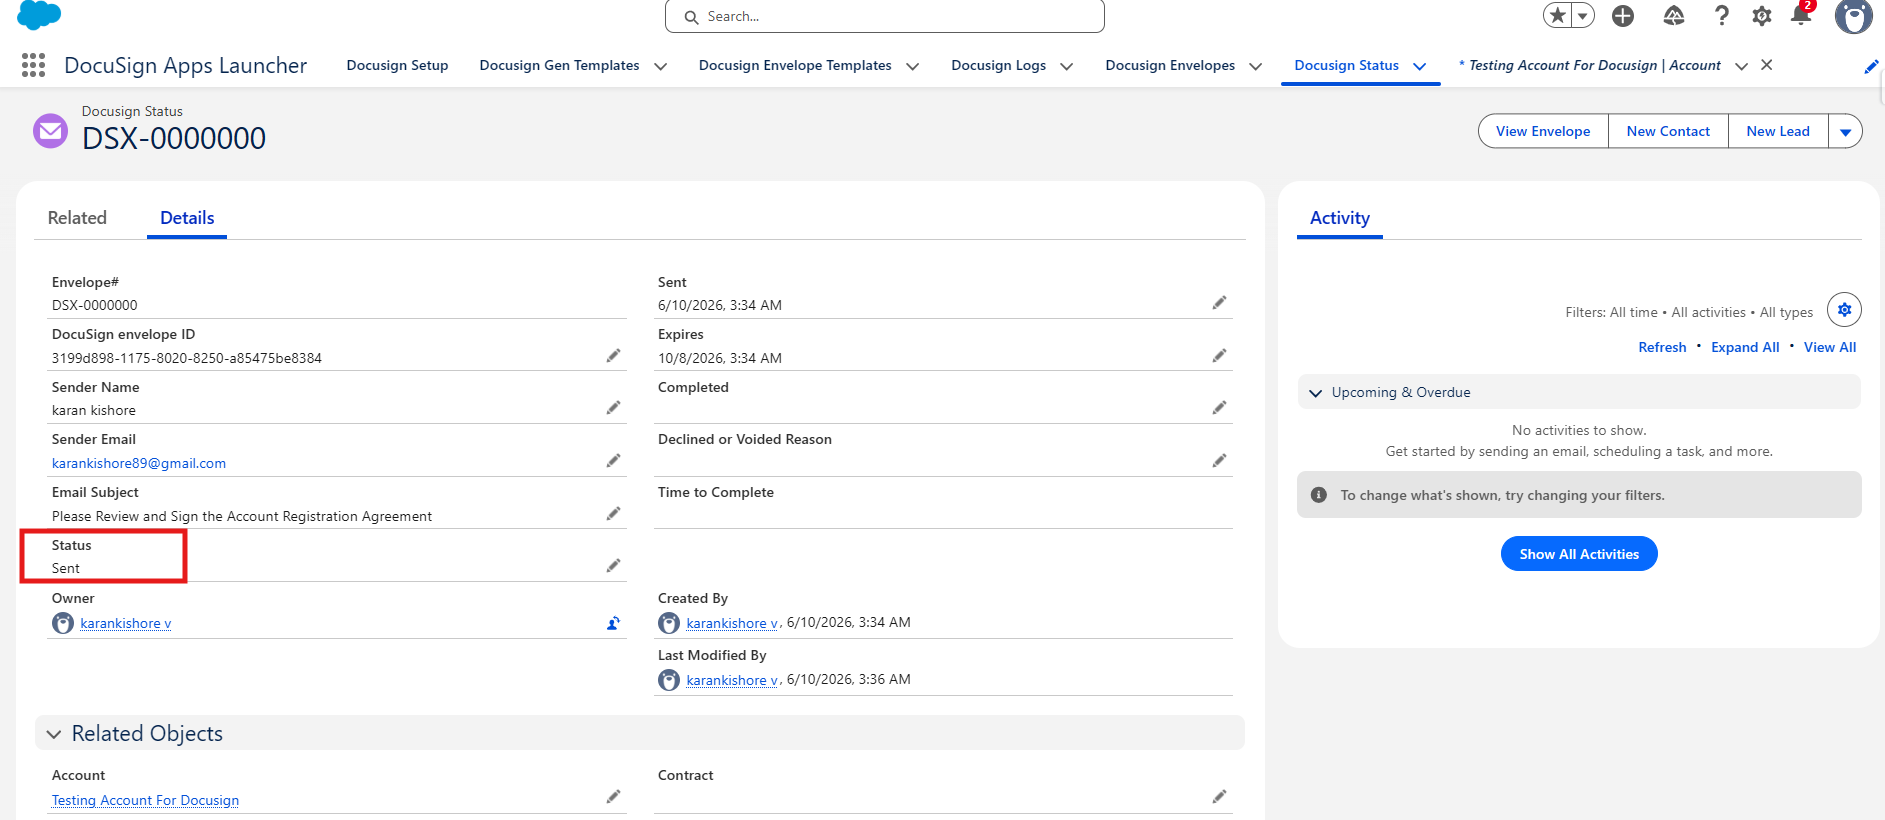
The dfsle__Envelope__c custom object is created on Salesforce, and actions are monitored via this object. 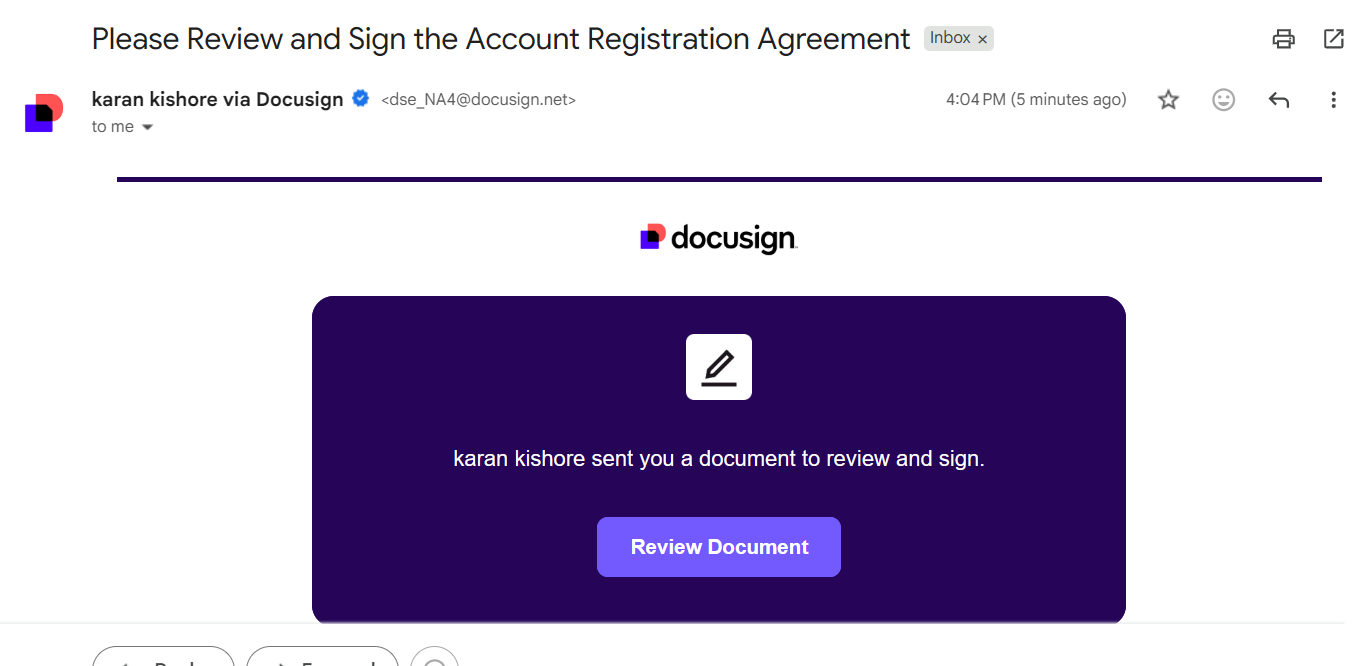 An email is sent to the recipient
 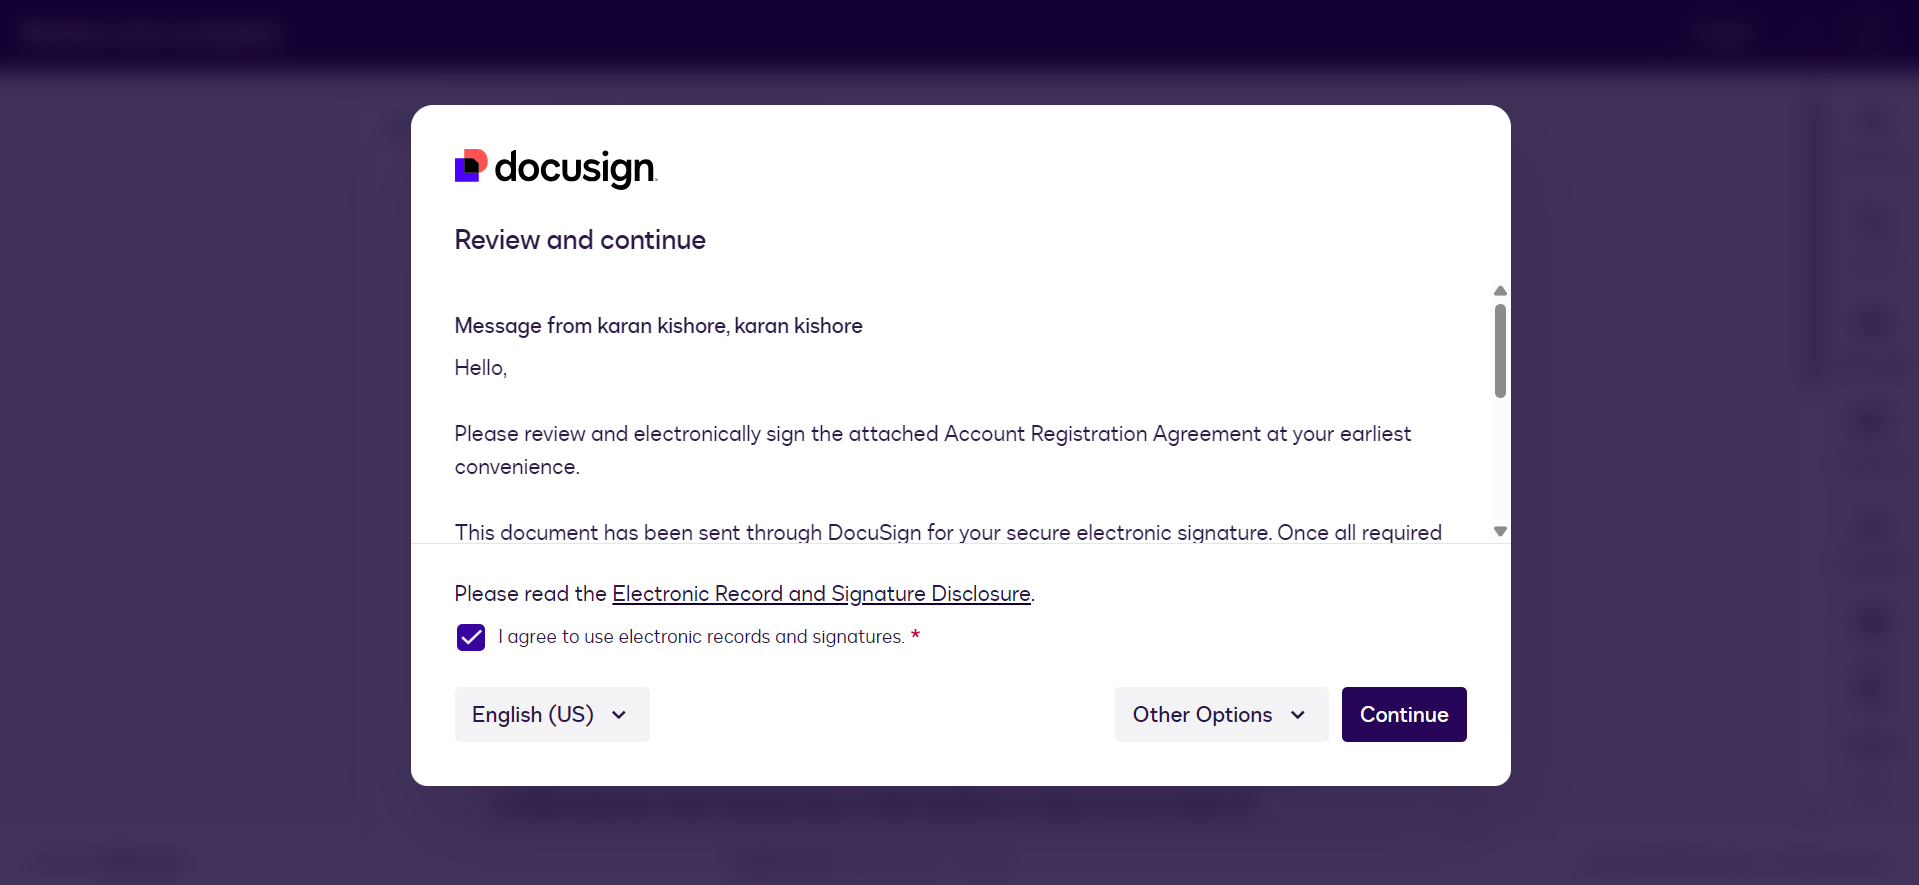 containing the message created on the template;
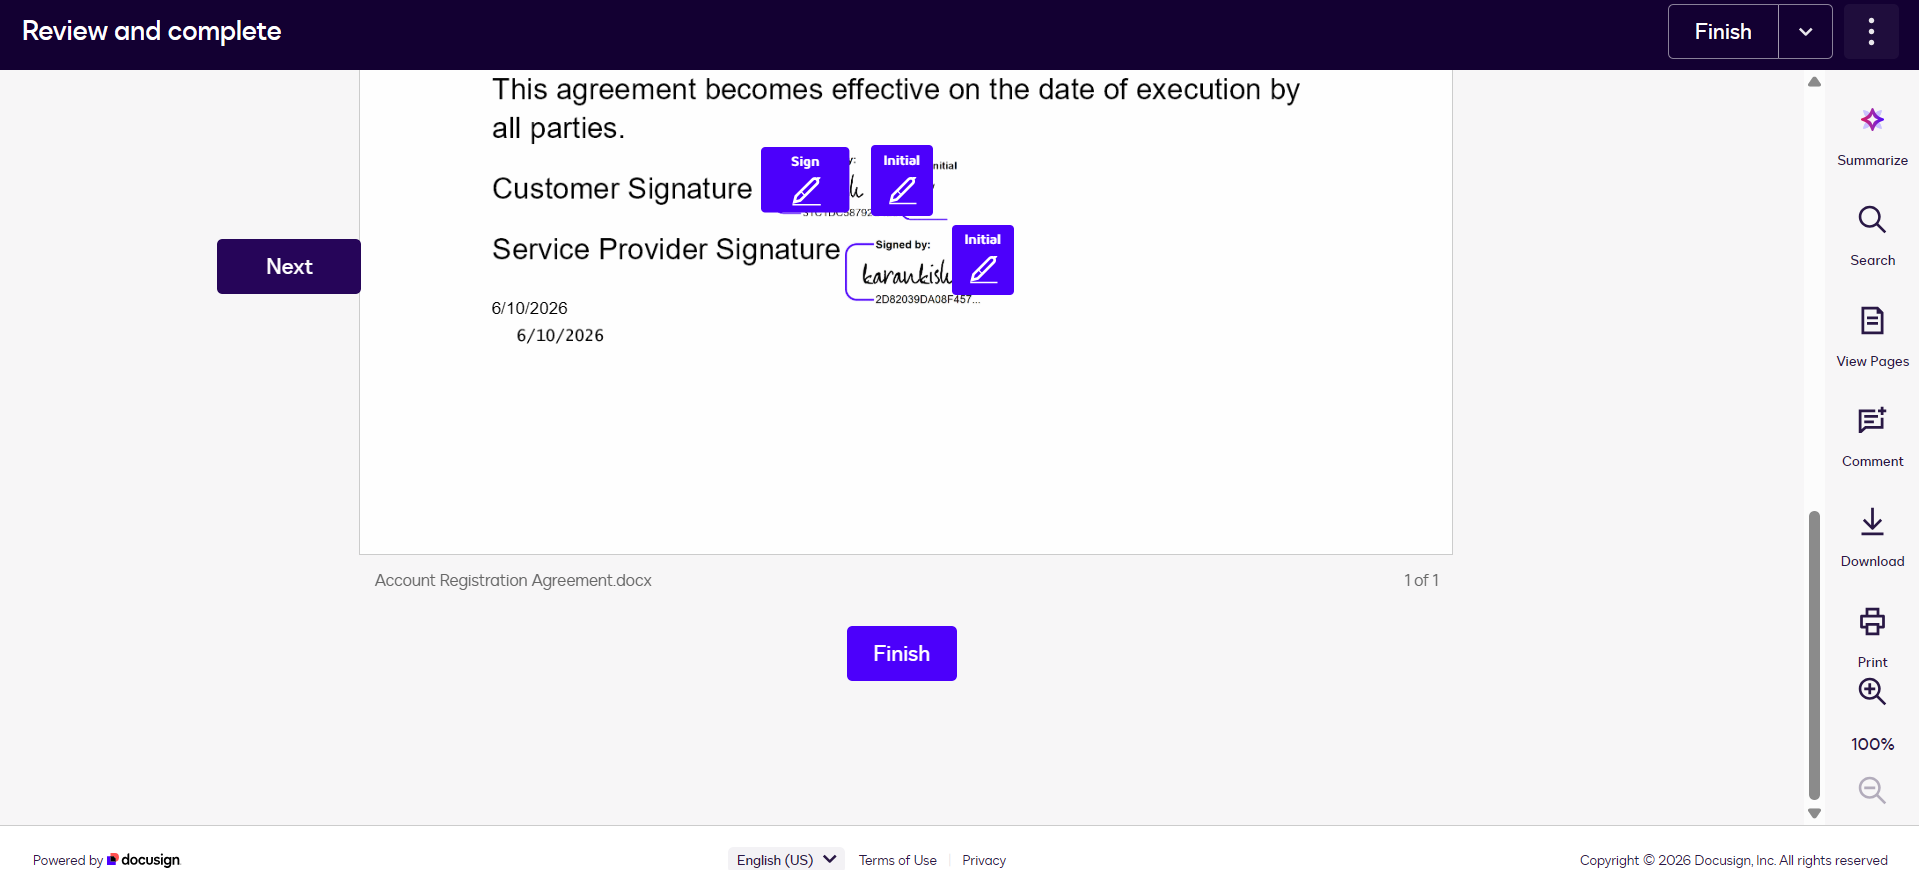 the recipient adds a signature and other required details, then clicks Finish.
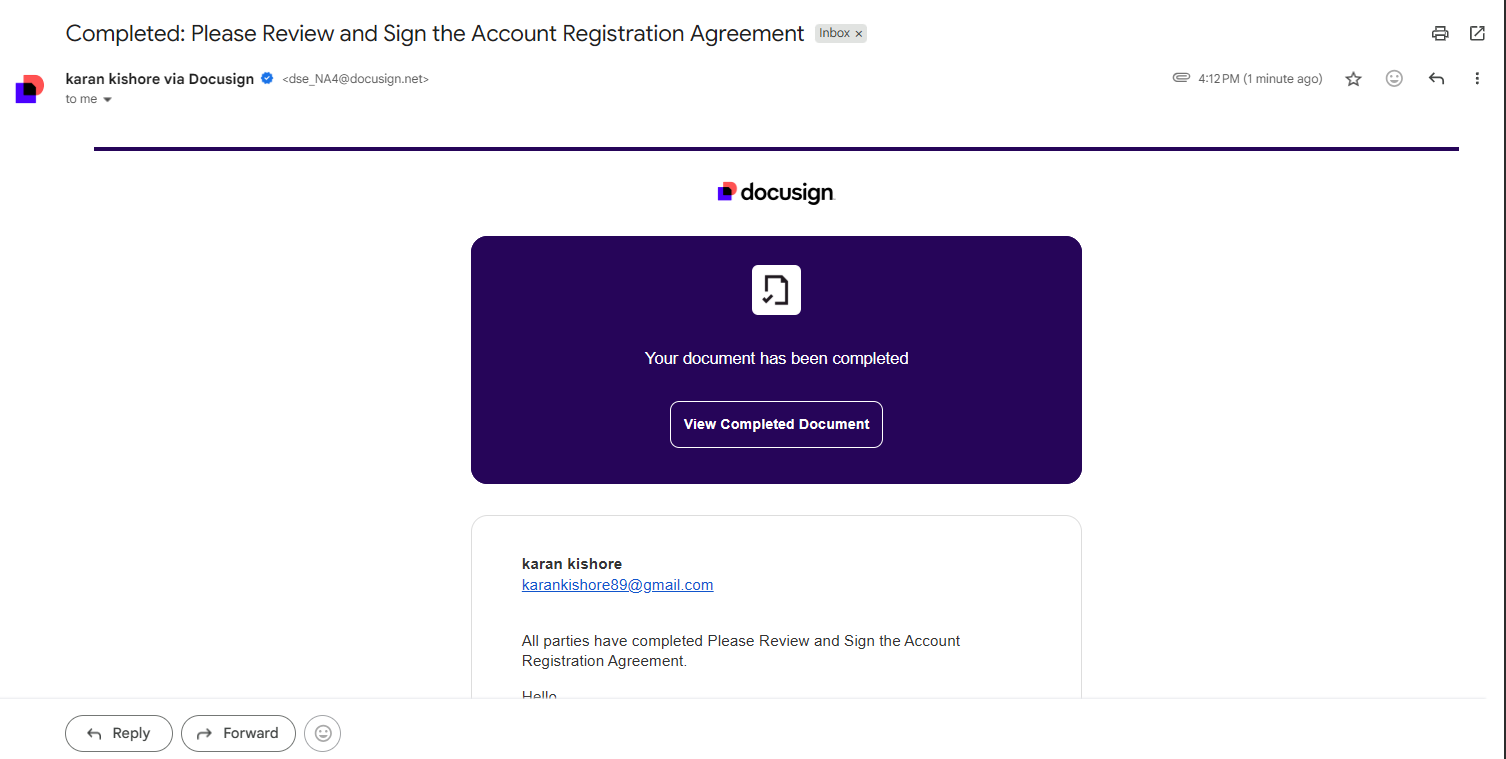 Once the review is completed, the record owner gets an email,
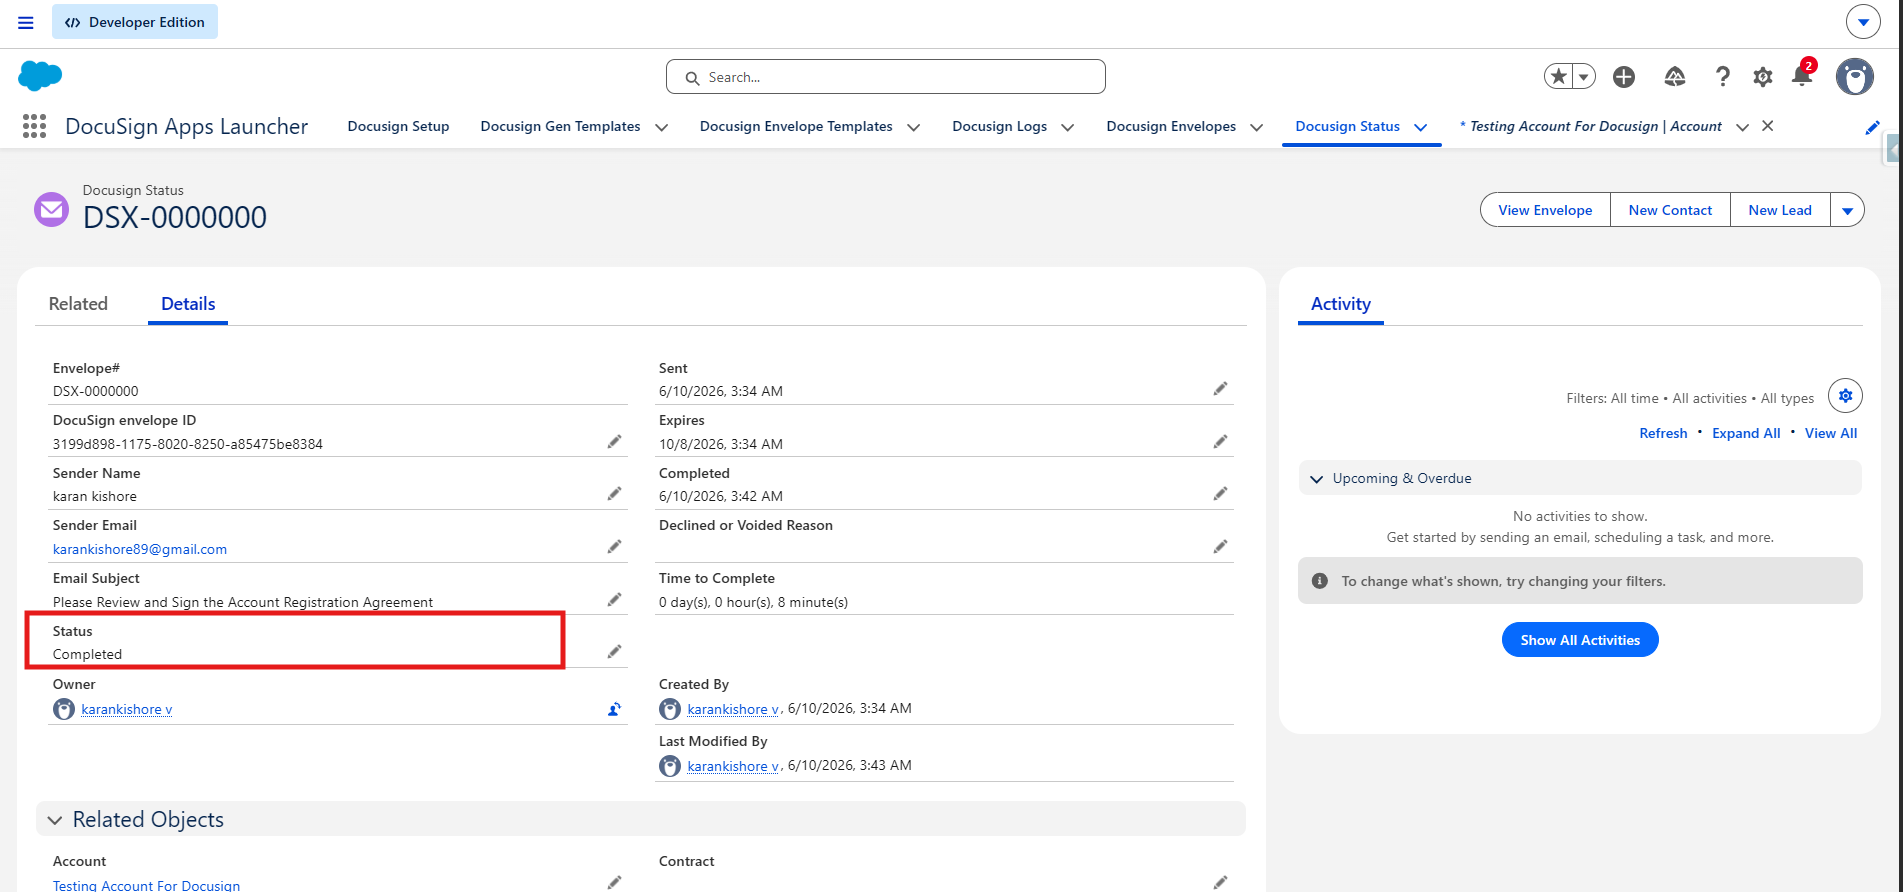 the
the dfsle__Envelope__c Status is updated,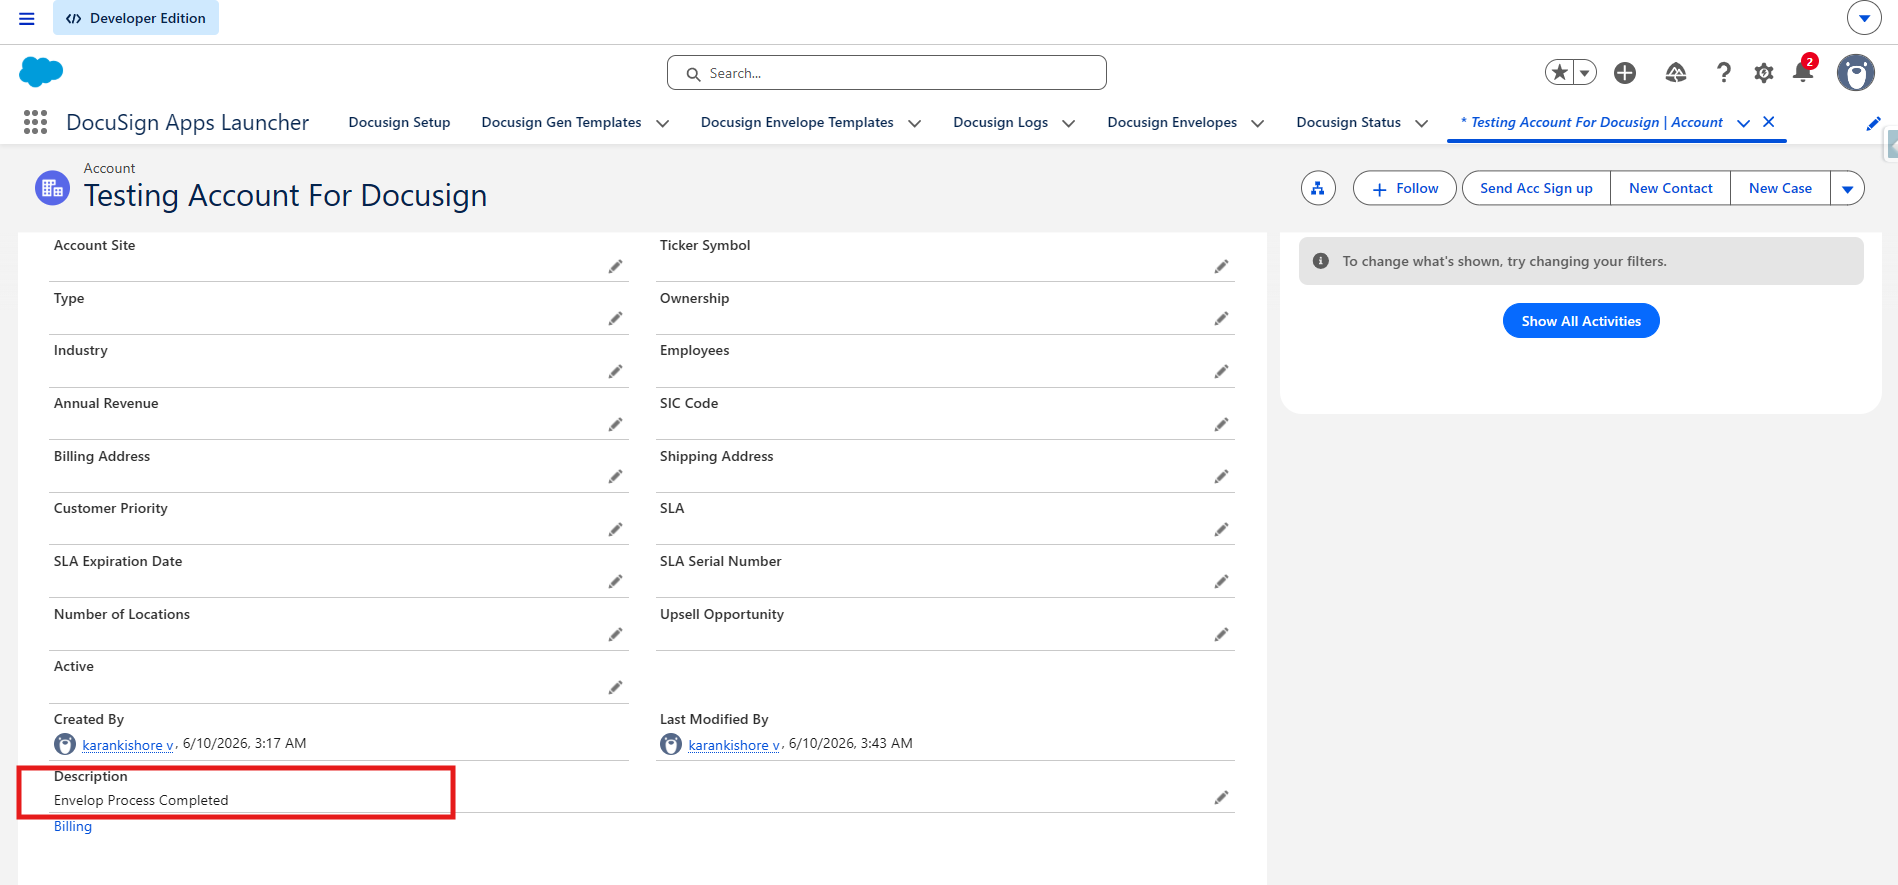 and the field update on the Account Description also happens as expected.
Common Issues and Troubleshooting
Issue: Unable to Access Merge Fields
Error: "This Account lacks sufficient permissions to use Merge Fields."
Resolution:
- Verify DocuSign subscription plan.
- Confirm user permission profile.
- Ensure Merge Fields are enabled.
- Validate Salesforce-to-DocuSign account mapping.
Issue: Authentication Failure
Resolution:
- Reconnect the DocuSign account.
- Verify login credentials.
- Confirm API access is enabled.
Issue: Users Cannot Send Envelopes
Resolution:
- Check assigned permission sets.
- Verify DocuSign user licensing.
- Confirm sender permissions.
Conclusion
Integration of DocuSign and Salesforce improves the process of managing documents while at the same time minimising the effort involved in managing them.
Advantages
- Eliminates manual document handling.
- Accelerates approval and signature processes.
- Tracks document status in Salesforce.
- Improves customer experience.
- Supports reusable templates and automation.
Disadvantages
- Advanced features may require additional licensing.
- Merge Fields depend on subscription level and permissions.
- Initial configuration requires Salesforce and DocuSign administrative access.
In summary, DocuSign integration into Salesforce enables organisations to have a simple way of sending out signatures using documents within Salesforce.