
Data Cloud - Configure Data Model
Learn how to configure Data Models in Salesforce Data Cloud for unified customer data management.
Salesforce Data Cloud Developer
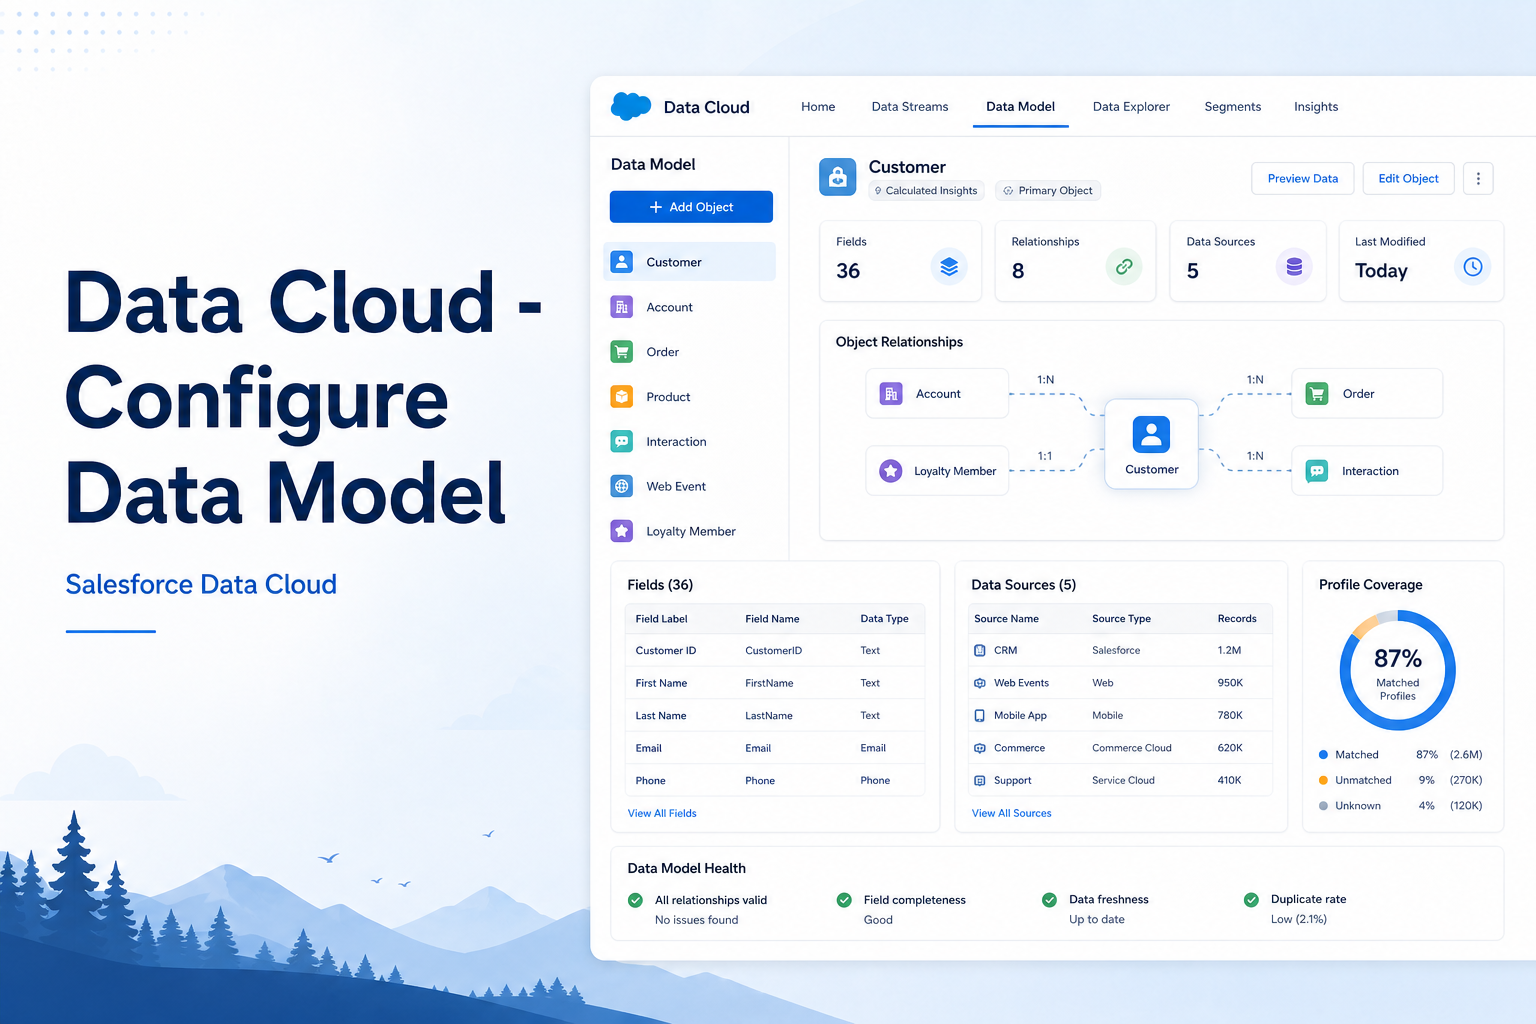
1. Abstract
This document provides a comprehensive guide to configuring the Customer 360 Data Model within Salesforce Data Cloud (Summer '24 release). The exercise covers mapping previously configured data streams to Data Model Objects (DMOs), creating custom entities, establishing data relationships, enabling value suggestions for segmentation, and aligning key qualifier configurations for accurate data joins.
The configuration spans two primary data sources: Salesforce CRM (Contact, Case, Booking, Rental, Rental Preference objects) and eCommerce Cloud Storage streams (Customer Profile, Orders, Line Items, Product Lookups, and Related Activity data). Throughout the exercise, the guiding philosophy is to prioritize and preserve the standard Customer 360 Data Model wherever possible, resorting to customizations only when no standard entity adequately represents the data.
The core objectives of this exercise are:
- Map ingested data from Data Streams to Data Model entities
- Familiarize with common standard Data Model entities and their relationships
- Create new custom Data Model Objects, additional fields, and new data relationships
- Enable value suggestion for selected attributes to improve the segmentation experience
- Ensure key qualifier alignment across DLOs and DMOs to enable correct data joins
2. Solution
The solution is structured around a layered approach to data model configuration, progressing from standard auto-mapped CRM objects through to fully custom entities built from external schema files and Cloud Storage streams. Below is a detailed explanation of each layer and the rationale behind key decisions.
2.1 Principle of Resource Efficiency
Only data required by defined customer use cases is mapped to the data model. This creates a lean model, reduces validation and testing scope, and prevents uncontrolled scope creep. Unmapped data points can always be added later without consequence, so nothing is permanently lost by deferring non-essential mappings.
2.2 Standard Model for CRM Data
CRM data streams deployed via Service Cloud starter bundles are automatically mapped to the data model for both customer demographics and engagement datasets. However, auto-mappings must always be reviewed and adjusted to match specific customer requirements. For example, the Contact stream auto-maps to Account Contact, which is not used in this solution and must be removed. Similarly, Business Phone is auto-mapped to Contact Point Phone, but Mobile Phone is the correct field for this scenario.
The Contact object mapping is extended to cover the Loyalty subject area (Loyalty Member Currency, Loyalty Program Member) and identity resolution (Party Identification), going beyond the standard auto-mapped entities. This is necessary because Loyalty attributes and unification identifiers are sourced from the Contact object in this implementation.
2.3 Formula Fields and Derived Attributes
Two formula field scenarios arise during this configuration:
The first is the RAVG Loyalty Points Bucket — a derived text categorization (Low, Medium, High, Extreme) based on the raw points balance value. This is added to the Contact data stream after initial ingestion and requires both a new source field (RAVG Loyalty Points Balance) and a formula field built on top of it. The new source field triggers a full data refresh of the stream when added, ensuring the formula field has data to work with.
The second is the Birth Date formula field on the Contact stream. A data type mismatch exists between the CRM Birthdate field (DateTime) and the eCommerce Birth Date field (Date). Because identity resolution matching rules cannot perform cross-attribute comparisons, both data sources must map to the same DMO field. The solution is to create a formula field on the CRM Contact stream that casts the DateTime Birthdate to a Date type, then remap the Contact stream to use this formula field instead of the raw standard field. This ensures both streams point to the same Individual.Birth Date (Custom) field, enabling unified matching.
2.4 Custom DMO Creation
Three CRM custom objects (Booking, Rental, Rental Preference) and two eCommerce custom objects (Product Related Activity, and a lookup-based store reference via Sales Store) require custom DMOs since no standard entity exists to represent them. Three methods of custom DMO creation are demonstrated:
- From the mapping screen directly, using the data stream schema as a foundation (Booking, Rental, Product Related Activity)
- From an externally defined CSV schema file (Rental Preference), uploaded via the Data Model tab's New > From File option
- By editing an existing standard DMO to add custom fields before mapping (Sales Order)
2.5 Relationship Configuration
Relationships are a critical part of the data model and must be explicitly configured for custom DMOs, as they are not automatically established. Key relationship decisions include:
- The Individual-to-Loyalty Program Member relationship is deliberately changed from the default 1:M to 1:1. This is done by creating a new relationship via the custom Individual Id field (not the standard Party field), because using the standard Party field would cause the platform to enforce 1:M treatment for segmentation and activation. The 1:1 configuration enables Membership Number and other Loyalty attributes to be exposed in activation targets. This decision carries a significant operational implication: reverting it in the future (e.g., when adding additional loyalty programs for new brands) would require deleting and recreating all dependent segments and activations.
- Case is related to Individual via the Account Contact field using N:1 cardinality, bypassing the standard Account entity relationship since that object is not used in this solution.
- Booking and Rental are both related to Individual via the Customer field (N:1), and Rental is additionally related to Booking via Booking Id (1:1), creating a chain of transactional relationships traceable back to the individual.
- Rental Preference has a 1:1 relationship with Individual, reflecting the source object's 1:1 relationship with Contact in CRM.
- Sales Order is related to Individual via Sold To Customer (N:1). Sales Order Product is related to Sales Order. Goods Product is related to Sales Order Product. Product Related Activity is related to Goods Product via Related Activity Id (1:1).
2.6 Key Qualifier Alignment
Key qualifiers are identifiers configured on DLOs that enable correct joins between objects at query time. The eComm Product Lookup DLO has Product Id configured with the key qualifier KQ_ProductId (named Product_Id_PK). However, the eComm Line Item DLO, which maps the SKU field to the Product field on the Sales Order Product DMO (a foreign key pointing back to Goods Product), does not have this key qualifier configured. Without it, joins between Sales Order Product and Goods Product fail silently, producing incorrect (zero) segment counts when cross-entity criteria are applied.
The fix is to add the existing Product_Id_PK key qualifier to the SKU field on the eComm Line Item DLO. This aligns the foreign key reference with the primary key qualifier on the referenced object, enabling correct joins. The challenge inherent in this configuration is that key qualifiers are managed on DLOs while relationships are configured on DMOs, making it easy to miss the alignment requirement without deliberate upfront planning.
2.7 Value Suggestion Enablement
Value suggestion is enabled strategically on attributes that represent a bounded set of known values — picklists, checkboxes, or coded reference values — in the source systems. This converts free-text filter inputs in the segmentation canvas into dropdown selections, reducing user error and improving the segmentation experience. It is enabled on custom fields added to Case (Case Creation Reason, Action Priority), standard Case fields (Case Status, Escalated), several Booking and Rental location and coverage fields, all four Rental Preference vehicle and coverage type fields, Loyalty Member Currency's Points Bucket, and the Sales Order's Delivery Method. It is not enabled indiscriminately — only where the bounded value set makes it appropriate.
3. Step-by-Step Guide
Section 1 — Salesforce CRM Data
If you see "Unable to fetch data stream details" error while configuring mappings, disregard it and continue.
If you see "We hit a snag" error when saving, close the mapping dialog, return to Data Streams or Data Lake Objects tab, and retry.
A yellow warning after saving does not mean the mapping failed — it has been saved. The "Error logging suggested mapping" message will not impact subsequent activities.
1.1 Contact Object Mapping
Step 1 — Remove unused auto-mappings:
- Navigate to Data Streams tab and open Contact_<ORG_ALIAS> data stream.
- Click Review in the Data Mapping area.
- Locate Account Contact object. Click the Remove Mappings (trash icon) on the right of its name.
- Confirm by clicking Delete Object in the dialog.
Step 2 — Fix Contact Point Phone mapping:
- Locate Contact Point Phone object. It shows a warning sign indicating missing mandatory mappings.
- Click on the Business Phone → Telephone Number mapping pill and select Delete to remove it.
- Configure the following mappings under Contact Point Phone:
- Contact (DLO) Mobile Phone → Telephone Number (DMO: Contact Point Phone)
- Contact (DLO) Mobile Phone → Formatted E164 Phone Number (DMO: Contact Point Phone)
- Save your progress.
Step 3 — Update Individual object:
- Under the Individual object, delete the mapping to Photo URL.
- Map External ID to External Record Id.
- Save your progress.
Step 4 — Add Loyalty entities:
- Click the pen (edit) icon next to Data Model entities.
- Add Loyalty Member Currency and Loyalty Program Member.
- For both newly added objects, delete the auto-mapped Created Date and Last Modified Date fields.
- Configure the following mappings:
- Contact (DLO) Contact ID → Loyalty Member Currency Id (primary key) (DMO: Loyalty Member Currency)
- Contact (DLO) Contact ID → Loyalty Program Member (DMO: Loyalty Program Member)
- Contact (DLO) Contact ID → Loyalty Program Member Id (primary key) (DMO: Loyalty Program Member)
- Contact (DLO) RAVG Loyalty ID → Membership Number (DMO: Loyalty Program Member)
- Save your progress.
Step 5 — Add custom Individual Id field to Loyalty Program Member:
- Click Add New Field under Loyalty Program Member > Unmapped fields.
- Field Label = Individual Id, Data Type = Text.
- Save and map to Contact ID from the Contact DLO.
- Save your progress.
Step 6 — Add Party Identification entity (separately to avoid primary key conflict):
- Click the Update Target Entities icon (pen icon) next to Data Model entities title.
- Add Party Identification entity.
- Delete auto-mapped Created Date and Last Modified Date.
- Configure the following mappings:
- Contact (DLO) Contact ID → Party Identification Id (primary key) (DMO: Party Identification)
- Contact (DLO) Contact ID → Party (DMO: Party Identification)
- Contact (DLO) RAVG Loyalty ID → Identification Number (DMO: Party Identification)
- Save your progress.
Step 7 — Add RAVG Loyalty Points Balance source field:
- Enable Read Access to RAVG Retail Points Balance field on the Contacts object in CRM via the appropriate help page instructions.
- Open the Contact data stream. Click Add Source Fields.
- Set Field Label = RAVG Loyalty Points Balance, Field API Name = RAVG_Loyalty_Points_Balance_c (keep single underscore as system suggests).
- Select the field and save.
- Click Update Status to refresh stream metadata.
Step 8 — Create RAVG Loyalty Points Bucket formula field:
- Click New Formula Field.
- Field Label = RAVG Loyalty Points Bucket, Formula Return Type = Text.
- Enter the following formula:
IF(sourceField['RAVG_Retail_Points_Balance__c'] <= 3000, "Low",
  IF(sourceField['RAVG_Retail_Points_Balance__c'] <= 5000, "Medium",
    IF(sourceField['RAVG_Retail_Points_Balance__c'] < 15000, "High", "Extreme")))
Test with values: 2357 = Low, 5000 = Medium, 5001 = High, 15000 = Extreme.
Save the field.
Step 9 — Map new fields to data model:
- Click Review on the Contact data stream.
- Map RAVG Loyalty Points Balance → Points Balance (DMO: Loyalty Member Currency).
- Save your progress.
- Click Add New Field under Loyalty Member Currency:
- Field Label = Points Bucket, Data Type = Text, enable Value Suggestion.
- Save and map to RAVG Loyalty Points Bucket from Contact.
- Save your progress.
1.1.1 Update Relationships — Individual to Loyalty Program Member (1:M to 1:1)
- Navigate to Data Model tab. Locate and open Loyalty Program Member object.
- Click Relationships, then Edit, then New Relationship.
- Configure: Field = Individual Id, Cardinality = 1:1, Related Object = Individual, Related Field = Individual Id.
- Save and verify the new relationship shows as Active.
- Close the dialog.
1.2 Case Object Mapping
Step 1 — Open data stream:
- Navigate to Data Streams. Open Case_<ORG_ALIAS> data stream.
- Click Review in the Data Mapping section.
Step 2 — Add custom fields to Case DMO before mapping (to avoid mid-mapping save conflicts):
- Click Add New Field under Case (DMO):
- Field Label = Case Creation Reason, Data Type = Text, enable Value Suggestion. Save.
- Click Add New Field again:
- Field Label = Action Priority, Data Type = Text, enable Value Suggestion. Save.
Step 3 — Configure mappings:
- Case_<ORG_ALIAS> (DLO) Action Priority → Action Priority (DMO: Case)
- Case_<ORG_ALIAS> (DLO) Case Reason → Case Creation Reason (DMO: Case)
- Case_<ORG_ALIAS> (DLO) Escalated → Escalated (DMO: Case)
Save your progress but remain on the screen.
1.2.1 Create Relationship — Case to Individual
- Click Edit Relationships icon on the right of Case.
- Click Edit, then New Relationship.
- Configure: Field = Account Contact, Cardinality = N:1, Related Object = Individual, Related Field = Individual Id.
- Save and close.
1.2.2 Enable Value Suggestion for Standard Case Attributes
- Click Edit Properties icon on the right of Case.
- Enable Value Suggestion for: Case Status and Escalated.
- Save and close.
1.3 Booking Object Mapping (Custom DMO Creation)
Step 1 — Locate data stream:
- In Search Data Lake Objects, locate and open Booking__c_<ORG_ALIAS> data stream.
- In Data Model entities on the right, click Select Objects.
Step 2 — Create new custom DMO:
- Click Custom Data Model tab, then New Custom Object.
- Object Label = Booking.
- Deselect the following fields: Created By Id, Customer External ID, Is Business, Is Leisure, Owner ID, System Modstamp.
- Rename the following fields:
- Booking ID → Booking Reference Number
- Deleted → Is Deleted
- Record ID → Booking Id
- SfdcOrganizationId → Internal Organization
- Enable Value Suggestion for: Drop Off Location Code, Drop Off Location Name, Pick Up Location Code, Pick Up Location Name, Protection Coverage, Purpose.
- Save the new object.
Step 3 — Verify auto-mapping:
- The system will auto-map all attributes since the DMO schema was derived from the data stream.
- Verify that the Customer field from Booking__c_<ORG_ALIAS> is mapped to the Customer field in the Booking DMO. If not, map it manually.
- Save your progress and remain on screen.
1.3.1 Create Relationship — Booking to Individual
- Click Edit Relationships on Booking.
- Click New Relationship.
- Configure: Field = Customer, Cardinality = N:1, Related Object = Individual, Related Field = Individual Id.
- Save and close.
1.4 Rental Object Mapping (Custom DMO Creation)
Step 1 — Locate data stream:
- In Search Data Lake Objects, locate and open Rental__c_<ORG_ALIAS> data stream.
- Click Select Objects, then Custom Data Model tab, then New Custom Object.
Step 2 — Create new custom DMO:
- Object Label = Rental.
- Deselect the following fields: Created By Id, Customer External ID, Driver License Country of Issue, Driver License Expiry Date, Driver License Number, Driver License State of Issue, Is Business, Is Leisure, Owner ID, System Modstamp.
- Rename the following fields:
- Booking → Booking Id
- Deleted → Is Deleted
- Marketing Optin for Deals and Offers → Marketing Optin
- Record ID → Rental Id
- Rental ID → Rental Reference Number
- SfdcOrganizationId → Internal Organization
- Enable Value Suggestion for: Drop Off Location Code, Drop Off Location Name, Fleet Vehicle External ID, Pick Up Location Code, Pick Up Location Name, Protection Coverage, Purpose.
- Save the new object.
Step 3 — Verify auto-mapping:
- The system auto-maps all attributes based on the DMO schema derived from the data stream.
- Verify mappings and adjust if needed.
1.4.1 Create Relationships — Rental to Booking and Individual
- Click Edit Relationships on Rental.
- Click New Relationship:
- Field = Booking Id, Cardinality = 1:1, Related Object = Booking, Related Field = Booking Id.
- Click New Relationship again:
- Field = Customer, Cardinality = N:1, Related Object = Individual, Related Field = Individual Id.
- Save and close.
1.5 Party Identification Collection Mapping
- Navigate to Data Lake Objects tab. Locate and open Party Identification Collection DLO.
- Click Start to begin mapping.
- Switch the view from Visual to Table using the toggle.
- Open object selection using the View Object Panel link.
- Add Party Identification object.
- The mapping is pre-done based on the designed schema. Verify and adjust if needed.
- Save your progress. Ignore any additional warning messages.
- Switch back to Visual View and verify the mapping structure looks correct.
1.6 Rental Preference Object Mapping (Schema File-Based DMO Creation)
Step 1 — Create DMO from external schema file:
- Navigate to Data Model tab. Click New, choose From File, and click Next.
- Download the rental_preference_schema_248.csv file. Upload it on the next screen.
- Set: Object Label = Rental Preference, Object Category = Other, Object Description = Individual preferences for leisure and business rentals.
- Enable Value Suggestion for: Leisure - Vehicle Type, Leisure - Protection Coverage, Business - Vehicle Type, Business - Protection Coverage.
- Save the object.
- If not immediately visible under Data Model tab, change list view to All to confirm creation.
Step 2 — Map data stream:
- Navigate to Data Streams. Open Rental_Preference__c_<ORG_ALIAS> data stream.
- Click Start, then Select Objects. Add Rental Preference from the Custom Data Model tab.
- The system auto-maps most fields. Make the following adjustment:
- Delete the existing mapping to Rental Preference ID (Primary Key).
- Configure the following mappings:
- Rental_Preference__c_<ORG_ALIAS> (DLO) Customer → Individual ID (DMO: Rental Preference)
- Rental_Preference__c_<ORG_ALIAS> (DLO) Record ID → Rental Preference ID (primary key) (DMO: Rental Preference)
- Rental_Preference__c_<ORG_ALIAS> (DLO) Rental Preference ID → Rental Preference Reference Number (DMO: Rental Preference)
- Save your progress.
1.6.1 Create Relationship — Rental Preference to Individual
- Click Edit Relationships on Rental Preference.
- Click New Relationship.
- Configure: Field = Individual Id, Cardinality = 1:1, Related Object = Individual, Related Field = Individual Id.
- Save and close.
Section 2 — eCommerce Data
Cloud Storage data streams have no auto-mapping capability. All mappings must be completed manually.
2.1 eComm Customer Profile Mapping
Step 1 — Select target objects:
- In Search Data Lake Objects, locate and open eComm Customer Profile data stream.
- Click Select Objects and add Contact Point Email, Individual, and Party Identification.
Step 2 — Configure mappings (completing what auto-map did not handle):
- eComm Customer Profile (DLO) Customer Ref Number → Party (DMO: Contact Point Email)
- eComm Customer Profile (DLO) Email → Email Address (DMO: Contact Point Email)
- eComm Customer Profile (DLO) Customer Ref Number → Individual Id (DMO: Individual)
- eComm Customer Profile (DLO) Customer Ref Number → Party (DMO: Party Identification)
- eComm Customer Profile (DLO) Rewards Program ID → Identification Number (DMO: Party Identification)
Save your progress.
Step 3 — Handle Birth Date data type mismatch:
The Birth Date field in the eComm stream is of type Date, but the standard Individual.Birth Date field is DateTime. The system will not allow mapping across different types.
- Click Add New Field under Individual: Field Label = Birth Date, Data Type = Date. Save.
- Map eComm Customer Profile.Birth Date to Individual.Birth Date (Custom).
- Save your progress.
2.1.1 Update CRM Contact Mapping (Birth Date Alignment)
Step 1 — Update Contact stream mapping:
- In Search Data Lake Objects, locate and open Contact_<ORG_ALIAS> data stream.
- Remove the existing mapping between Birthday and Birth Date fields.
- Map Contact_<ORG_ALIAS>.Birth Date (the formula field previously created during Data Ingestion activity) to Individual.Birth Date (Custom).
- Save your progress.
2.2 eComm Order Mapping
Step 1 — Add custom fields to Sales Order DMO first (alternative method via Data Model tab):
- Navigate to Data Model tab. Change view from Mapped to All.
- Search for and open Sales Order DMO. Click Edit.
- Scroll to bottom. Click Add Field:
- Label = Delivery Method, Type = Text, enable Value Suggestion.
- Add another field:
- Label = Loyalty Points Accrued, Type = Number.
- Save the schema.
Step 2 — Map data stream:
- Navigate to Data Streams. Open eComm Order data stream.
- Click Start, then Select Objects, add Sales Order.
- Delete the existing mapping to Total Amount field.
- Configure the following mappings:
- eComm Order (DLO) Customer Number → Sold To Customer (DMO: Sales Order)
- eComm Order (DLO) Order Date → Order Start Date (DMO: Sales Order)
- eComm Order (DLO) Order Number → Sales Order Id (primary key) (DMO: Sales Order)
- eComm Order (DLO) Status → Sales Order Status (DMO: Sales Order)
- eComm Order (DLO) Store Number → Sales Store (DMO: Sales Order)
- eComm Order (DLO) Total Amount → Grand Total Amount (DMO: Sales Order)
- Save your progress.
2.2.1 Create Relationship — Sales Order to Individual
- Click Edit Relationships on Sales Order.
- Click New Relationship.
- Configure: Field = Sold To Customer, Cardinality = N:1, Related Object = Individual, Related Field = Individual Id.
- Save and close. Remain on the mapping screen.
2.3 eComm Store Number Lookup Mapping
- In Search Data Lake Objects, locate and open eComm Store Number Lookup data stream.
- Click Select Objects and add Sales Store.
- Configure the following mappings:
- eComm Store Number Lookup (DLO) Store Number → Name (DMO: Sales Store)
- eComm Store Number Lookup (DLO) Store Number → Sales Store Id (primary key) (DMO: Sales Store)
- Save your progress and remain on mapping dialog.
2.4 eComm Line Item Mapping
- In Search Data Lake Objects, locate and open eComm Line Item data stream.
- Click Select Objects and add Sales Order Product.
- Configure the following mappings:
- eComm Line Item (DLO) Order Line Key → Sales Order Product (primary key) (DMO: Sales Order Product)
- eComm Line Item (DLO) Order Line Number → Order Product Number (DMO: Sales Order Product)
- eComm Line Item (DLO) Order Number → Sales Order (DMO: Sales Order Product)
- eComm Line Item (DLO) Quantity → Ordered Quantity (DMO: Sales Order Product)
- eComm Line Item (DLO) SKU → Product (DMO: Sales Order Product)
- eComm Line Item (DLO) Subtotal → Total Line Amount (DMO: Sales Order Product)
- eComm Line Item (DLO) Unit Price → Unit Price Amount (DMO: Sales Order Product)
- Save your progress.
- Click Add New Field under Sales Order Product: Label = Loyalty Points, Type = Number. Save.
- Map eComm Line Item.Loyalty Points to Sales Order Product.Loyalty Points.
- Save your progress and remain on mapping dialog.
2.5 eComm Product Lookup Mapping
- In Search Data Lake Objects, locate and open eComm Product Lookup data stream.
- Click Select Objects and add Goods Product.
- Configure the following mappings:
- eComm Product Lookup (DLO) Product Id → Goods Product Id (primary key) (DMO: Goods Product)
- eComm Product Lookup (DLO) Product Id → Product SKU (DMO: Goods Product)
- Save your progress.
- Click Add New Field under Goods Product: Label = Related Activity Id, Type = Text. Save and map Related Activity Id to Related Activity Id.
- Save your progress and remain on mapping dialog.
2.6 eComm Related Activity Lookup Mapping (Custom DMO Creation)
Step 1 — Create new custom DMO:
- In Search Data Lake Objects, locate and open eComm Related Activity Lookup data stream.
- Click Select Objects, then Custom Data Model tab, then New Custom Object.
- Object Label = Product Related Activity.
- Include only the following fields: Data Source, Data Source Object, Internal Organization, Related Activity (rename label to Related Activity Id).
- Save the new object.
Step 2 — Add Name field and configure mapping:
- Click Add New Field under Product Related Activity: Label = Name, Type = Text, enable Value Suggestion. Save.
- Map eComm Related Activity Lookup.Related Activity to Product Related Activity.Name.
- Save your progress but do not close the mapping dialog.
2.6.1 Create Relationship — Product Related Activity to Goods Product
- Click Edit Relationships on Product Related Activity.
- Click New Relationship.
- Configure: Field = Related Activity Id, Cardinality = 1:1, Related Object = Goods Product, Related Field = Related Activity Id.
- Save and close.
Section 3 — Review Data Model Relationships
Before proceeding with any further configuration, validate all relationships are correctly established.
- Navigate to the Data Model tab.
- Open each of the following objects and confirm the number of configured relationships matches expectations:
- Individual — 10 relationships
- Loyalty Program Member — 2 relationships
- Sales Order — 3 relationships
- Sales Order Product — 2 relationships
- Goods Product — 2 relationships
- If any relationships are missing, navigate back to the relevant DLO and complete the configuration following the relevant sections above.
- Switch the Data Model tab view from List to Graph. Confirm the model loads without orphaned objects and that the relationship structure is consistent with the expected model diagram.
Section 4 — Update Key Qualifier Configuration
4.1 Inspecting Key Qualifier Relationships
Key qualifiers are identifiers on DLOs that enable the platform to correctly join objects during segmentation and calculated insights computations.
The eComm Product Lookup DLO has Product Id configured with key qualifier KQ_ProductId (stored as Product_Id_PK). This means Goods Product can be identified and joined via this qualifier.
The Sales Order Product DMO has a Product field (mapped from SKU in the eComm Line Item DLO) that acts as a foreign key referencing Goods Product. The expectation is that the foreign key field (SKU in eComm Line Item DLO) must also carry the same key qualifier (Product_Id_PK) so that the join between Sales Order Product and Goods Product works correctly.
How to validate the problem:
- Navigate to Data Explorer. Open eComm Product Lookup DLO.
- Confirm that KQ_Product_Id column contains the value Product_Id_PK for records.
- Open eComm Line Item DLO. Add the KQ_SKU column to the view.
- Observe that KQ_SKU is empty — the key qualifier is not yet assigned.
Without this, cross-entity segments that use Related Activity criteria will return a count of 0, even though data exists.
4.2 Configure Key Qualifier for eComm Line Item DLO
- Navigate to Data Lake Objects tab. Open eComm Line Item DLO.
- On the right of the SKU field, click the arrow-down icon and select Add Key Qualifier.
- In the presented table, select the existing record Product_Id_PK and click Add.
- Save the configuration.
- Click the arrow-down icon on SKU again and select View Key Qualifiers.
- Confirm two records are now shown — this indicates the qualifier is correctly assigned.
- Return to Data Explorer. Open eComm Line Item DLO.
- Confirm KQ_SKU field now contains the value Product_Id_PK for records.
Result: Cross-entity segments combining Sales Order Product and Goods Product (e.g., filtering by Related Activity) will now return correct counts. If you deferred this step to test the impact during segmentation, you can now return to the segment configuration and confirm the count recovers without any changes to the segment criteria itself.
4. Conclusion
This exercise walked through the complete configuration of the Customer 360 Data Model in Salesforce Data Cloud, covering the full spectrum from auto-mapped CRM bundle streams through to fully custom entities built from external schema files and eCommerce Cloud Storage data.
Key outcomes achieved:
- CRM Contact is mapped to six DMOs including Individual, Contact Point Phone, Loyalty Member Currency, Loyalty Program Member, and Party Identification, supporting segmentation on demographics, loyalty balances, and identity resolution.
- Custom CRM objects (Booking, Rental, Rental Preference) are represented as custom DMOs with appropriate field labels, deselected irrelevant fields, and value suggestion enabled on bounded-value attributes.
- eCommerce data is fully mapped across Customer Profile, Orders, Line Items, Products, Stores, and Related Activities — creating a rich transactional layer linked back to Individual.
- All necessary relationships are established, with a deliberate design decision to configure a 1:1 Individual-to-Loyalty Program Member relationship to support activation use cases.
- Key qualifier alignment is applied to the eComm Line Item DLO, resolving an invisible join failure that would otherwise produce incorrect zero-count segments.
Pros
- Maximizing the standard Customer 360 Data Model ensures long-term compatibility, scalability, and supportability of the solution.
- The lean mapping philosophy (only map what the use case requires) keeps the model focused, reduces validation overhead, and allows incremental expansion without rework.
- Value suggestion on bounded-value attributes meaningfully reduces user error and improves segmentation UX without any downstream technical cost.
- Using formula fields to handle data type mismatches and derived attributes is a low-disruption approach that avoids full stream reconfiguration.
- Creating custom DMOs from CSV schema files (Rental Preference) enables pre-planned schema deployment ahead of the mapping activity, which is particularly useful in larger multi-team implementations.
- Explicit key qualifier alignment, once understood, is a reliable method to ensure correct cross-object joins in segmentation and calculated insights.
Cons
- The 1:1 override of the Individual-to-Loyalty Program Member relationship is operationally risky — reverting it in the future (e.g., when adding a second loyalty program or brand) requires deleting all dependent segments and activations, which could be a significant undertaking in a production environment.
- Formula fields do not trigger a full data stream refresh. Data will only populate in formula-derived fields when source records are updated in CRM or a manual full refresh is initiated (which occurs on a fortnightly cycle by default). This can create temporary data gaps after configuration changes.
- Key qualifier misalignments between DLOs and DMOs are not surfaced clearly in the UI — they fail silently in segmentation rather than producing an obvious error. This requires careful upfront design planning and explicit verification during the review stage.
- Data type mismatches between source streams (e.g., Date vs DateTime for Birth Date) require workarounds that add configuration complexity and can be easy to overlook when onboarding new data sources later.
- Customizing DMO field labels and deselecting fields during custom object creation is a one-time decision — changing these later may require re-mapping or disrupting existing segment and activation configurations.
- Using Store Number as the Name value for Sales Store is a functional shortcut that harms user experience in segmentation. In production, proper store name data should be sourced to avoid users needing to decode reference numbers.