
Setting Up a Stripe Payment Gateway Integration in Salesforce B2B Commerce
Configure Stripe payment gateway integration in Salesforce B2B Commerce for secure online payment processing.
Salesforce Commerce Developer
Abstract
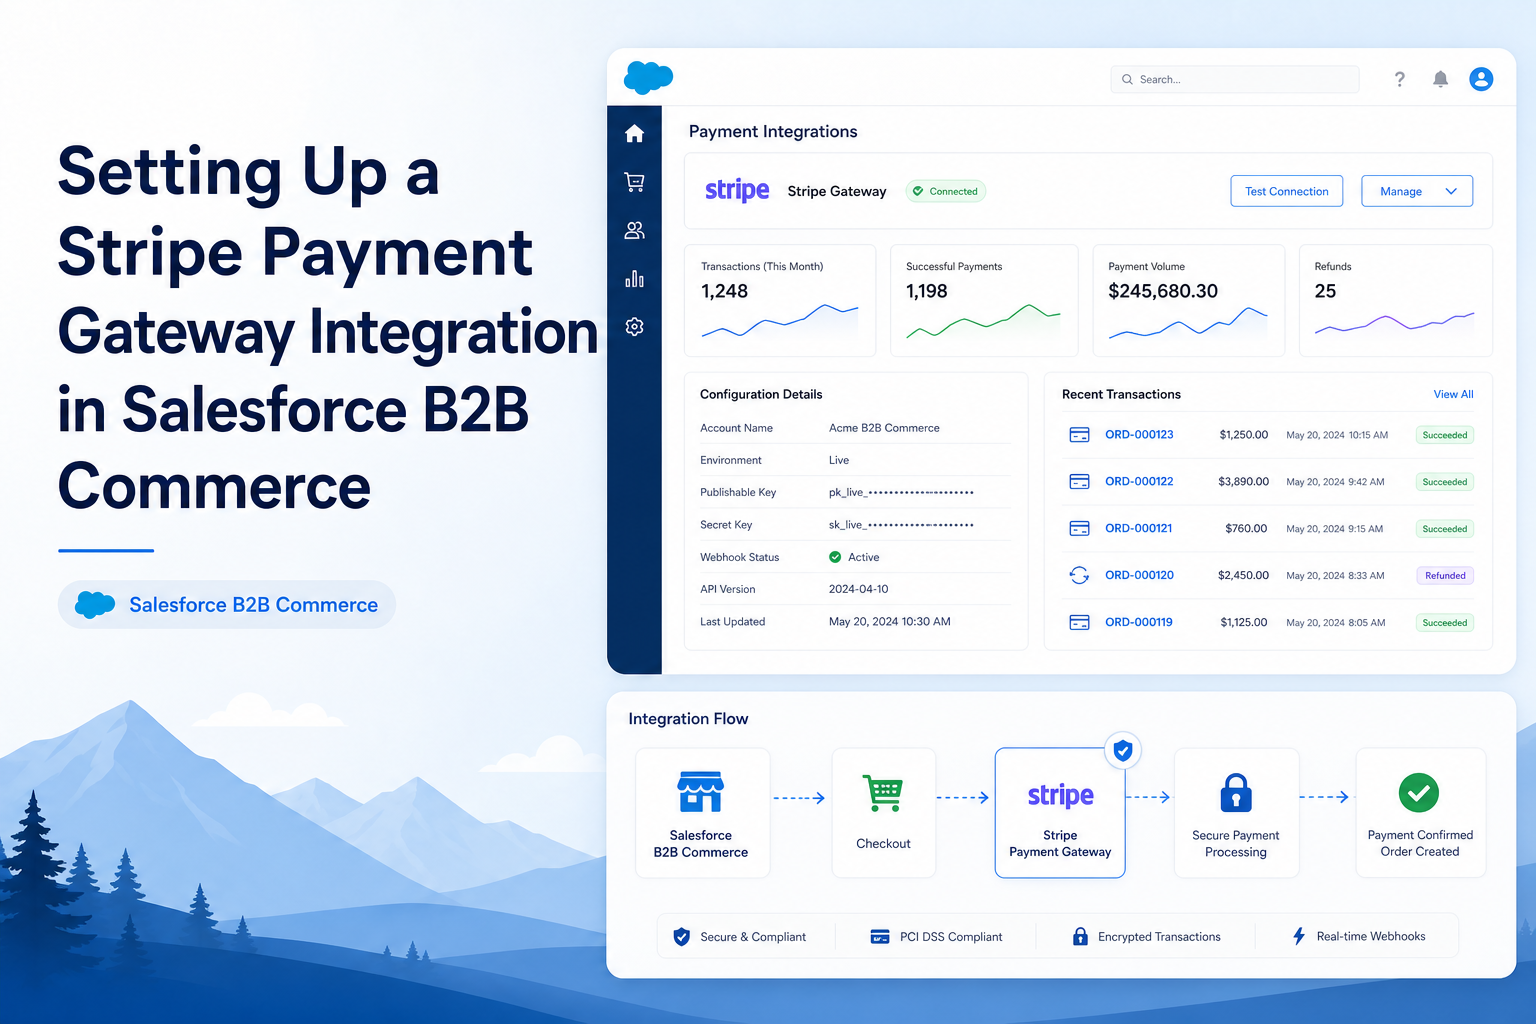
This article explains the process of configuring a mock Stripe Payment Gateway integration in Salesforce B2B Commerce to enable a test payment flow by connecting Salesforce Commerce with Stripe using Apex adapters, Named Credentials, Payment Gateway Provider, and Payment Gateway configuration. When a storefront requires credit card payments instead of only supporting Purchase Orders or term-based payments, a Payment Gateway setup is required. This guide provides a step-by-step approach to configure a quick Stripe passthrough integration for testing checkout transactions and mapping the payment gateway with the Commerce storefront.
Solution
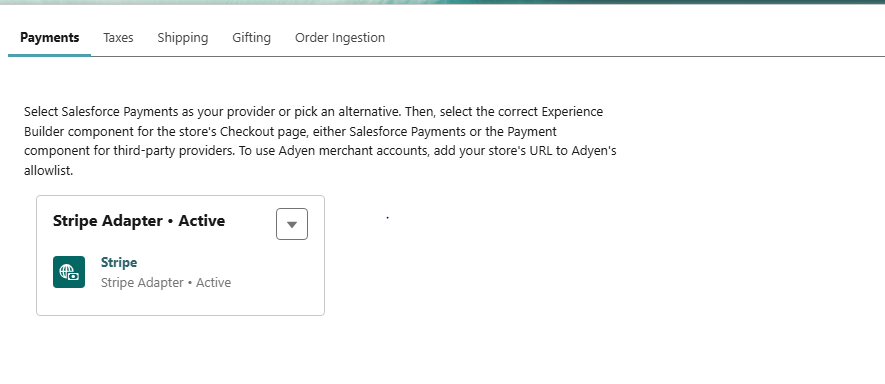
To implement the Stripe payment gateway integration, the following approach was followed:
- Created custom Apex classes required for payment adapter processing.
- Configured a Named Credential to securely connect Salesforce with Stripe APIs.
- Created a Payment Gateway Provider using the Stripe Adapter Apex implementation.
- Configured a Payment Gateway record and associated it with the Stripe provider.
- Mapped the payment integration with the B2B Commerce storefront.
- Tested the checkout payment flow using Stripe test credentials.
The solution provides a simple mock payment implementation that allows payment processing validation within a Salesforce B2B Commerce environment.
Step-by-Step Guide
Step 1: Create Payment Adapter Apex Classes
To enable the Stripe payment gateway integration, the required Apex adapter classes must first be added into the Salesforce org. These classes contain the logic required for handling payment gateway communication and processing.
Required Apex Classes
The following classes are available in the codev2 folder of the b2b-commerce-gtk-admin repository:
- StripeValidationException
- QueryUtils
- StripeAdapter
Deployment Steps
- Open the Salesforce Setup menu.
- Navigate to: Setup → Apex Classes
- Click the New Apex Class button.
- Create each class by copying the corresponding code from the repository.
- Save the classes in the following sequence:
- StripeValidationException
- QueryUtils
- StripeAdapter
Step 2: Configure Named Credential for Stripe Integration
A Named Credential is used to securely store the authentication details required for external API communication. In this implementation, the Named Credential establishes a secure connection between Salesforce and the Stripe payment service.
Create Named Credential
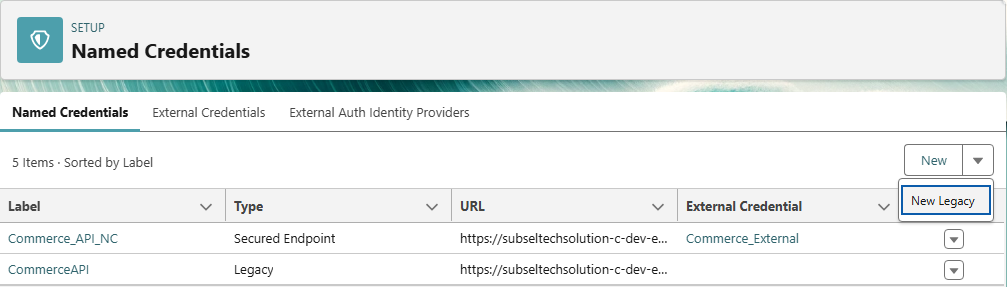
- Navigate to: Setup → Security → Named Credentials
- Click the dropdown next to the New button.
- Select: New Legacy
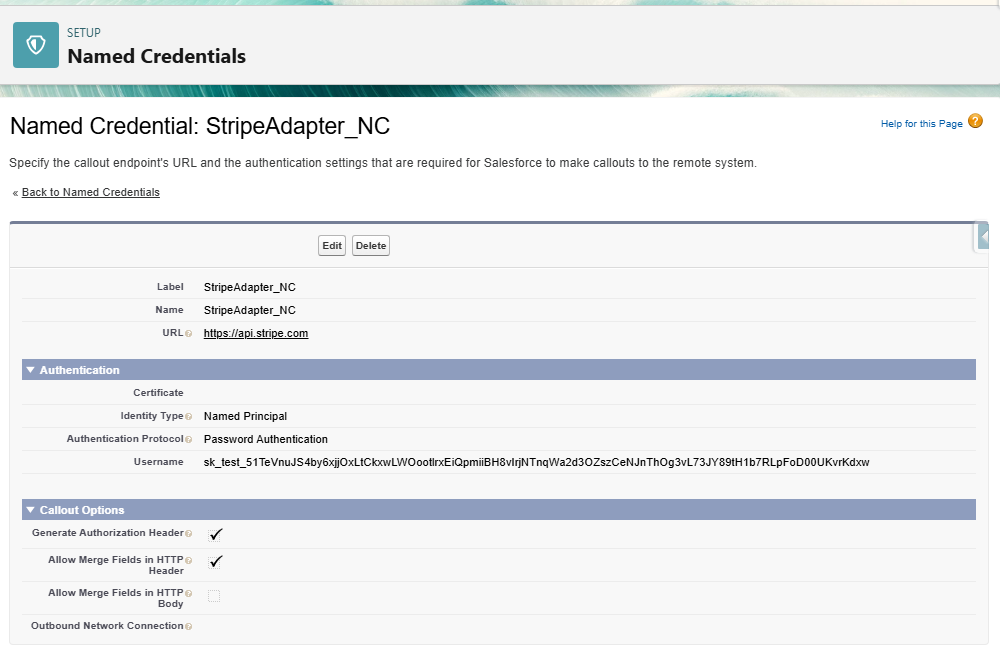
- Enter the following configuration details:
| Field | Value |
|---|---|
| Label | StripeAdapter_NC |
| Name | StripeAdapter_NC |
| URL | https://api.stripe.com |
| Certificate | Leave Blank |
| Identity Type | Named Principal |
| Authentication Protocol | Password Authentication |
| Username | Stripe Test API Key |
| Password | test1234 |
| Generate Authorization Header | Enabled |
| Allow Merge Fields in HTTP Header | Enabled |
| Allow Merge Fields in HTTP Body | Disabled |
- Click Save.
Step 3: Create Payment Gateway Provider Using Workbench
The Payment Gateway Provider acts as a connection layer between Salesforce Commerce and the Stripe payment adapter. After deploying the StripeAdapter Apex class, the class reference needs to be registered as a Payment Gateway Provider.
Retrieve Stripe Adapter Apex Class ID
First, identify the unique ID of the StripeAdapter Apex class from the Salesforce environment.
- Open Workbench
- Navigate to: Queries → SOQL Query
- Select the object: ApexClass
- Execute the following SOQL query:
SELECT Id, Name FROM ApexClass WHERE Name LIKE 'StripeAdapt%'- Click Query.
- From the query result, copy the Id of the StripeAdapter Apex Class.
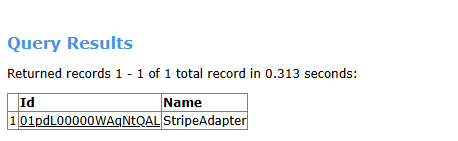
After retrieving the Apex Class ID, create a Payment Gateway Provider record.
- In Workbench, navigate to: Data → Insert
- Select the object type: PaymentGatewayProvider
- Click Next.
- Enter the following details:
| Field | Value |
|---|---|
| ApexAdapterID | StripeAdapter Apex Class ID |
| DeveloperName | Stripe_Adapter |
| MasterLabel | Stripe Adapter |
| IdempotencySupported | Yes |
Insert the Record
- Review the entered values.
- Click Confirm Insert.
- Verify that the Payment Gateway Provider record is created.
Step 4: Configure Payment Gateway Record
After creating the Payment Gateway Provider, the next step is to create a Payment Gateway record and associate it with the Stripe Adapter configuration.
The Payment Gateway record defines the payment service details that will be used during the Commerce checkout process.
Create Payment Gateway
- Open the App Launcher in Salesforce.
- Search for and select: Payment Gateways
- Click the New button available at the top-right corner.
Gateway Configuration
| Field | Value |
|---|---|
| Payment Gateway Name | Stripe |
| Payment Gateway Provider | Stripe Adapter |
| Merchant Credential | StripeAdapter_NC |
| Status | Active |
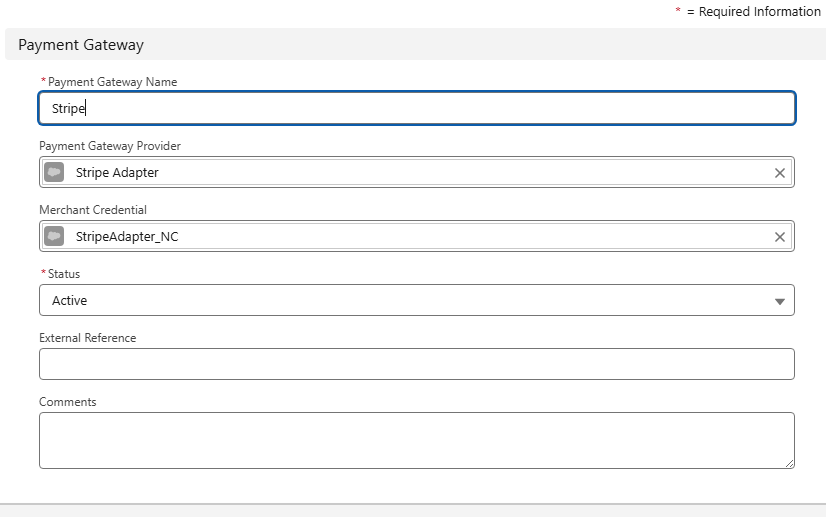
Click Save. After successful creation, Salesforce displays a confirmation message: Payment Gateway "Stripe" was created successfully.
Step 5: Connect Payment Gateway with Commerce Storefront
After creating the Payment Gateway, the final step is to associate the Stripe payment configuration with the B2B Commerce storefront. This mapping allows the storefront checkout process to identify and use the configured payment provider.
Configure Storefront Payment Integration
- Open the Commerce App.
- Select the required Store.
- Open the: Settings → Checkout
- Navigate to the Payments section.
Select Payment Provider
- Click: Select Provider
- Choose: Stripe Adapter
- Click Next.
- Review the payment gateway mapping details.
- Click Confirm to complete the integration.
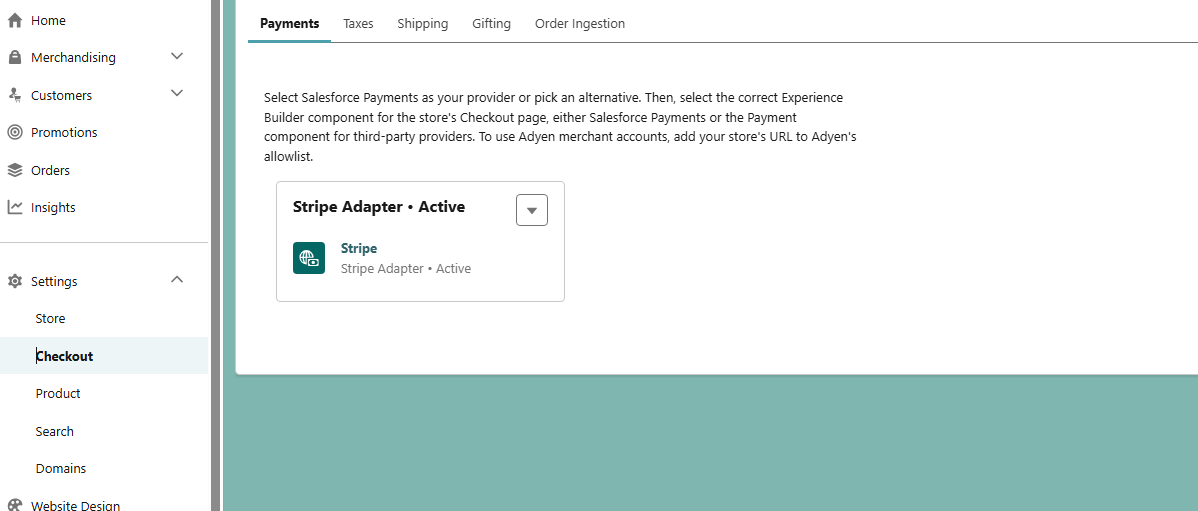
Post Configuration Steps After Connecting Stripe Payment Gateway
Once the Stripe Payment Gateway is successfully mapped with the Salesforce B2B Commerce storefront, the next step is to configure and validate the Stripe payment flow.
Stripe Configuration and Testing Process
1. Configure Stripe Account
First, log in to the Stripe Dashboard and switch to Test Mode for development and testing activities.
- Navigate to: Stripe Dashboard → Developers → API Keys
- Retrieve the required API credentials.
Example:
| Key Type | Example Value |
|---|---|
| Publishable Key | pk_test_xxxxxxxxx |
| Secret Key | sk_test_xxxxxxxxx |
Use the Secret Key for Salesforce integration. The secret key is used by Salesforce to authenticate API communication with Stripe.
2. Update Stripe Credentials in Salesforce
Update the Stripe authentication details in the existing Named Credential.
Navigation: Setup → Security → Named Credentials → StripeAdapter_NC
Verify:
- Stripe API endpoint is configured.
- Authentication details are updated.
- The secret key is available for API communication.
Save the changes.
3. Enable Payment Methods in Stripe
Configure the payment methods required for checkout.
Navigation: Stripe Dashboard → Settings → Payment Methods
Enable required options such as:
- Card Payments
- Digital Wallets (if required)
Example: Card Payments, Google Pay, Link, Apple Pay
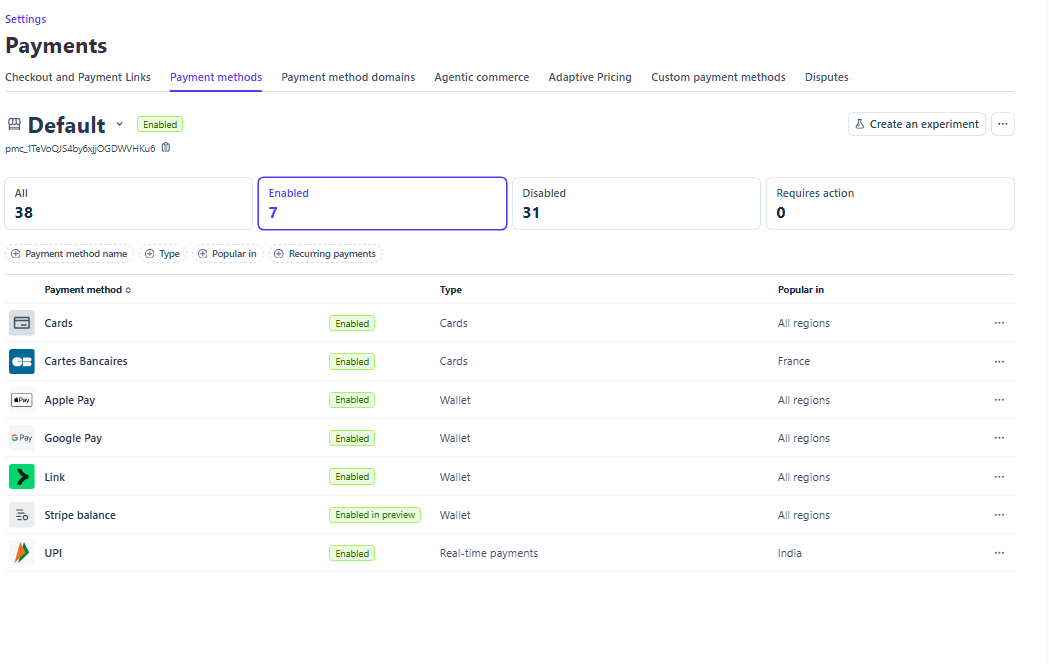
4. Perform Checkout Testing
Validate the complete payment flow from the Salesforce Commerce storefront.
Testing steps:
- Open the Commerce storefront.
- Select a product.
- Add the product to cart.
- Proceed to checkout.
- Select Stripe payment option.
- Enter Stripe test card details.
- Complete the order.
5. Verify Payment Transaction
After completing checkout, verify the transaction in Stripe.
Navigate: Stripe Dashboard → Payments
Confirm:
- Payment transaction is created.
- Payment status is successful.
- Transaction details are available.
6. Validate Salesforce Order Status
Verify that Salesforce receives the payment response.
Check: Order → Payment Details
Confirm:
- Payment status updated.
- The order completion process is successful.
- Payment gateway response is recorded.
Conclusion
The Stripe mock payment gateway integration was successfully configured in Salesforce B2B Commerce by creating Apex adapter classes, setting up secure authentication through Named Credentials, creating payment gateway records, and mapping the integration to the storefront.