
Building an E-Signature Solution in Salesforce
Implement a secure electronic signature solution using Salesforce, Apex, and Lightning Web Components.
Salesforce Developer

Overview and Objective
Electronic signatures have become an essential part of modern business processes. Salesforce provides a flexible platform for building custom e-signature solutions using Lightning Web Components (LWC), Apex, and document templates.
This article explains how to capture a user's signature through a canvas-based signature pad, store it within Salesforce, dynamically inject it into an HTML document template, and generate a signed PDF document. The objective is to create a seamless end-to-end document signing experience without relying on third-party e-signature platforms.
End-to-end flow:
Canvas Capture → Apex Storage → Template Injection → PDF Generation → Signed DocumentApproach and Implementation
The solution consists of several components working together to complete the document signing process. Each layer has a clearly defined responsibility, making the system modular and easy to extend.
Signature Capture — LWC Canvas
Users draw their signature on a canvas element. The output is converted to a Base64 PNG using canvas.toDataURL(), supporting both mouse and touch input.
Signature Storage
The Base64 image is written to a custom field (e.g. Signature_Image__c) on the document object (e.g. Document__c), decoupling capture from generation.
HTML Template Processing
An Apex method retrieves the template, finds the [Signature Here] placeholder, and replaces it with an <img> tag embedding the Base64 signature.
Signed Document Storage
The merged HTML is saved into a custom field (e.g. Signed_Document__c) on the same record, preserving the signed version for preview and PDF export.
PDF Generation
The signed HTML is sent to a PDF conversion service. The output is saved as a Salesforce File linked to the document record, ready for download or email delivery.
Status Tracking
A status field (e.g. Status__c) moves from Initiated to Signed, providing lifecycle visibility across reports, dashboards, and automation flows.
Step-by-Step Guide
Follow these steps in order to build a working e-signature flow inside your Salesforce org.
1. Create the Document Template
Author an HTML document containing all required content. Insert the placeholder [Signature Here] exactly where the signature should appear. Example:
<p>Customer Signature:</p>
[Signature Here]
2. Capture the Signature in LWC
Add a <canvas> element to your LWC component. Bind pointer and touch events to draw paths. On completion, export the drawing using canvas.toDataURL('image/png') to get the Base64 string.
3. Save the Signature via Apex
Call an Apex method from the LWC, passing the Base64 string. The method updates the signature field on the target document record with the captured image data.
4. Generate the Signed HTML
Apex retrieves the template and stored signature, builds the <img> tag, and replaces the placeholder. See the code pattern below:
// Build the signature img tag using the stored Base64 value
String signatureImg = '<img src="' + savedSignature + '" style="width:150px;" />';

// Inject into the HTML template at the placeholder
html = html.replace('[Signature Here]', signatureImg);

// Save the signed document and update the status field
doc.Signed_Document__c = html;
doc.Status__c = 'Signed';
update doc;
5. Preview the Signed Document
Render the signed HTML field in a read-only LWC preview component using lightning-formatted-rich-text or an iframe. Allow the signer to verify before proceeding to export.
6. Convert to PDF and Attach
Send the signed HTML to a PDF conversion endpoint via Named Credential or external callout. Save the binary response as a ContentVersion record linked to the document via ContentDocumentLink.
7. Share or Archive
The attached Salesforce File is now available for download, email via Messaging.EmailFileAttachment, or long-term archival. Status tracking and record links keep everything auditable.
Summary
This custom Salesforce e-signature solution provides a simple and effective way to digitally sign documents without relying on external platforms. By combining Lightning Web Components, Apex, HTML templates, and PDF generation, organisations can automate document signing and maintain signed records directly within their org.
| Pros | Cons |
|---|---|
| Fully customisable — no external subscriptions | Large Base64 strings increase field storage usage |
| All signed records stay inside your org | PDF conversion requires an external service or endpoint |
| HTML templates are fast to author and iterate | Compliance needs (audit trail, timestamps) require extra development |
| Instant preview closes the loop for signers | Custom code means your team owns ongoing maintenance |
Overall, this approach provides a scalable and cost-effective method for implementing e-signatures in Salesforce while maintaining complete control over the document generation process. Teams already working with LWC and Apex will find the stack familiar and the integration surface minimal.
Screenshots
The original article includes screenshots showing: the ROI authorization form ready for e-signature with the embedded E-Sign action highlighted; the embedded signature pad opened from the E-Sign action, capturing the signer's input; and the completed authorization form showing the captured signature with the "Done" confirmation step.
<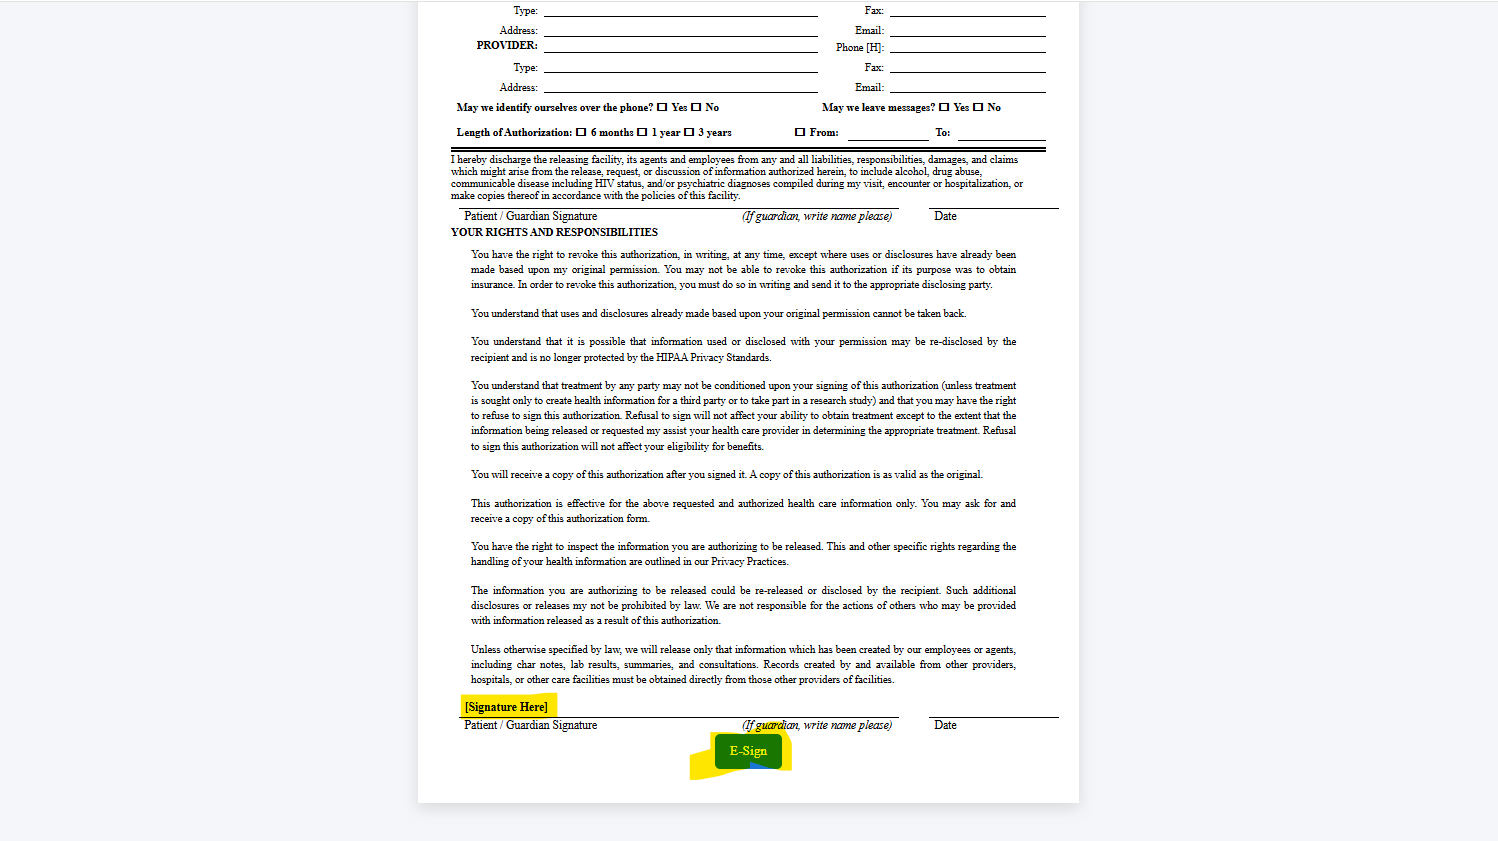
Figure 1: ROI authorization form ready for e-signature, with the embedded E-Sign action highlighted.
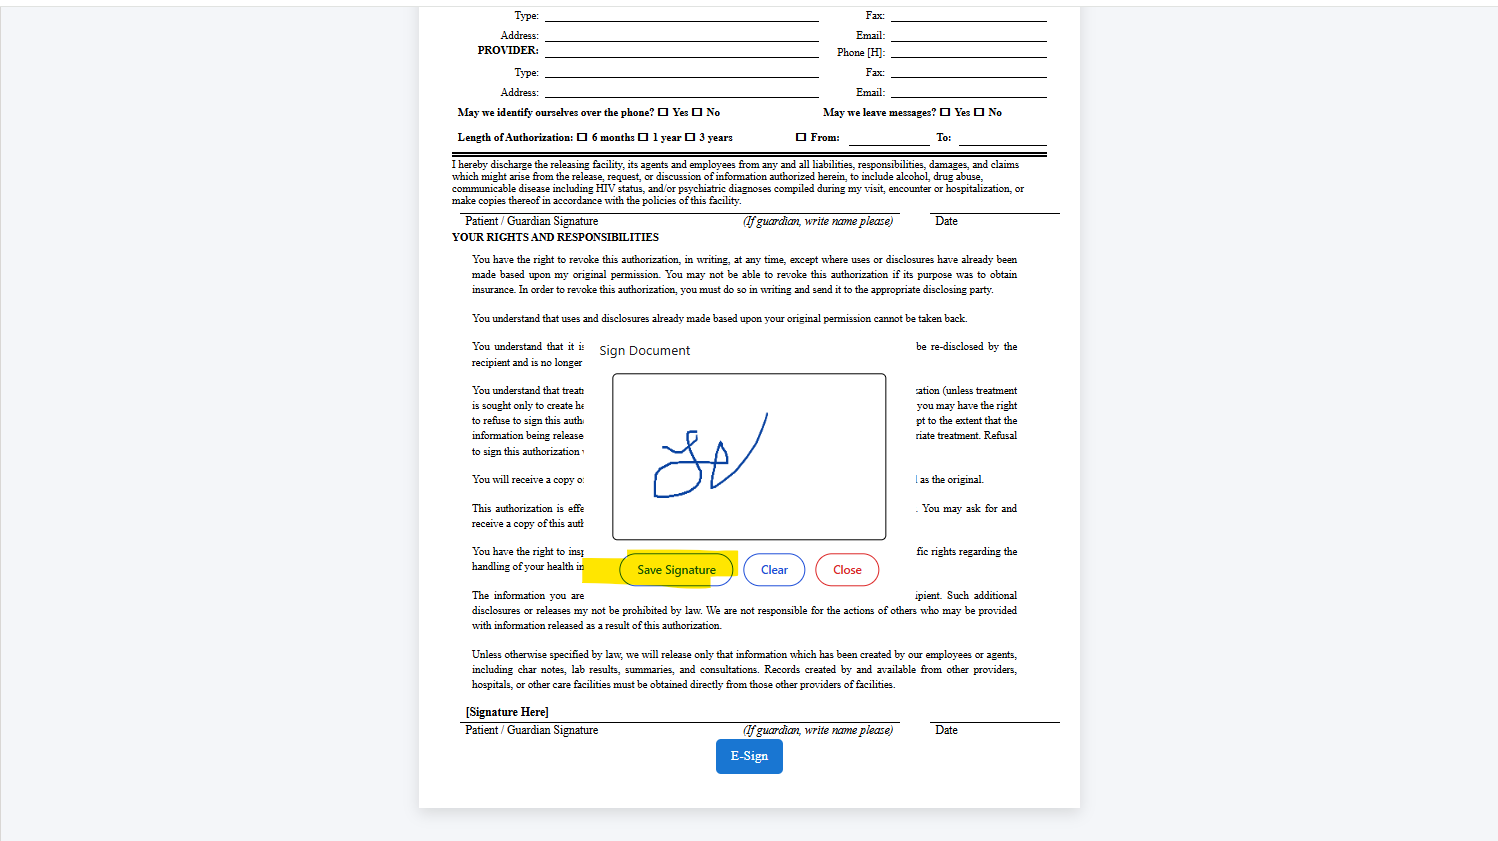
Figure 2: Embedded signature pad opened from the E-Sign action, capturing the signer’s input.
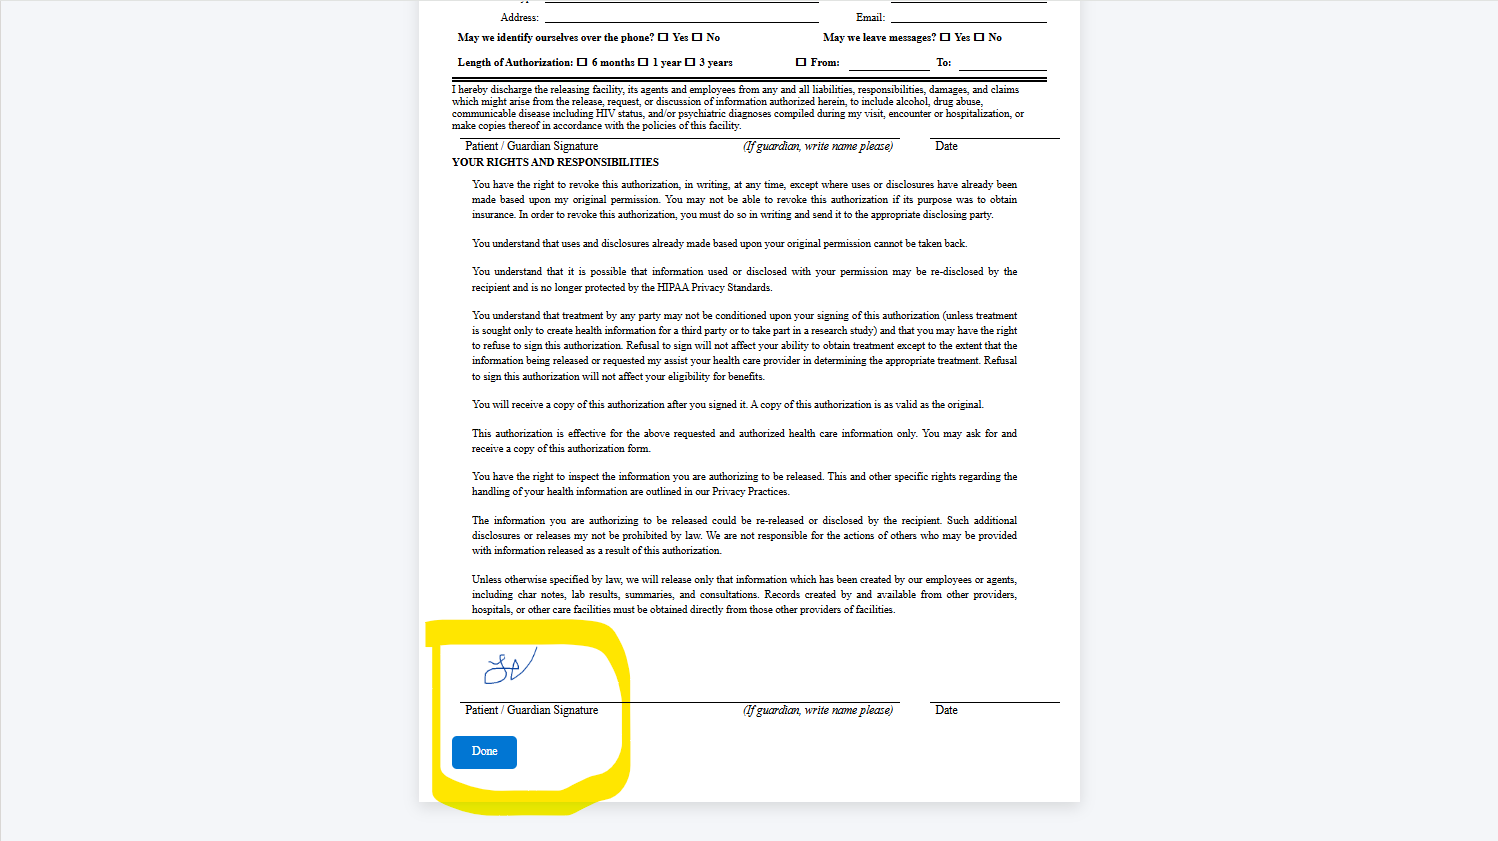
Figure 3: Completed authorization form showing the captured signature and the “Done” confirmation step.